-
Notifications
You must be signed in to change notification settings - Fork 65
DocQuickStartEnglish
Prev () | Home | Manual | Index | () Next
Table of contents
- Quickstart
(Short summary for Windows users)
Valid from QMapShack commit 8ddec3217899 (Wed Apr 04 17:38:39 2018 +0200).
Except for the parts relating to the QMapShack installation itself this summary is valid for non-Windows operating systems, too.
QMapShack (in brief QMS) for Windows is a 64-bit application and requires therefore a 64-bit Windows operating system.
This summary is kept as short as possible in order to quickly get the user to work with QMS. Many of the described actions can also be performed in a different way. The discussion of these possibilities is suppressed.
Detailed information on QMS is available in the Wiki.
Users having an already installed QMS will find a welcome page at the first QMS start. From there some of the installation steps described on this page can be carried out, too.
- Easy and flexible use of vector, raster, and online maps
- Use of elevation data (offline and online)
- Creation/planning of routes and tracks with different routers
- Analysis of recorded data (tracks) from various navigation and fitness devices
- Editing of planned routes and tracks
- Structured saving of data in databases or files
- Direct read and write connection to up-to-date navigation and fitness devices
Hints:
- The version numbers mentioned can change. The latest available version should always be selected.
- Often, files can be selected for specific regions on the specified pages. The user should find the region he is interested in.
- The recommendations given here are examples. There are many other options available!
The following links are recommendations for files which allow comfortable work with QMS and which can be downloaded from the Internet.
-
QMapShack:
-
Load QMS installation file from server.
Download the file
QMapShack_Win64bit_1.14.0.exefrom this site (approximately 100 MB, version number can be different).
-
Load QMS installation file from server.
Download the file
-
Use of maps (recommended):
-
Load vector map Germany (Freizeitkarte).
(Choose your region! This links to a file! Approximately 1.4 GB, if a Garmin navigation device is used, a suitable file
gmapsupp*.imgmay already exist and can be used in this step) -
Optional: Load links to online maps.
Hint: Click field
Download online maps! Result is a downloaded fileOnlinemaps.zip.
-
Load vector map Germany (Freizeitkarte).
(Choose your region! This links to a file! Approximately 1.4 GB, if a Garmin navigation device is used, a suitable file
-
Routing support (recommended for creation of new routes and tracks):
-
Load Routino data. On this page, go e.g. to line
Berlin(choose your region!) and click in this line on.osm.pbf. The fileberlin-latest.osm.pbfis downloaded.
-
Load Routino data. On this page, go e.g. to line
-
Elevation data (recommended, if elevations should be assigned to new tracks):
-
Load tiles with elevation data. Use coordinates to choose necessary file(s), e.g.
N51E012.hgt.zip. The coordinates in the file name describe the south-western corner of a tile.Or:
-
Load elevation data for a region. On the displayed map select your region and click on it. E.g. a file
N32.zipis downloaded. Here,N32is the name of the so-called UTM zone.
Hint: Download as many files as needed for your region!
-
- All downloaded files are normally saved in the user's download directory.
- Find the file
QMapShack_Install_Windows64bit__1.14.0.exein the download directory. - Start this installation file by double-clicking the filename.
- Confirm the information in the first installation windows.
- In the
Select Components window, selectMSVC ++ 2013 SP1 runtime(this can be omitted if this runtime environment has been already installed). - Confirm starting the installation of the runtime environment. Hint: The installation may take a few minutes!
- At the end of the installation of the runtime environment, finish this installation with the
Closebutton. The QMS installation is then continued and QMS is installed completely. - Hint: Never use non-ASCII characters in installation directory names!
- QMS can already now be started from the Start menu. However, it is recommended to perform still the following steps.
- Create a directory where the user has write permission. In the following discussion
this directory is called
QMS. Note: The user has no full write permission for the default installation directory, so in this step a separate directory for data must be created. - Add the following subdirectories to the directory
QMS:-
Maps, -
Routino, -
BRouter, -
DEM, -
Databases, -
GPX.
-
- Open the file
DEU_de_gmapsupp.img.zip(or the vector map you downloaded) with the leisure map of Germany and copy the filegmapsupp.imginto theMapsfolder. - Rename the file
gmapsupp.imgtoLeisureMap_DE.img. -
Optional: Open the file
Onlinemaps.zipand copy the files contained in it into theMapsfolder. -
Optional: Move the file
berlin-latest.osm.pbf(or the Routino data you downloaded) to theRoutinofolder. -
Optional: Open the file
N51E012.hgt.ziporN32.zipand copy the files in it into theDEMfolder.
-
Start QMS from the Start menu (Choose
QMapShack - QMapShack).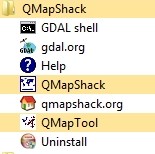
-
The empty QMS user interface (GUI) appears. QMS tries to use the language of the operating system. If this language is not supported by QMS, then English is used as language of the QMS interface.

The middle part of the user interface is designed for map display, for data editing windows, and for some other purposes. At the first start a welcome page is shown here, as mentioned above.
Each of the subwindows on the left and right edges (
Maps,Dig.Elev.Model(DEM),Workspace,Database,Routing,Realtime,POI collections) can be moved and docked at the left resp. right edge of the main window or used as floating window (so-called docked windows). You can open and close these windows using theWindowmenu item or the corresponding icons in the toolbar. The toolbar is a docked window, too. It can be moved to new locations. -
The welcome page allows you to perform some of the installation steps described here directly from the QMS GUI. The welcome page disappears as soon as a map is activated. It can be made visible again by deactivating all activated maps.
-
When working with QMS, the user often receives information about actions to be performed in the form of info bubbles when pointing the mouse to a displayed object.
-
Activate vector maps and choose level of map details:
- Go to the
Mapswindow with your mouse. - Open the context menu with a right-click and select
Setup map paths. - Open the folder
QMS\Mapsand select this folder. - In the map window appears a new entry
LeisureMap DE. - Open the context menu with a right-click on the map name and select
Activate. - Move the map to a position that is contained in the map. The map should be visible.
- A double-click on the name of an activated vector map opens the display of configurable map properties:
- Opacity of the map (slider).
- Display of areas, lines and points.
- Level of map details display (between -5 and 5).
- Layout of map objects (selection of a
TYPfile).
-
Remark: Open more map windows and configure them independently of each other with the help of the menu entry
View - Add map view.
- Go to the
-
Optional: Activate online maps: (requires selection of the map folder in the previous step!)
-
Go to the
Mapswindow with your mouse. -
Open the context menu with a right-click and select
Reload Maps. -
In the map window appears a new entry, in the example
4UMaps-eu(maybe appeared already during the activation of the vector map!). -
Open the context menu with a right-click on the map name and select
Activate. -
If an Internet connection is active, then the selected online map is now loaded (this can take some time, progress is shown in the middle window!)
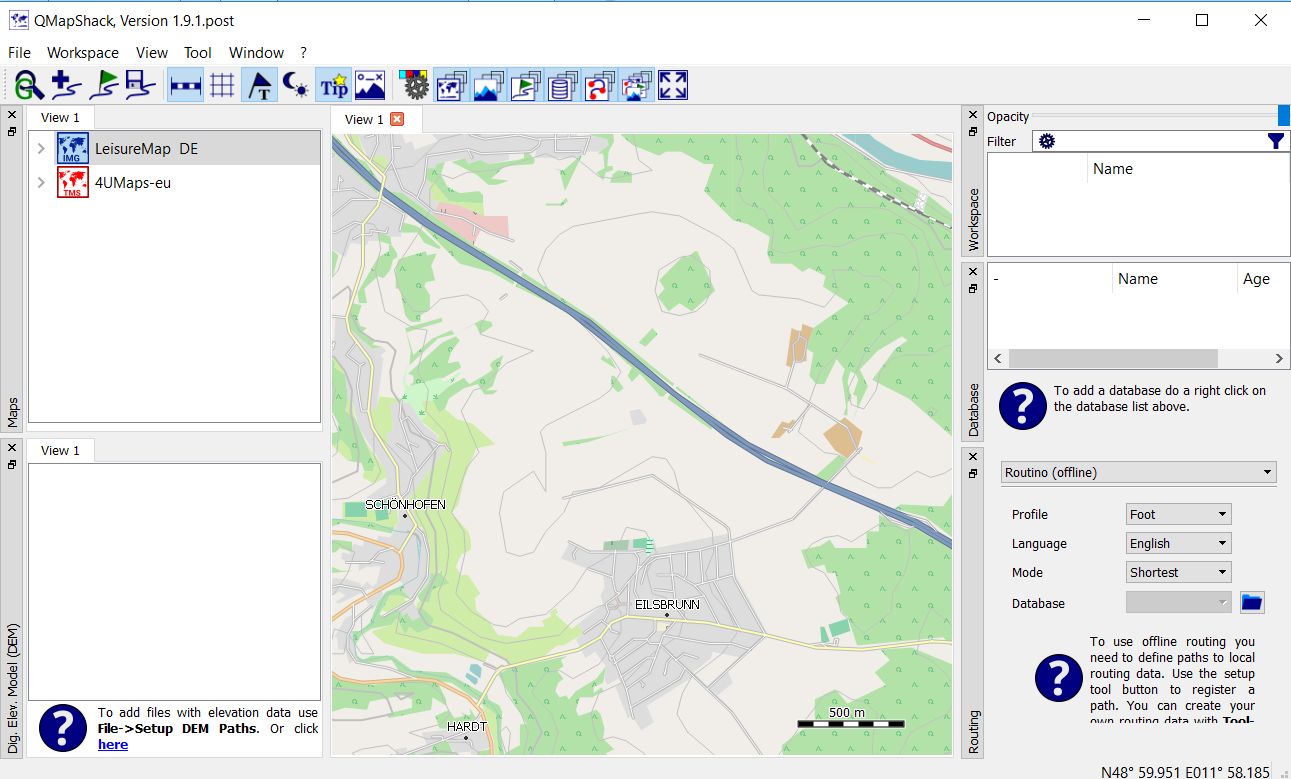
-
-
Optional: Activate Routino routing support:
-
Choose menu entry
Tool - Create Routino Database. -
A new window will open.
-
Select
QMS\Routino\berlin-latest.osm.pbfas source file andQMS\Routinoas target path (Paths shown in the snapshot are different!). -
Type
BEas file prefix. -
Click the
Startbutton. -
In the right column of the window you can follow the executed actions. This process can take some time! The completion of the operation is shown.
-
Go to the
Routingwindow and add theQMS\Routinofolder using the 'Open' icon. -
Open the database selection list in the
Routingwindow and selectBE. -
Routes and tracks can now be created with the support of the offline Routino router (in the area covered by the selected database, in the example for Berlin!).
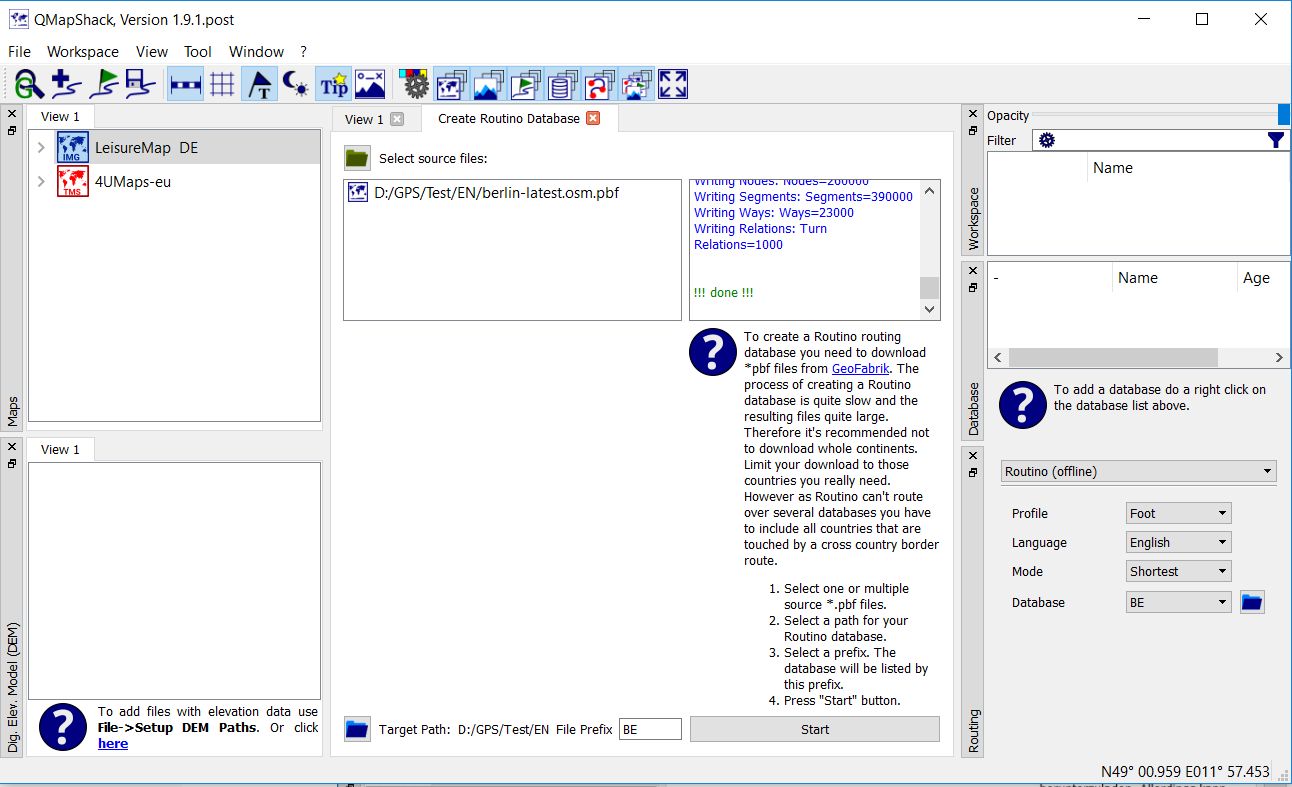
-
-
Optional: Activate support for digital elevation data:
-
Choose the menu entry
Tool - VRT Builder. -
A new window will open.
-
Select
QMS\DEM\N51E012.hgtas source file (multiple selections for further HGT files possible!) andQMS\DEM\N51E012as target file (the extension.vrtis added automatically). Paths shown in the snapshot are different! -
Click the
Startbutton. The completion of the operation is shown.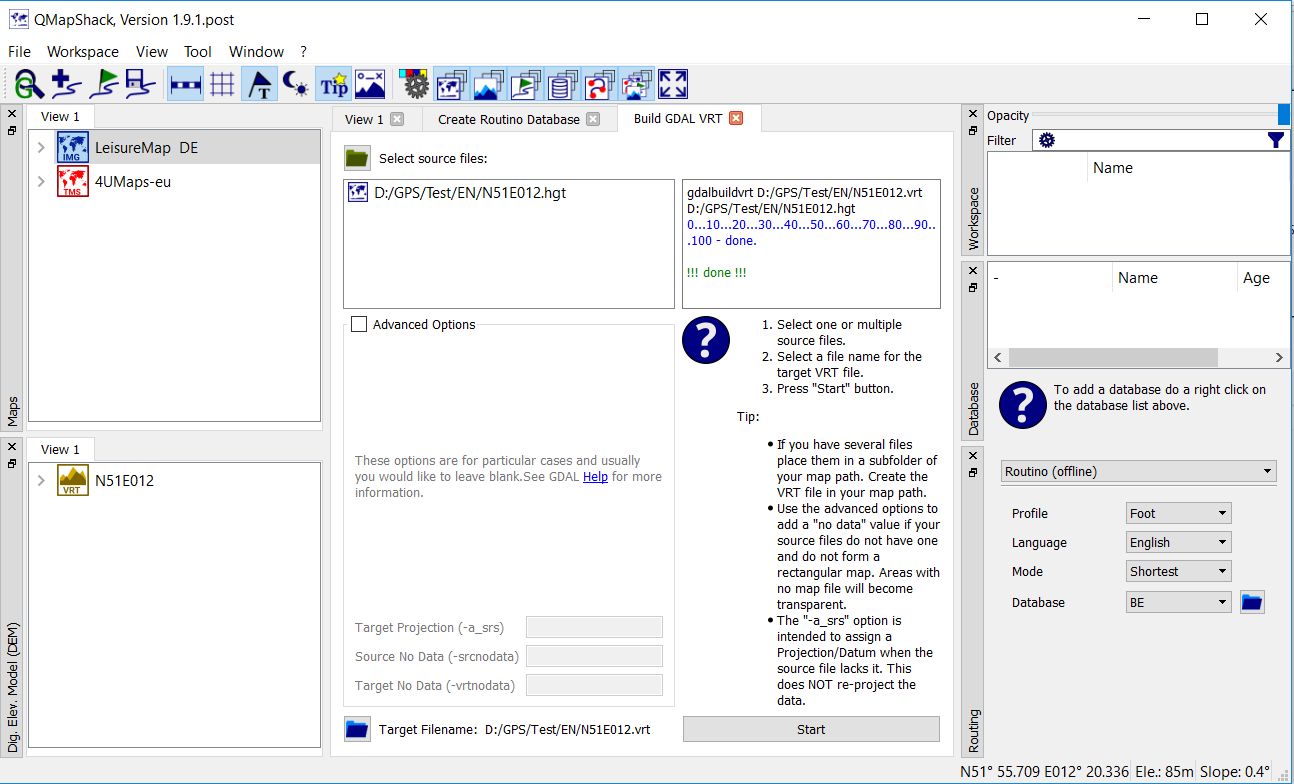
-
Move the mouse to the
Dig.Elev.Model (DEM)window. -
Open the context menu with a right-click and choose
Setup DEM paths. -
Choose
QMS\DEMas folder. -
In the
Dig.Elev.Model (DEM)window now appears, among others, an entryN51E012. -
Open the context menu with a right-click on this name and select
Activate. -
Elevation data is now available for the selected area (in the example the south-west corner of the area has the coordinates 51° North, 12° East and extends over 1° in both directions).
-
The existence of elevation data at the location of the mouse pointer is indicated in the status line by an existing elevation specification.
Status line without elevation data:

Status line with elevation data:

-
With these steps, a workable state of QMS is reached.
-
With the keyboard:
- Arrow keys move the map in the selected direction.
- The keys "+" and "-" increase or decrease the map scale (zoom in and out).
-
With the mouse:
- Press and hold the left mouse button to fix the map to the mouse. When moving the mouse (without releasing the pressed key), the map is moved. Once the desired map position has been reached, release the mouse button.
- Use the mouse wheel to zoom in or out.
-
Assumption: There exists a GPX file
QMS\GPX\MyProject.gpx. -
Remark: Files with GIS data in some other formats (TCX, FIT, ...) can be loaded in a similar way!
-
Choose the menu entry
File - Load GIS Dataand selectQMS\GPX\MyProject.gpxin the file selection window. -
In the workspace window appears a new project entry with name
MyProject. -
After opening the project, the waypoints and tracks present in the GPX file (that is, the project) are displayed.
-
If you move the mouse pointer to one of the displayed lines, you get some information about the selected object.
-
A double-click on a waypoint or track centers the selected map around this object.
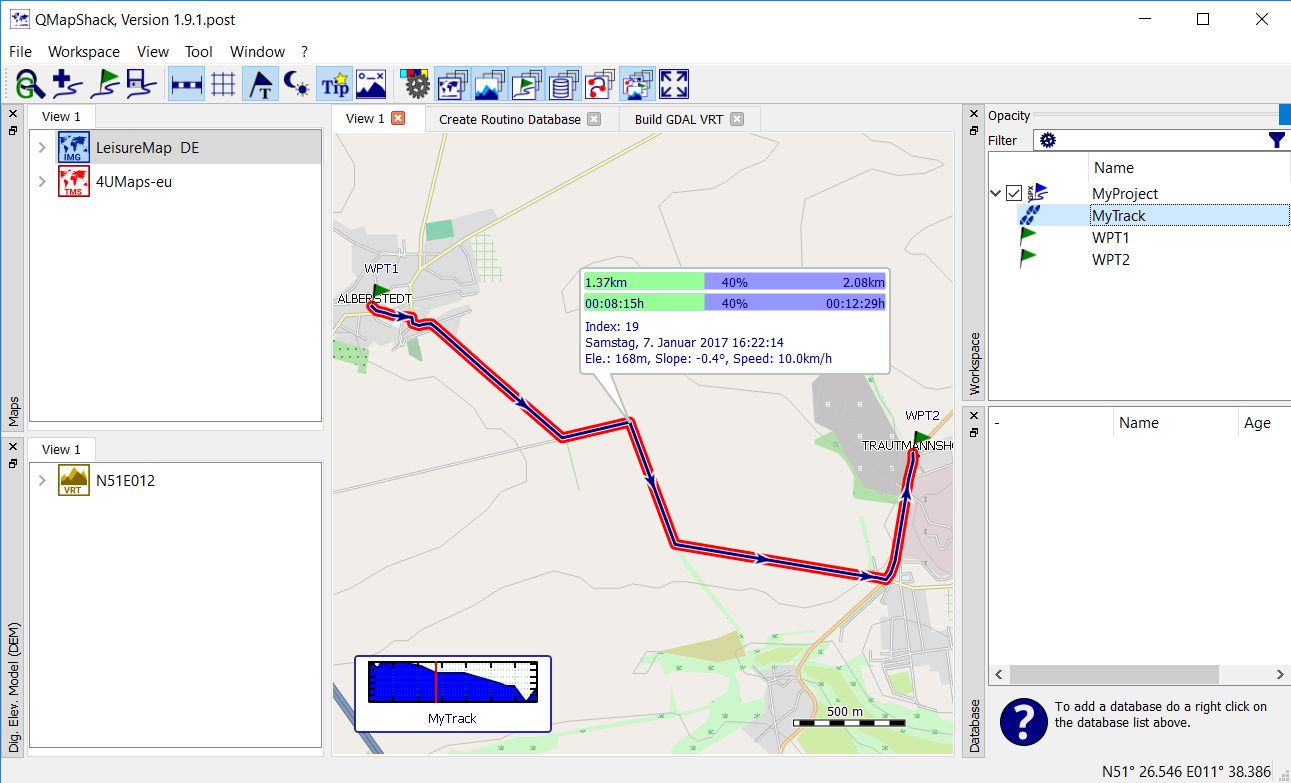
QMS provides various forms of data storage. A recommended and powerful form is storing the data in a database. The following steps are required to create a database:
- Go with the mouse to the database window.
- Open the context menu with a right-click and select
Add Database. - In the next window, select a database name and a file name in the form
QMS\Databases\MyDatabase.db(leaveSQLiteselected!). - The selected database name appears as a new line in the database window.
QMS databases are appropriate for a clear tree-like data structure similar to that in a folder tree. The nodes of the tree (also called folders) can have one out of three different types used for a clearer organization of the data:
- Group: Is only used to keep together subordinate folders. Groups can only contain subfolders, but no data.
- Project, Other: Can contain subfolders and data. Data can be displayed and edited in the workspace window.
Physically saved are databases. Saving can be done manually or, if properly setup with the help of the menu entry Workspace - Setup workspace,
automatically within certain time intervals.
Example:
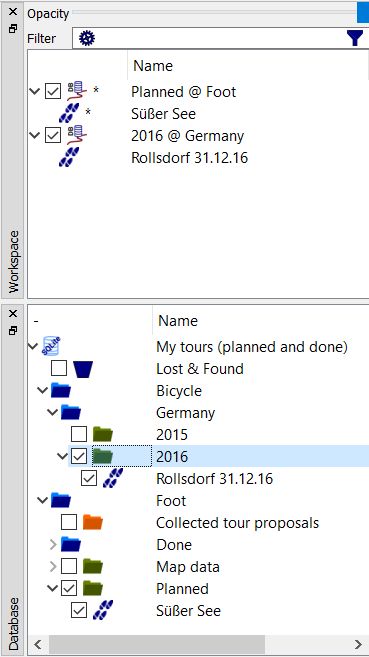
The names selected in the example describe the purpose of the database or the folders.
The group Bicycle can be filled with an analogous structure.
The creation of databases was described in the previous step.
To create group, project and other folders follow these steps:
- Open the context menu with a right-click on the database or folder name.
- Choose the menu entry
Add folder. - In the next window, select a folder name and a folder type (different types use different folder colors).
Further information:
- By setting a hook in the field in front of the folder name, the folder is opened in the workspace window and the data contained in it (if also selected) is shown in the map window. For a clearer identification of the source of the project (folder) the name of the next higher folder is appended to the folder name after the separator "@". This additional information is not appended to top-level folders. The described procedure allows a target-oriented and structured display of selected data in the workspace and in the map windows.
- Editing and deleting data is done in the workspace window.
If the data of a folder has been edited, then this is indicated by a dot in front of the folder name and the data name (in the example the
edited track Süßer See is not yet saved to the database). Edited projects
should be saved regularly to the database using the context menu entry
Save. - Complete deletion of data has to take place in the database window. Deleted data is moved to the automatically created
Folder
Lost & Foundand final deletion should be done from this folder. Deletion in the workspace window deletes the data from the displayed project, but not from the database. - In addition to folders (projects) that belong to databases, there are still projects that are saved directly in a GPX or QMS file.
- Assumption: Routing support has been installed.
- Move the mouse to the
Routingwindow. - In the selection list at the top of the window select
Routino (offline). - In the other lists select the profile (the kind of movement), the language (for turn-by-turn instructions), the mode (quickest/shortest)
and one of the
existing Routing databases (in the example
BE). - Move the mouse to the starting point of the track in the map window.
- Open the context menu with a right-click and select
Add Track. - Press
Aon the keyboard (this selects the automatic routing mode). - Move the mouse to the wanted next intermediate point of the track and fix it with a left-click. An intermediate track segment is automatically calculated in accordance with the selected routing options between the last two selected points. This segment is displayed in the map window.
- Repeat the previous step until the end of the track is reached.
- Right-click to finish the new track.
- Select
Save as newfrom the toolbar at the top of the map window. - Enter a track name.
- Select a new project name and
Databaseas the project type. - Select the available database.
- Select a name for a database folder.
- A new project with the selected name is displayed in the workspace window. This project contains the newly created track.
- The database window shows a new folder for the used database.
- Open the context menu with a right-click on the project name and select
Save. The project with its data is permanently saved in the selected database folder. The saved track appears as a line in the database folder.
Track information is provided in various forms and with different detail level.
- In the workspace window: If the mouse pointer is located on the track name in the workspace window, then a summary of track information is shown.
- In the map window: A double-click on the track name in the workspace window moves and zooms the map so that the track is completely shown in the map window. Moving the mouse to the track in the map window gives the distance of the selected trackpoint to the begin and the end of the track as well as some additional information (elevation, speed, ...) of the trackpoint.
-
In the track info (edit) window: To open this window select
Edit...from the track context menu in the workspace window. It shows summary information of the track and up to 3 graphs. Depending on data availability track speed, elevation, slope, ... can be shown as function of the distance or the time. Select the form of the graph with the help of the tabGraphs. This window also provides in the tabFiltera series of filters for editing track data.
-
Task: Find track through given series of waypoints.
-
Assumption: Routing support has been installed and activated.
-
Copy, if necessary, all required waypoints into 1 project.
-
Choose in the window
Routingthe wanted router (Routino (offline)) and its options. -
Select while holding the CTRL-key down the required waypoints in the wanted order.
-
Open with a right-click on a selected waypoint the context menu and select
Create Route. -
Check and change, if necessary, the order of the waypoints in the window
Create route from waypoints.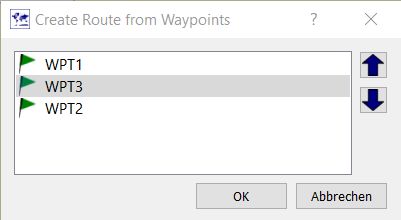
-
Press
Okto start the creation of a route through the given waypoints. -
Assign a name and project to the new route.
-
Open with a right-click on the new route the context menu and select
Convert to Track. -
Assign a name and a project to the new track.
-
Assumption: Connection to the Internet is available.
-
Select menu entry
Workspace - Geosearchto open an edit field in the workspace window. -
Type name resp. address of the waypoint if the form used for Internet searches and press the
Returnkey.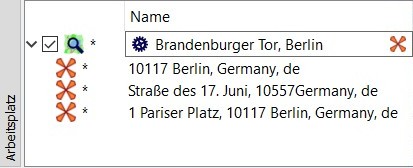
-
If the waypoint could be found, then the result is shown as a new waypoint (maybe even as several waypoints) below the edit field.
-
Copy the new waypoint into a normal project for saving.
-
A click on the search setup icon opens a window in which the user can select between several supported search engines and provide required user data for the search engines. Details about this setup can be found in the section Geosearch of this Wiki.