NanoLIMS v2.0 Manual For Admin
#Table of Contents
- Creating Admin User
- Creating More Users
- How to Customize Colors and Homepage Picture
- Set-up Freezer Storage
- Set-up Sample Types
- Approve Project Names As Needed
- Add Dropdown Options
- Update Dropdown Options
- Delete Dropdown Options
- Create Custom Fields
- Notes for Admin
In your web browser go to http://[myipaddress]/[path from document root to nanolims folder]/NanoLIMS/login.php Ex: http://localhost/NanoLIMS/login.php
- Create New User
- Login With Default NanoLIMS Admin User
- Activate New Admin User
- Deactivate NanoLIMS Default Admin User
###Create New User
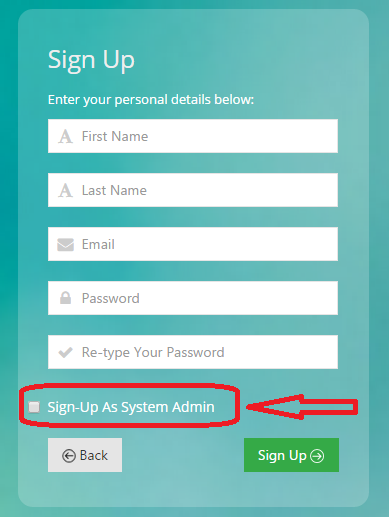
Select ‘Create an account’

Enter account details and check the checkbox ‘Sign-Up As System Admin’
###Login With Default NanoLIMS Admin User
NanoLIMS comes with an admin user pre-loaded.
Username: [email protected]
Password: admin
###Activate New Admin User
Go to 'Admin Tools'
Select 'User Info'
Select 'Update User Login'
Change Login Allow (Y/N) to 'Yes' for new user
If User role is not set to 'Admin', switch at this time to make yourself an Admin

###Deactivate Default NanoLIMS Admin User
Go to 'Admin Tools'
Select 'User Info'
Select 'Update User Login'
Change Login Allow (Y/N) to 'No' for [email protected]

Admins can create new users in the webUI:
Go to 'Admin Tools'
Select 'User Info'
Select 'Add Users'
Alternatively, users can register using 'Create an account' feature on login page. An email will be sent to admin to activate their account

Colors can be edited in config/css.php
Homepage photo can be edited in body.homepage{} block of Home Page section. Place photo in images directory
Background color can be edited in body{} block of Home Page section
Navigation bar colors can be edited in Navigation Bar section

Login page background can be changed in aquired/assets/img/bg. Login rotates through 4 images. Upload image and rename to 1.jpg,2.jpg,3.jpg, or 4.jpg
Select ‘Admin Tools’ from main toolbar Select ‘Add Manipulate Dropdown Options’ from dropdown Select ‘Add Freezer/Drawer’ from dropdown
Select ‘Add Freezers’ from dropdown
Enter Freezer name in ‘New Freezer Name’ input
Click ‘Submit Button

Select ‘Add Drawers’ from dropdown
Enter Drawer name in ‘New Drawer Name’ input
Click ‘Submit Button

Select ‘Connect Drawers To Freezers’ from dropdown
Select a Freezer Name from ‘Pick A Freezer’ dropdown for which you would like to link specific drawers to
Select a Drawer Name from ‘Pick A Freezer’ dropdown for which you would like to assiciate with the above named freezer
Click Submit button. Repeat as needed

Select ‘Admin Tools’ on the main toolbar
Select 'Manipulate Dropdown Options'
Select ‘Add Sample Type’
Fill in form. Note that Sample Type ID will be used to build the unique sample names ([YYYY/MM/DD][Project Name][Sample Type][3-digit sample number]). This allows the user to quickly identify which sample type it is.
For example:
Sample Type Name: Fungal
Sample Type ID: F
Sample Name: 2015/10/21MyFirstProjectF001
Note: Sample types P (pooling) and B (sterilization blank) come already populated. Blank-Sterilization sample types are currently are set to have no sampling duration regardless of what is input

Once a user has requested a project name to be added to the database, the admin will be sent an email with this information
Login and select ‘Admin Tools’
Select ‘Add Manipulate Dropdown Options’ from dropdown
Select ‘Add Project Name’
Fill out information using the information in the email sent to you. Email user separately, before entering any information, if there are any questions. An email will automatically be generated to notify the user that their project name has been approved and entered, once you submit the form

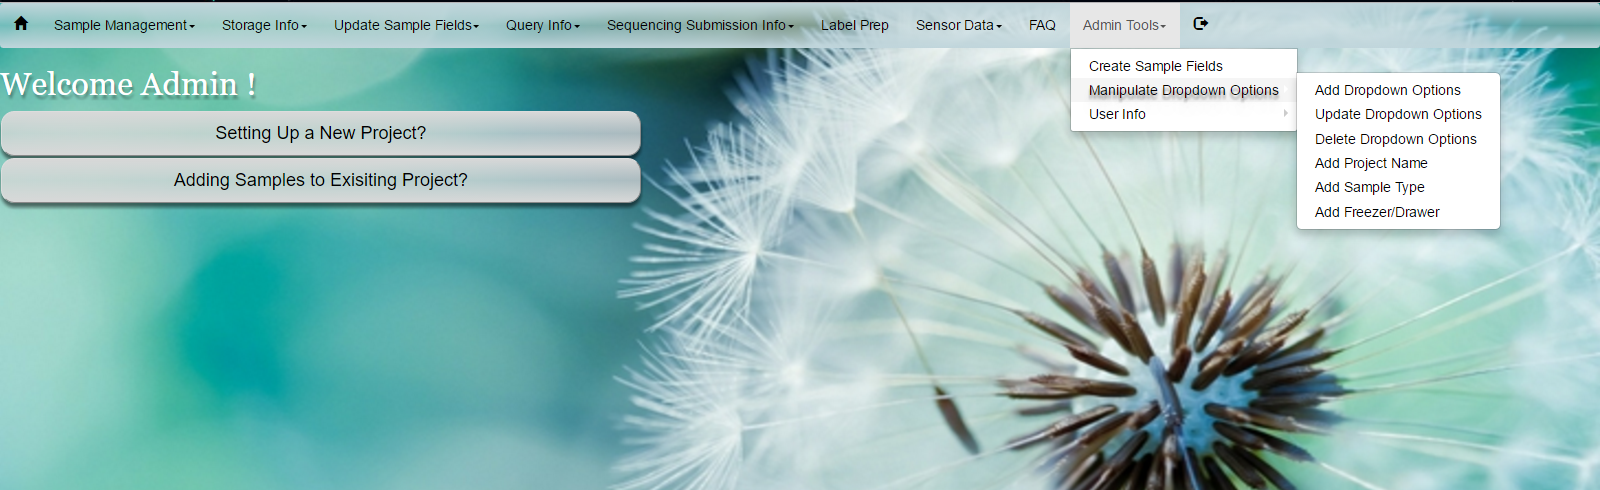
Admins can quickly add options to any dropdown option used for sample entry
Select ‘Admin Tools’
Select ‘Add Manipulate Dropdown Options’ from dropdown
Select ‘Add Dropdown Options’ from the dropdown
Choose desired table to add to from the Table Name dropdown (ex: Media Type)
Enter in the name of the media
Press the Add button
Note : Users can also add a to limited amount of fields on their own under ‘Update Sample Fields’

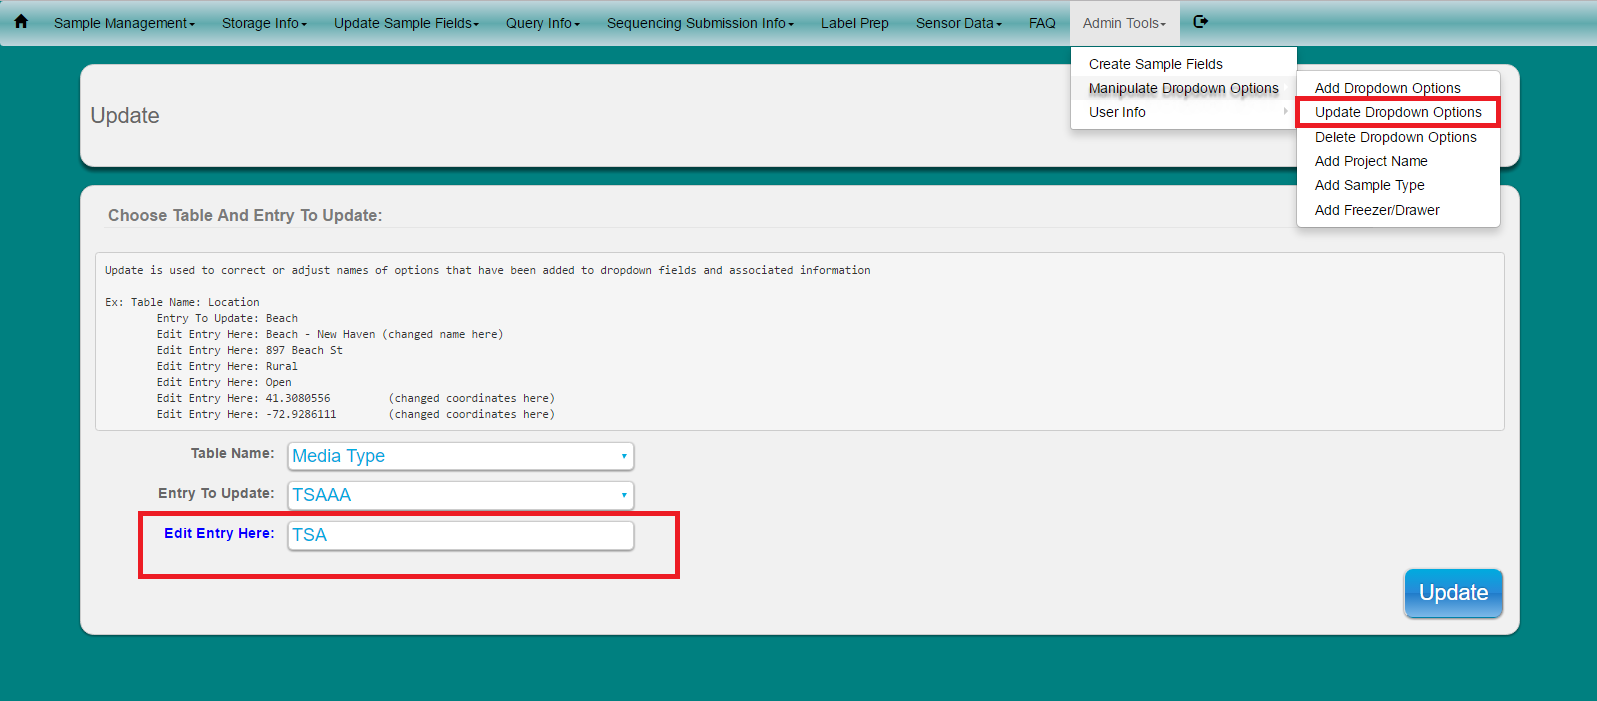
Admins can update options to any dropdown option used for sample entry. This option would most likely be used to correct typing errors. Updates will update all old entries in the database automatically
Select ‘Admin Tools’
Select ‘Add Manipulate Dropdown Options’ from dropdown
Select ‘Add Dropdown Options’ from the dropdown
Choose desired table to update from the Table Name dropdown (ex: Media Type)
Select the entry that you would like to update from the ‘Entry To Update’ dropdown
Correct the entry in the ‘Edit Entry Here’ Box
Press the Update button
Admins can delete options to any dropdown option used for sample entry by changing their visibility in the database. This option may be used if an option is no longer being used and should not be chosen. Updates to visibility will remove the option from being chosen but does not change any sample entries which have been entered with the option that is being removed. Note: Any option that is ‘deleted’ can be made visible again if needed by selecting ‘Option 2: Make Visible’
Select ‘Admin Tools’
Select ‘Add Manipulate Dropdown Options’ from dropdown
Select ‘Delete Dropdown Options’ from the dropdown
Choose desired table to update from the Table Name dropdown (ex: Media Type)
Select the entry that you would like to delete
Press the Delete button

Admins can add custom fields to record custom information about their samples on a per sample basis. These custom fields will appear in the 'User Created Fields' in both Insert Sample and Update Sample.

NanoLIMS currently allows admins to add custom numeric and text entries (free text or dropdown).
To create a custom field:
Enter a Label Name (include units if needed)
Select Field Type (Numeric Input, Text Input, or Text Dropdown)
If Text Dropdown, enter dropdown options seperated by semi-colon in ‘Enter Dropdown Options’
Select if the new field is to be required input for each sample.
**Created Fields can be edited and visibility changed (non-permanent delete) using the ‘Update Dropdown Options’ and ‘Change Visibility’ functions as noted above

-
Blank-Sterilization sample types are currently are set to have no sampling duration regardless of what is input
-
No Sample Deletion - Samples cannot be deleted via the web-ui at this time. However, samples entries that were entered incorrectly or by mistake can be edited using the 'update samples' option to change many fields including date/time, project name, project type, and sample number (as long as it does not exist already for the given project)
-
Read submission recording - Read submission function is only for keeping a record of reads submitted public database, it does not actually create the formal submission of the reads to that database
-
No Sequencing submission update - Currently there is no form to update past sequencing submission info
-
There is no admin log file
-
Admin is responsible for appropriate database back-up (If using suggested AWS LightSail, follow snap-shot instructions)
Please see NanoLIMS v2.0 Manual For Developers for more information