This is step-by-step guide, how to start using TeamCity on your Salesforce project for Continuous Integration.
When something pushed/merged to develop branch it will be deployed to mentioned environment in build.properties.
- PYTHON must be installed on agent.
- Execute next command in command line on agent:
pip install gitpython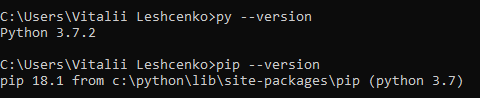
- build.properties, build.xml, config.ini, package_generator.py, packagexml_template.xml must be on the same level as src directory.
- Open your TeamCity address and click ‘Administration’ panel.
- Go to ‘Projects’ tab and click ‘Create project’ button.
- Choose existing project and click ‘Create build configuration’ button.
- Choose create ‘From a repository URL’.
- Provide your VCS Repository URL. (for example https://github.com/vitaliaventel/SalesforceTeamCityStart.git)
- Provide your username and password to repository.
- Click ‘Proceed’ button.
- Enter build configuration name. (for example: ‘Develop build’)
- Click ‘Proceed’ button.
- Go to ‘Build Steps’ tab and click ‘Configure build manually’ button.
- Choose Runner type – Command Line.
- Enter step name. (for example ‘Generate package.xml’)
- Enter ‘Custom script’: If you have installed agent on the same disc as a python then you can use next command
cd %PYTHONPATH%
python.exe %teamcity.build.checkoutDir%\package_generator.py
otherwise you should use
C:
cd %PYTHONPATH%
python.exe %teamcity.build.checkoutDir%\package_generator.py- Click ‘Save’ button.
- Click ‘Add build step’ button.
- Choose Runner type – ANT.
- Enter step name. (for example ‘Deploy changes with all tests run’)
- Enter ‘Targets’: deployUnpackaged.
- Click ‘Save’ button.
- Go to ‘Version Control Settings’ tab and click ‘Edit’ button.
- Enter VCS root name. (for example ‘Develop branch’)
- For VCS root ID click ‘Regenerate ID’.
- Enter ‘Default branch’ value – refs/heads/develop.
- Click ‘Test connection’ button.
- Click ‘Save’ button.
- Go to ‘Triggers’ tab and click ‘Add new trigger’.
- Choose ‘VCS Trigger’.
- Mark ‘Trigger a build on each check-in’ checkbox.
- Mark ‘Include several check-ins in a build if they are from the same commiter’ checkbox.
- Click ‘Save’ button.
- Go to ‘Parameters’ tab and click ‘Edit’ on PYTHONPATH parameter.
- Enter value - <YOUR_PATH_TO_PYTHON_FOLDER>. (for example C:\Python)
- Click ‘Save’ button.
- Go to ‘Build Features’ tab and click ‘Add build feature’ button.
- Choose build feature – Commit status publisher.
- Choose VCS Root that was created in Configure VCS for develop branch section.
- Choose publisher – GitHub.
- Enter username of your Github account.
- Enter password to your Github account.
- Click ‘Test connection’ button.
- Click ‘Save’ button.