Please check out CircuitPython Online IDE 2.0!
- GitHub Repo: https://github.com/urfdvw/circuitpython-online-ide-2
- IDE Link: https://urfdvw.github.io/circuitpython-online-ide-2/
Development on this version has been discontinued. No substantive updates will be made to this repository in the future, apart from cleanup activities.
Open the IDE: https://urfdvw.github.io/circuitpython-online-ide-1/
Follow me to get the latest update! Mastodon: @[email protected], Twitter: River Wang, Youtube: CircuitPythonic, Email: [email protected]
The goal is to provide a CircuitPython IDE with Zero-Installation, that can be helpful for
- anyone wants to start/work on a project quickly
- people who are working on public computers
- teachers and students
This IDE Runs on any device with the Chrome browser, including Chromebooks, or Chromium-based browsers such as MS Edge. It includes essential tools for CirtuitPython microcontroller projects, including
- Code editor with multiple tabs
- Serial Console for communication and Read-Evaluate-Print loop (REPL)
- Serial data plotter
- File browser and management
Useful features:
- IDE specific Keyboard shortcuts
- History command recall
- Supports status bar introduced in CircuitPython 8.0.0
- File unsaved changes indicator
- 2 IDE layouts
- Board nickname
- Settings saved on microcontroller (not browser cookies)
This guide assumes that CircuitPython is already installed. About how to install CircuitPython to supported devices, please check CircuitPython Website and Adafruit tutorial.
A quick introduction to CircuitPython Online IDE ⤵
- Plugin your CircuitPython-supported microcontroller board, and make sure it shows up as a drive.
- There should NOT be a
.uf2file in the drive.- If so, that means you are in boot mode, where CircuitPython is installed.
- To exist boot mode, try:
- clicking the
resetbutton on the board - Plug and unplug the board
- clicking the
- There should NOT be a
- Open the CircuitPython online IDE. in supported browser (Chrome, Edge ...)
- Click on
Step 1, in the popup list, select your microcontroller, then click on connect - Click on
Step 2, in the popup file explorer, navigate to the root of your microcontroller directory, then click on 'open folder'.- Click on the blue buttons to allow the asked permissions.
- there could be one or two.
- note, you should open the microcontroller drive as a whole instead of subfolders or any single file.
- Click on the blue buttons to allow the asked permissions.
- Click on
Step 3and then start coding.- If you missed any previous steps, the system will stop you from proceeding.
Once the microcontroller board is plugged in, the initial mode is 'Script mode', which will run the saved script file code.py (main.py in the old days). To switch back to 'Script mode' from 'REPL' mode (where you see >>>), Click on the CTRL-D button on the UI.
How to work in script mode
- Click on any file in the folder view on the left will open the file in the Editor
- for example, in most the cases, we want to open
code.py
- for example, in most the cases, we want to open
- Click on the file tab to choose a file to edit.
- After editing, click on
Save and Runbutton on the UI (on the left of the first tab) to save the changes.- This will trigger the microcontroller to reset and start to run the code.
- Command window can be used for serial communication in the 'Script mode', such as feeding inputs when
input('message')is used.
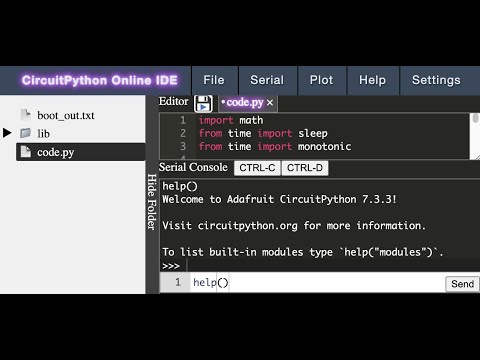
REPL (Read-Evaluate-Print loop) is a coding mode where you can interact with the microcontroller in real-time. In this mode, you send one or multiple lines of code instead of a whole script to the microcontroller. This code piece is run immediately after the microcontroller receives it, and the result is going to show up after it is finished. The microcontroller will be on halt until you send the next piece of code.
While scripts are used as deliverables, REPL mode is often used for quick testing and debugging. This IDE also provides shortcuts that help the user to use REPL together with Editor, so that code can be constructed with exploring.
How to work in REPL mode
- Click on the
CTRL-Cbutton on the UI to start the REPL mode.- You might need to click more than one time. Stop until you see
>>>in the terminal.
- You might need to click more than one time. Stop until you see
- Write one or multiple lines of code in the command window. Hit
Enteron the keyboard to send the command(s) to the board.- When writing multiple lines, use
Shift-Enterto create a new line - If you prefer to use
Enterfor newline andShift-Enterto send, you can change this in the setting
- When writing multiple lines, use
- In the Command window, use the keyboard button
UpandDownto recall command history. - In the Editor
- write one or multiple lines of code.
- Hit
Shift-Enteron the keyboard to run the current line.- The cursor will move to the following line, so keep on hitting to run a sequence of lines.
- Select multiple lines of code, then hit
Shift-Enteron the keyboard to run the selected code. - Hit
Ctrl-Enteron the keyboard to run the current 'Cell' in REPL.- Cells are multiple lines of code that start with
#%%.
- Cells are multiple lines of code that start with
- Hit
Ctrl-Sto save changes to the current file- different from "save and run", this shortcut will not force exit REPL mode.
- More REPL shortcuts can be found here
Ploting is very useful when working with sensors. CircuitPython is not responsible for plotting out figures, instead, in CircuitPython, we print out a table of data (In the right format), and the Online IDE will plot the printed data.
How to use plot
- You need to start the plot by print out
startplot: xname y1name y2name ..., separated by space.- In python, this is done by
print("startplot:", "xname", "y1name", "y2name"). - no space in the names, use
_instead.
- In python, this is done by
- Plot data should immediately follow the start line in the serial output. Each line should contain the data of one timestep,
xdata y1data y2data ..., separated by space.- In python, this is done by
print(xdata, y1data, y2data), wherexdataand alike areintorfloatvariables.
- In python, this is done by
- in "Plot" menu, click on "open plot" to open the plot window
- you can move and resize the plot window.
- Check the box [x-axis] in the menu to use the first dimension as the x-axis. Otherwise, all dimensions of the data are considered as paralleled y-axes, and the x-axis on the figure is going to be the index.
- Plot can be real-time if you open the plot window while the data is developing.
Example of plot code
- First, start REPL mode (how)
- In the "Plot" menu, click on "Load Example"
- The example code is going to be populated in the command window
- Click on "send" in the command window to run the example.
"""
CircuitPython Online IDE plot example
please check and uncheck the [x-axis] box to see the difference.
"""
import math
from time import sleep, monotonic

time_start = monotonic()
# 'startplot:' is the start indicator
# column names separated by `,` in `print()`, no space in names.
print('startplot:', 't*cos(t)', 't*sin(t)')
for i in range(100):
    sleep(0.1)
    t = monotonic() - time_start
    # print the data for plotting
    # column separated by `,` in `print()`
print(t*math.cos(t), t*math.sin(t))For baisc Editor shortcuts, Please check Ace Editor Default Keyboard Shortcuts. CircuitPython related shortcuts are listed below.
MacOS shortcuts in ()
System Related:
- [Ctrl-S] ([Cmd-S]): Save the file
- If not in REPL mode. This will trigger reset and run the saved script
- This is different from "Save and Run" which will trigger reset and run the script despite of REPL mode or not.
- [Ctrl-Shift-C] ([Ctrl-C]) Send "ctrl-c" signal to the microcontroller
- [Ctrl-Shift-D] ([Ctrl-D]) Send "ctrl-d" signal to the microcontroller
REPL Mode Specific:
- [Ctrl-Enter] ([Cmd-Enter]) RUN the current Cell
- Cells are multiple lines of codes starting with
#%%
- Cells are multiple lines of codes starting with
- [Shift-Enter] RUN the current line of code
- or selected lines of code
- [Alt-Enter] ([Option-Enter]) RUN and REMOVED the current line of code
- or selected lines of code
- [Alt-Up] and [Alt-Down] ([Option-Up] and [Option-Down]) RECALL Command Window history
- [Alt-Shift-Enter] ([Option-Shift-Enter]) GRAB Command Window content to Editor
- [Ctrl-Shift-C] ([Ctrl-C]) Send "ctrl-c" signal to the microcontroller
- [Ctrl-Shift-D] ([Ctrl-D]) Send "ctrl-d" signal to the microcontroller
- [Up] and [Down] recall history commands
- [Enter] send command(s)
- [Shift-Enter] newline
- The shortcut of send and newline can be swapped in settings.
This project is under rapid development. The Offline version should only be used when the internet connection is unstable. Please use the online version whenever possible to get the leatest feature.
- Visit the Release Page of this project,
and open the version with lable
latest. - Download the zip file named
CircuitPython.Online.IDE.v***(not source code) - Decompress the file
- Open the
index.htmlfile in the folder to use - Check
readme.mdfor help
From high priority to low
- rename file
- on microcontroller trash bin
- cleaner code
- variable watcher
- 中文界面和中文帮助
- adjustable layout ()
- unified widget framework
This project focuses on the USB workflow of CircuitPython, and will not support BLE or WIFI workflow in foreseen future. If you are interested in versitile workflows, check out code.circuitpython.org and this corresponding Adafruit tutorial, which includes BLE, WIFI, and USB workflow.
This project will not support MicroPython in foreseen future. If you are interested in coding MicroPython online, check out tinkerdoodle.
This project will not support android or IOS anytime. I encourage anyone coding on touch screens to migrate to keyboards to build some muscle memories and shortcut vocabulary (and dialect). However, if you insist on doing so, check out these Adafruit tutorials for android and for ios.
This project relies on the following frontend APIs
- File API
- Web Serial API
This project relies on the following open-source projects
- Ace Editor for Editor
- plotly.js for plot
- TreeJs for folder view
- WindowJs for plot window
- Responsive Navigation Bar for navigation bar
- MenuJS for setting pannel
Also, inspired by the following projects.