Rotary axis
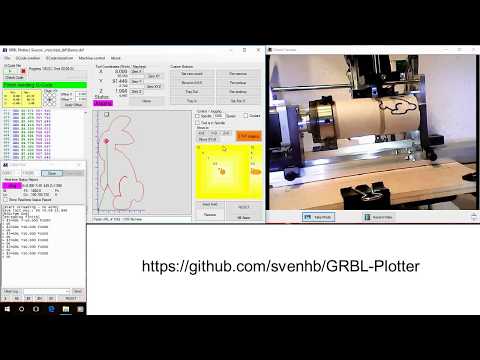
In this example the Y axis will be substituted by a rotary axis. A toilet paper roll with a diameter of 45mm will be machined.

- secure the GRBL Settings for the Y-axis ($101=40; $121=500) 40 steps/mm (belt drive)
- switch off electronis (to protect motor drivers)
- rebuild mechanics
- switch on electronis
- set GRBL Settings for the rotary axis ($101=4.4444; $121=100) 4.444 steps/degree (1600 steps/turn)
- Attention: the Y axis scaling is now in degree
- set the diameter of work piece
- Adaption of the gcode by scaling the Y axis (attention G2 / G3 commands must be converted into lines prior)
Via '$$' the actual settings can be read out, they can be set in the setup-tab for automatic transfer.

Automatisches Setzen der Motorparameter, abhängig von der Auswahl "Achsenersetzung"

- Original GCode (max. Y is 35.25mm)
- Set of work piece diameter (45mm -> circumference = 141mm)
- scaling of the Y-axis to the circumference of the work piece
- The gcode was scaled to 90 (now degree) on the Y axis (this correlates to 35.25mm on the circumference)