Use programmable keyboard firmware with any keyboard.
- Use QMK, ZMK, or KMK with any keyboard connected to a Linux host, including
- non-programmable keyboards,
- incompatible programmable keyboards,
- QMK, ZMK, or KMK keyboards (using a keymap or layer without dual function keys),
- BT or other wireless keyboards, and
- built-in laptop keyboards.
- Record and play back timed keystrokes to
- test keymap changes,
- compare behaviour between QMK, ZMK, and KMK, or
- debug firmware timing issues.
- For other uses see #2.
𝑥MK facilitates the use of programmable keyboard firmware with any keyboard.
With 𝑥MK, a keyboard, and an MCU board running programmable keyboard firmware, are connected to the host, and key events are diverted by xmk from the keyboard to the MCU board for processing by the firmware. 𝑥MK supports any keyboard, Linux hosts, and QMK, ZMK, or KMK keymaps, and requires an MCU board and the xmk application.
graph LR
    kbd([keyboard])-->xmk
    subgraph host
        xmk
        apps([applications])
    end
    xmk-->mcu
    mcu[MCU board]-->apps
With 𝑥MK Native, the firmware instead runs as a process on the host. 𝑥MK Native supports any keyboard, Linux hosts, and ZMK keymaps, and requires the xmk and usbip applications and no additional hardware.
graph LR
    kbd([keyboard])-->xmk
    subgraph host
        xmk-->firmware-->usbip-->apps([applications])
    end
With non-programmable keyboards, keyswitches are scanned for state changes by an integrated controller, and keycode events are generated with a fixed relationship between key and keycode. Keycode events are transmitted from the controller to the host and are made available to applications on the host.
graph LR
    subgraph non-programmable keyboard
        ks([keyswitches])-->|state <br> changes|c[controller]
    end
    subgraph host
        apps([applications])
    end
    c-->|keycode <br> events|apps
QMK, ZMK, and KMK are firmware for compatible programmable keyboards, and support customisation functions such as remapping, layers, and dual functions keys. Typical programmable keyboards use an MCU board to run the firmware. The firmware scans the keyswitches for state changes in the same way as with a non-programmable keyboard. Keycode events are generated via a customisable keymap. Keycode events are transmitted from the keymap to the host and are made available to applications on the host.
graph LR
    subgraph programmable keyboard
        ks([keyswitches])
        subgraph MCU board
            km[keymap]
        end
        ks-->|state <br> changes|km
    end
    km-->|keycode <br> events|apps
    subgraph host
        apps([applications])
    end
𝑥MK and related projects facilitate the use of customisable keymaps with non-programmable keyboards.
With KMonad, key events are diverted from the keyboard to the kmonad application on the host for processing by the KMonad keymap. KMonad supports any keyboard, multiple platforms, and KMonad keymaps, and requires the kmonad application and no additional hardware.
graph LR
    kbd([keyboard])-->kmonad
    subgraph host
        kmonad-->apps([applications])
    end
With a QMK USB to USB keyboard protocol converter, the converter is connected between keyboard and host, and key events are processed by the keymap. The converter supports USB keyboards, any host, and QMK keymaps, and requires the converter hardware and no additional software.
graph LR
    kbd([keyboard])-->km
    subgraph converter
        km[keymap]
    end
    subgraph host
        km-->apps([applications])
    end
With hardware modification, the non-programmable controller can be replaced with an MCU board running programmable firmware, converting the non-programmable keyboard into a programmable keyboard. Hardware modification supports modifiable keyboards, any host, and QMK, ZMK, or KMK keymaps, and requires the MCU board and no additional software.
| 𝑥MK | 𝑥MK Native | KMonad | Converter | Modification | |
|---|---|---|---|---|---|
| Keyboard | any | any | any | USB | modifiable |
| OS | Linux | Linux | multiple | any | any |
| Hardware | MCU board | none | none | converter | MCU board |
| Software | xmk | xmk, usbip | kmonad | none | none |
| Keymap | QMK, ZMK, KMK | ZMK | KMonad | QMK | QMK, ZMK, KMK |
𝑥MK can be used with any keymap. Miryoku QMK, Miryoku ZMK, and Miryoku KMK include support for 𝑥MK. Miryoku KMonad can be used as an alternative to Miryoku QMK, Miryoku ZMK, and Miryoku KMK with 𝑥MK.
The required hardware components are any keyboard, an MCU board running QMK / ZMK / KMK firmware built with the QMK converter / xmk keyboard / ZMK xmk shield / KMK xmk keyboard and desired keymap, and a Linux host. The required software components are the xmk python application, and a map of keyboard keycode to keymap key positions.
The keyboard is connected to the host via USB, BT, PS/2, etc. Keycode events from the keyboard are made available on the host as a keyboard evdev device.
xmk reads the map, grabs the keyboard evdev device, reads the keyboard keycode events, converts keycodes to keymap key positions according to the map, and outputs key position event shell commands via stdout.
The MCU board is connected to the host via USB. The firmware includes a serial shell supporting keymap key position event shell commands. The shell is made available on the host as a tty device over USB CDC ACM (serial over USB).
Output from xmk is redirected to the tty device. The firmware shell interprets the shell commands and triggers the corresponding events in the keymap.
Keycode events from the keymap are sent to the host via USB HID, and are made available to the host as an MCU board firmware evdev device.
graph TB
    kbd([keyboard])-->|keycode events via <br> USB, BT, PS/2, etc.|kd
    subgraph Linux host
        kd[keyboard <br> evdev device]-->|keycode events <br> via evdev|xmk
        mapfile[(map)]-->|keycode to keymap <br> position mapping <br> from file|xmk
        xmk-->|key position event shell commands <br> via stdout|tty[MCU board firmware tty device]
        md[MCU board firmware evdev device]-->|keycode events via evdev|a([applications])
    end
    tty-->|key position event shell commands <br> via USB CDC ACM|sh
    subgraph MCU board firmware
        sh[shell]-->|key position events|km[keymap]
    end
    km-->|keycode events via USB HID|md
The required hardware components are any keyboard, and a Linux host. The required software components are the xmk python application, a map of keyboard keycode to keymap key positions, ZMK firmware built with the 𝑥MK native_posix_64 board and desired keymap, and a USB/IP client.
The keyboard is connected to the host via USB, BT, PS/2, etc. Keycode events from the keyboard are made available on the host as a keyboard evdev device.
xmk reads the map, grabs the keyboard evdev device, reads the keyboard keycode events, converts keycodes to keymap key positions according to the map, and outputs key position event shell commands via stdout.
The firmware runs as a native process on the host. The firmware includes a serial shell supporting keymap key position event shell commands. The shell is made available on the host as a pty device.
Output from xmk is redirected to the pty device. The firmware shell interprets the shell commands and triggers the corresponding events in the keymap.
The firmware process includes a USB/IP server. Keycode events from the keymap are made available via the USB/IP server.
The USB/IP client connects to the USB/IP server, and receives keycode events via USB/IP. Keycode events are made available on the host as a USB/IP evdev device.
graph TB
    kbd([keyboard])-->|keycode events via <br> USB, BT, PS/2, etc.|kd
    subgraph Linux host
        kd[keyboard <br> evdev device]-->|keycode events <br> via evdev|xmk
        mapfile[(map)]-->|keycode to keymap <br> position mapping <br> from file|xmk
        xmk-->|key position event shell commands <br> via stdout|pty[firmware process pty device]
        subgraph firmware process
            sh[shell]-->|key position events|km[keymap]-->|keycode events|us[USB/IP server]
        end
        pty-->|key position event shell commands <br> via pty|sh
        us-->|keycode events via USB/IP|uc[USB/IP client]-->|keycode events|ud[USB/IP client evdev device]
        ud-->|keycode events via evdev|a([applications])
    end
When recording, in addition to the normal 𝑥MK operation and 𝑥MK Native operation, xmk saves key position events with timing to a file.
graph TB
    kd[[keyboard evdev device]]-->|keycode events <br> via evdev|xmk
    mapfile[(map)]-->|keycode to keymap <br> position mapping <br> from file|xmk
    xmk-->|key position event shell commands <br> via stdout|tty[[firmware tty / pty device]]
    xmk-->|key position events <br> with timing <br> to file|rec[(recording)]
When playing back, the normal 𝑥MK operation and 𝑥MK Native operation is modified in that instead of reading the map and the keyboard evdev device, xmk reads key position events with timing from a file, and outputs key position event shell commands via stdout according to the timing.
graph TB
    rec[(recording)]-->|key position events with timing <br> from file|xmk
    xmk-->|key position event shell commands <br> via stdout|tty[[firmware tty / pty device]]
xmk is located at ./src/xmk.
Add your account to the input group.
sudo usermod -aG input `whoami`Login again.
Find the device for your keyboard under /dev/input.
First look under /dev/input/by-id/. It will usually end in event-kbd.
ls /dev/input/by-id/*Note the keyboard device in the output.
/dev/input/by-id/usb-SIGMACHIP_USB_Keyboard-event-kbd
If not listed, find the device with evtest.
evtestNote the keyboard device in the output.
/dev/input/event21: SIGMACHIP USB Keyboard
The -k option is used to select the keyboard. Give the path to the keyboard device from Find the Keyboard Device.
./src/xmk -k /dev/input/by-id/usb-SIGMACHIP_USB_Keyboard-event-kbd -m ./src/maps/minidox/60_ansi -s > /dev/ttyACM0./src/xmk -k /dev/input/event21 -m ./src/maps/minidox/60_ansi -s > /dev/ttyACM0The -c option is used to create a map. Give the path to the map file to be created. Also select the keyboard.
./src/xmk -k /dev/input/by-id/usb-SIGMACHIP_USB_Keyboard-event-kbd -c ./src/maps/minidox/60_ansiPress each key to be used in the keymap in order of keymap key position. Press a key a second time to insert a line break. Press a third time to exit. Optionally edit the file to reformat whitespace or add comments with #.
The -m option is used to select a map. Give the path to the map file. Use one of the included maps, or first create a map.
./src/xmk -k /dev/input/by-id/usb-SIGMACHIP_USB_Keyboard-event-kbd -m ./src/maps/minidox/tap -s > /dev/ttyACM0The -s option is used to output firmware shell commands.
Redirect output to the tty or pty device from converter/xmk Setup, xmk Shield Setup, native_posix_64 Board Setup, or KMK xmk Setup as appropriate.
Also select the keyboard and select the map.
./src/xmk -k /dev/input/by-id/usb-SIGMACHIP_USB_Keyboard-event-kbd -m ./src/maps/minidox/60_ansi -s > /dev/ttyACM0The -r option is used to record keystrokes with timing. Give the path to the recording file to be created. Optionally redirect output as when typing. Also select the keyboard and select the map.
./src/xmk -k /dev/input/by-id/usb-SIGMACHIP_USB_Keyboard-event-kbd -m ./src/maps/minidox/60_ansi -r ./src/recordings/hello_world > /dev/ttyACM0The -p option is used to read recorded keystrokes with timing and output firmware shell commands. Give the path to the recording file. Redirect output as when typing.
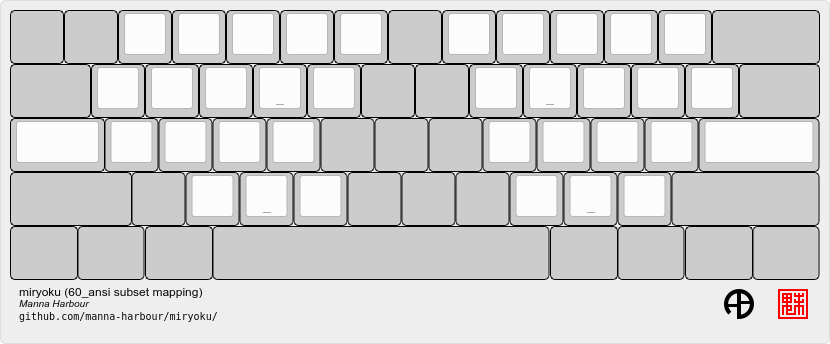
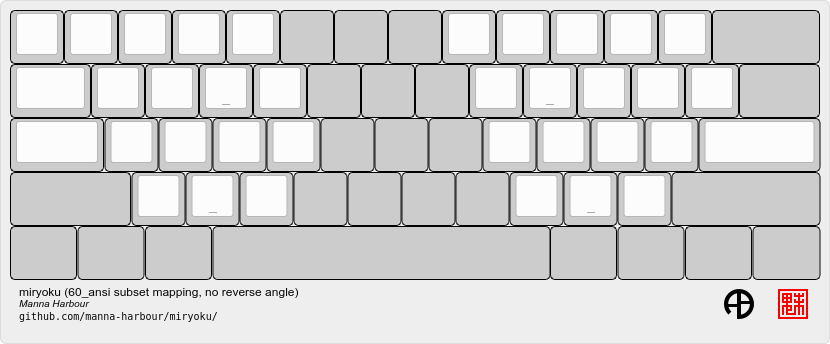
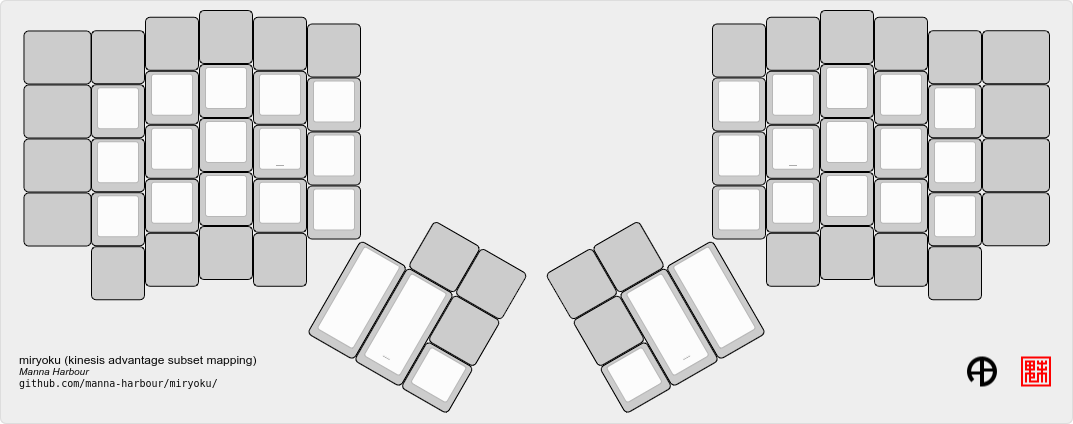
./src/xmk -p ./src/recordings/hello_world > /dev/ttyACM0Map of keyboard keys to keymap key positions.
Sample maps are included under ./src/maps by keymap layout.
Corresponds to the default Miryoku Tap layer.
A bare QMK-compatible MCU board connected to the host over USB, running QMK built with the converter/xmk keyboard definition. USB HID is over USB. Communication from xmk to QMK is over USB CDC ACM UART.
- A QMK-compatible MCU board.
The converter/xmk keyboard definition is a available at https://github.com/qmk/qmk_firmware/tree/master/keyboards/converter/xmk.
Add your keymap. If it is not using one of the supported layouts, also edit info.json to add a new entry under layouts, ensuring the matrix entries are in order and without gaps. If adding support for a community layout, also append to community_layouts.
For local builds, build with keyboard converter/xmk.
For workflow builds, fork this repo. Edit ./.github/workflows/build-converter-xmk.yml to modify the values for repository and ref in the qmk step for the QMK fork containing your keymap. Run the Build converter/xmk workflow.
Connect the MCU board to USB, enter the bootloader (e.g. for Pro-Micro), and flash the firmware.
Reconnect the MCU board and find the tty device.
sudo dmesg | grep ttyNote the tty device in the output.
cdc_acm 1-3.4.4:1.0: ttyACM0: USB ACM device
When using xmk for typing, redirect output to the tty device from the previous step.
./src/xmk -k /dev/input/by-id/usb-SIGMACHIP_USB_Keyboard-event-kbd -m ./src/maps/minidox/60_ansi -s > /dev/ttyACM0To enter the bootloader after flashing the firmware, xmk can be used to trigger a QK_BOOT keycode if present in the keymap, or enter the boot command in the converter/xmk shell e.g. echo "boot" > /dev/ttyACM0.
Two different methods of operation are supported.
A bare ZMK-compatible MCU board connected to the host over USB, running ZMK built with the xmk shield definition. USB HID is over USB. Communication from xmk to ZMK is over USB CDC ACM UART.
- A ZMK-compatible MCU board.
Edit ./zmk-config/xmk.keymap to add your keymap. No transform is required.
For local builds, merge zmkfirmware/zmk#1318, west update, and build with shield xmk and the appropriate board for your MCU board, using the path to ./zmk-config for ZMK_CONFIG.
For workflow builds, fork this repo. Edit ./zmk-config/xmk.yml to adjust the value for board for your MCU board. Run the Build xmk shield workflow.
Connect the MCU board to USB, enter the bootloader (e.g. for nice!nano or Seeeduino XIAO), and flash the firmware.
Reconnect the MCU board and find the tty device.
sudo dmesg | grep ttyNote the tty device in the output.
cdc_acm 1-3.4.4:1.0: ttyACM0: USB ACM device
When using xmk for typing, redirect output to the tty device from the previous step.
./src/xmk -k /dev/input/by-id/usb-SIGMACHIP_USB_Keyboard-event-kbd -m ./src/maps/minidox/60_ansi -s > /dev/ttyACM0To enter the bootloader after flashing the firmware, xmk can be used to trigger a &bootloader binding if present in the keymap.
Note: zmkfirmware/zmk#1444.
A Zephyr native posix application running on the host. USB HID is over USB/IP. Communication from xmk to ZMK is through a pty.
- usbip
Edit ./zmk-config/native_posix_64.keymap to add your keymap. No transform is required.
For local builds, merge zmkfirmware/zmk#1318, west update, and build with board native_posix_64, using the path to ./zmk-config for ZMK_CONFIG.
For workflow builds, fork this repo and run the Build native_posix_64 board workflow.
Load the usbip modules if necessary.
sudo modprobe vhci-hcdExecute zmk.elf.
zmk.elfNote the pty device in the output.
UART_0 connected to pseudotty: /dev/pts/18
Find the busid of the usbip server.
usbip list -r localhostNote the busid in the output.
Exportable USB devices
======================
 - localhost
        1-1: OpenMoko, Inc. : unknown product (1d50:615e)
           : /sys/devices/pci0000:00/0000:00:01.2/usb1/1-1
           : (Defined at Interface level) (00/00/00)
           :  0 - Human Interface Device / No Subclass / None (03/00/00)
Attach the usbip client using the busid from the previous step.
sudo usbip attach -r localhost -b 1-1When using xmk for typing, redirect output to the pty device from the earlier step.
./src/xmk -k /dev/input/by-id/usb-SIGMACHIP_USB_Keyboard-event-kbd -m ./src/maps/minidox/60_ansi -s > /dev/pts/18A bare KMK-compatible MCU board connected to the host over USB, running KMK with the KMK xmk keyboard definition.
USB HID is over USB.
Communication from xmk to KMK is over USB CDC ACM UART.
- A KMK-compatible MCU board.
Merge https://github.com/manna-harbour/kmk_firmware/tree/xmk with KMK master.
Install KMK from the merged branch according to the KMK documentation.
Add your keymap to boards/xmk/main.py.
Copy the contents of boards/xmk/ to the root of the USB drive for your MCU board.
Reset or reconnect the MCU board and find the tty device.
sudo dmesg | grep ttyNote the second tty device in the output.
cdc_acm 1-1:1.0: ttyACM0: USB ACM device
cdc_acm 1-1:1.2: ttyACM1: USB ACM device
When using xmk for typing, redirect output to the tty device from the previous step.
./src/xmk -k /dev/input/by-id/usb-SIGMACHIP_USB_Keyboard-event-kbd -m ./src/maps/minidox/60_ansi -s > /dev/ttyACM1


