Control a servo motor hand with the power of a glove and DIY flex sensors!
This project uses budget items and DIY parts to create a fully functional robotic hand that can be controlled by a glove with flex sensors. It is an introduction project to the world of biomechanical engineering and design. Starting from the basic building blocks of foam and string, you will explore how physical mechanics are combined with electronic parts to form an attention grabbing project.
For a more basic overview of the project, check out the project presentation
Rudimentary drawings of how the robotic hand and glove controller work. These pictures are not accurate to the final product but provide a basic explanation of the mechanics behind the project.
Fingers - Spring structure inside pulled by string/fishing wire
Full Hand - Combining five fingers and servo motors for individual control
Control Methods - Glove was chosen over muscle control due to the high cost of the EMG Sensor

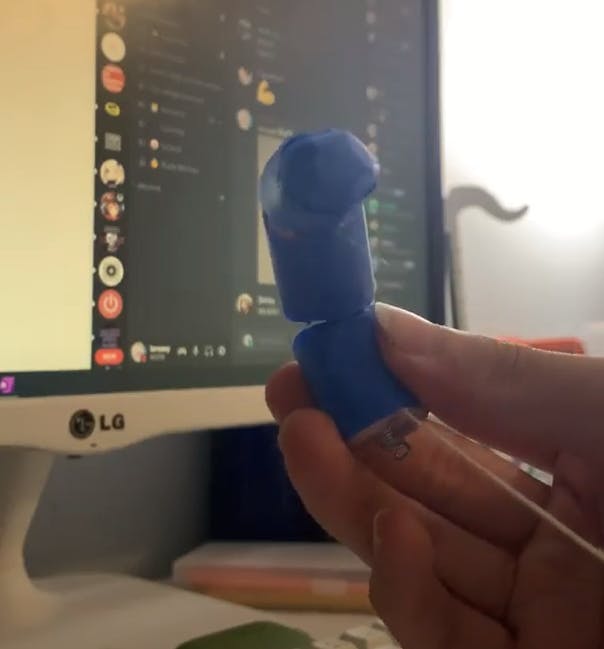
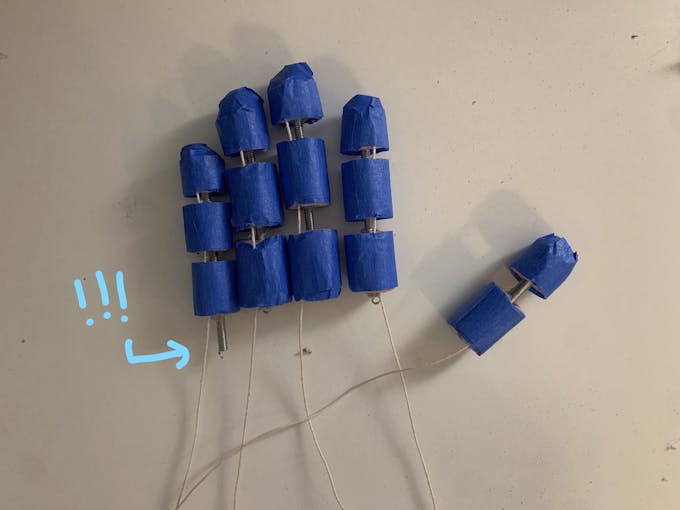
First, create fingers out of foam, springs, tape, and string. Each finger consists of three foam bases (two for the thumb) and a spring embedded through the center of it. String is hot glued to the top foam piece and guided down inside the foam piece. Lastly, tape is used to protect and cover up the foam. I recommend not using insulation foam like I did because it is very difficult to cut into.
It's important to have a section of the spring poking out from underneath the base of the finger. I did not have this for all my fingers so I soldered on another spring to the bottom to increase the length. An alternative method is to use a toothpick as a base, but your hand will not bend on the palm.
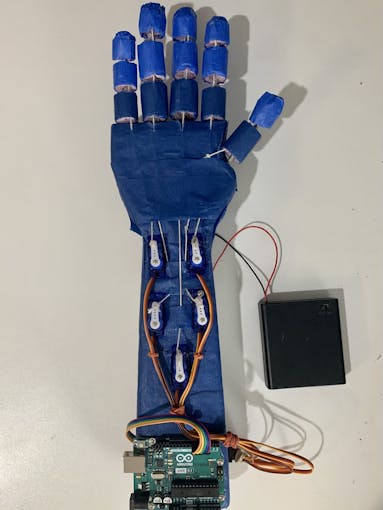
Next construct the palm and the arm base. I don't have much documentation of this process, but this should be pretty straightforward. Tracing my hand, I carved a palm like shape to hold all my fingers. Create holes on the top of the palm to hold the fingersThe arm base holds at least 5 servos and an Arduino Uno together. It measures 8x2.5x.5 inches on my project. Make sure the strings are able to be pulled from the base. Use staples on the palm as brackets to guide the strings to servo motors. Create indents and glue down servo motors.
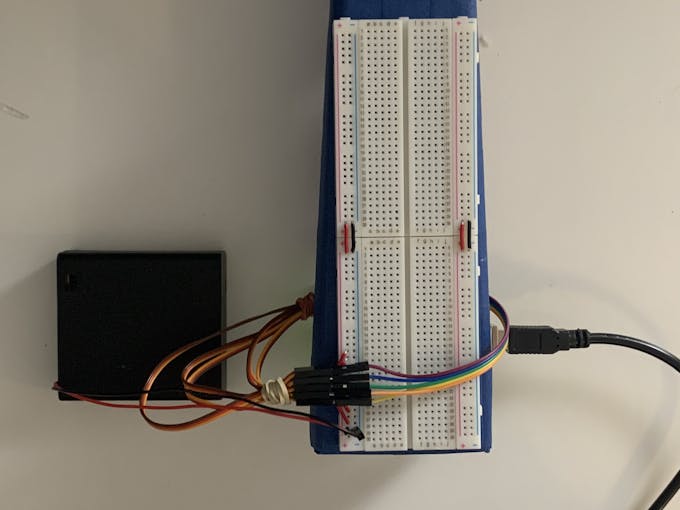
Guide the strings through the servo motor arm and hot glue it down when it is taut. Mount the Arduino Uno onto the bottom of the arm and attach a breadboard to the back. Organize wires with rubber bands/zip ties and connect all servo motors to the power rails on the breadboard. Lastly, connect the signal lines on the servo motors to the digital pins on the Arduino board. Use 4AA battery pack to power ONLY the servo motors. Wiring and construction of the hand is done for now. Arduino Uno can be programmed to control the servo motors now. For a clear visual explnation of the wiring, refer to the provided circuit diagram.

The most important part of the glove controller are the flex sensors. Rather than buying 5 sensors for 100 dollars, it's possible to DIY them. This is where you use paper and pencil, flexible plastic, and tape. Follow along with this video to construct the flex sensors. Captions are in English.
Next, tape down the sensors onto the a spare glove. I had to add another piece of tape on the knuckle, so this image is not the most accurate. It's important to stay organized, as there are a lot of jumper wires. There is a minimum of 10 wires that need to be attached to the breadboard. Twist wires together to stop them from spreading everywhere. Attach flex sensors according to the picture below. I used five 10kOhm resistors but alternative options work. Take note that this power rail receives power directly from the Arduino pins, not the 6V battery pack.
In the provided code, its important to realize that parameters will be different depending on each flex sensor and servo motor. In order to organize values clearly, I included the flexTest() function to test values for the flex sensors.
Serial Monitor output of flexTest() - Returns live feedback of the flex sensors
Keep track of values next to your flex sensor constants
For servo motor parameters, I tested the full bend of each finger with the servo motor and decreased the amount of rotation in order to ensure fingers don't extremely overlap with each other. (I have overlapping of the middle and index finger in my demo, but that is due to a loose string on the servo motor that I can't tighten because I ran out of hot glue D:)
Test out the program and change parameters as needed in order to get the best control with the glove. The project is finished now!
This project works OK in my opinion. It is not as refined as I would like, however it does do its job considering mostly everything is handmade. Alternative options like 3D printing or purchasing flex sensor may improve the experience, but they are costly.
Expansions on this project could include muscle control with an EMG sensor. Making the glove controller wireless is possible. Functional wrist and elbow movement would be a challenge too.


_08piBoNNtl.jpg?auto=compress%2Cformat&w=680&h=510&fit=max)


