OBS Studio now includes a nativ Multiview. I won't stop your from using this but i will no longer update it.
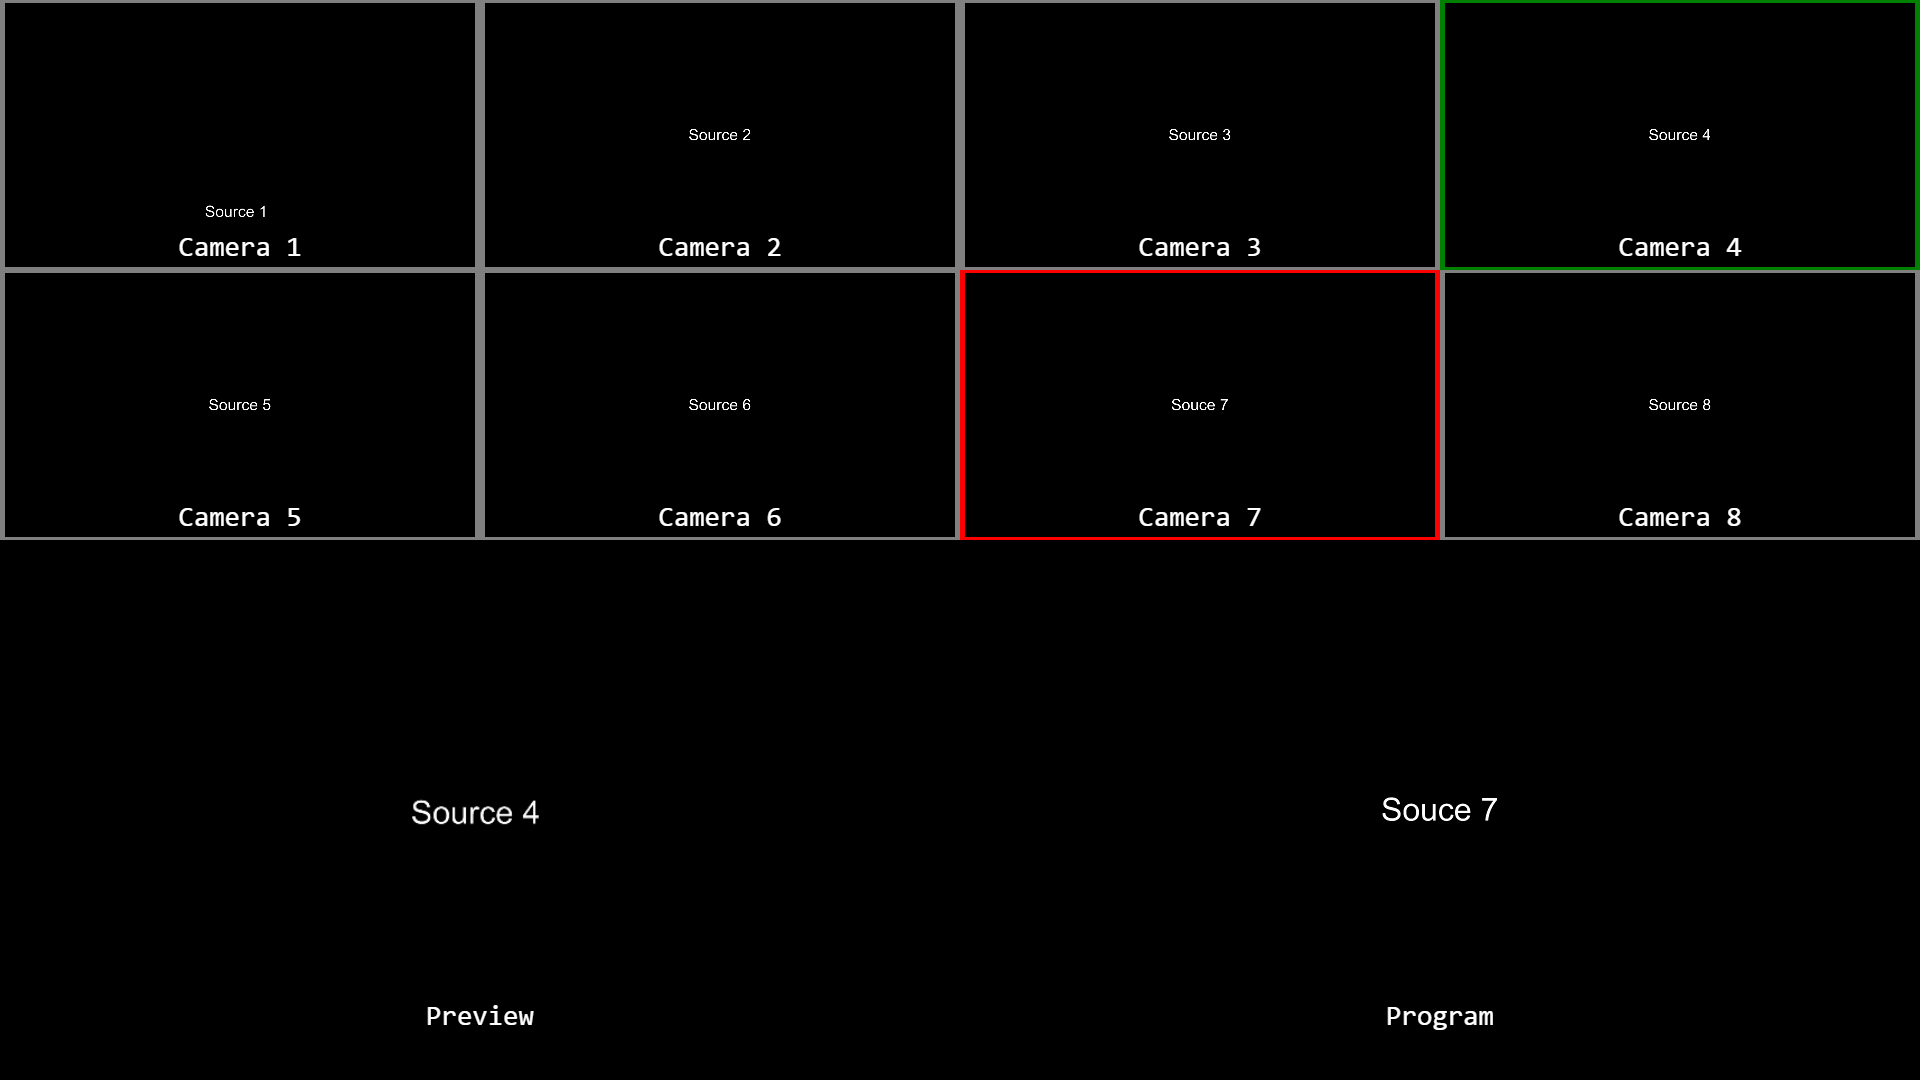
You ever wanted the look and feel of a professional video mixer in OBS? With this tool you can replicate the multiview look of video hardware mixers with different sources, preview and programm. Scroll down to see what it looks like.
-
The obs-websocket plugin (!! Please note that currently you have to use a build from appveyor until the next official stable version comes out !!)
-
Optional: The obs-ndi plugin so you don't have to use a screen capture for the "Program" display
-
Install the plugin (Guide)
-
Open the "Tools" menu and select "websocket server settings"
-
Make sure that "Enable Websocket server" is checked, "Server Port" is 4444 and "Enable authentification" is unchecked"
-
Switch OBS to Studio Mode
-
Download the repository or clone it
-
Create a new scene in OBS and name it "Multiview" (or whatever you like)
-
First, add a Browser source, select "local file" and choose the "background.html" in the "BG" subfolder
-
Set "Width" to 1920, "Height" to 1080, "FPS" to your streaming framerate and replace the the content of the "CSS" box with
body {margin: 0px auto; overflow: hidden;} -
Add your scenes or sources to the multiview scene which you want displayed.
-
Open the "positions.md" with a text editor.
-
Example for source 1:
-
Open the "Scene Item Transform" windows by right clicking your first source and selecting "Transform" followed by "Edit Transform"
-
Copy the X and Y potition from the "positions.md" to the first two boxes titled "Position"
-
Copy the "Width" and "Height" values to the two boxes titled "Size"
-
Click "Close"
-
-
Repeat this steps for all of the sources
-
Right click the "Multiview" scene name and select "Fullscreen Projector (Scene)"
-
Choose the display you want to see the multiview on
If you want to display labels over the scenes then repeat the above steps 4 and 5 except selecting the "labels.html" in the "Labels" subfolder and setting "FPS" to 1
Make sure that the "background.html" source is on the bottom and the "labels.html" source is on the top of your source stack
You have to configure the template to accept your scene names
-
Open "client.js" in the js subfolder with a text editor
-
In the first line you can see a list with the different scene names
-
If your first scene is named "Intro", change "src 1" to "Intro" (!!case sensitive!!)
-
Repeat this for all the other scenes
You can change the text and text color of the labels
-
Open "labels.html" in the "Labels" subfolder with a text editor
-
In line 7 you can change the text color
-
In line 12-21 you can simply replace the placeholder text
-
Don't forget to reload the cache in the source options

- Pull requests with new layouts are welcome
- Let me know how you use it ;D