Old Guide (ES)

!! W A R N N I N G !!
This wiki pages was moved to the official CanAirIO documentation portal, please visit it for the lastest guides and docs:
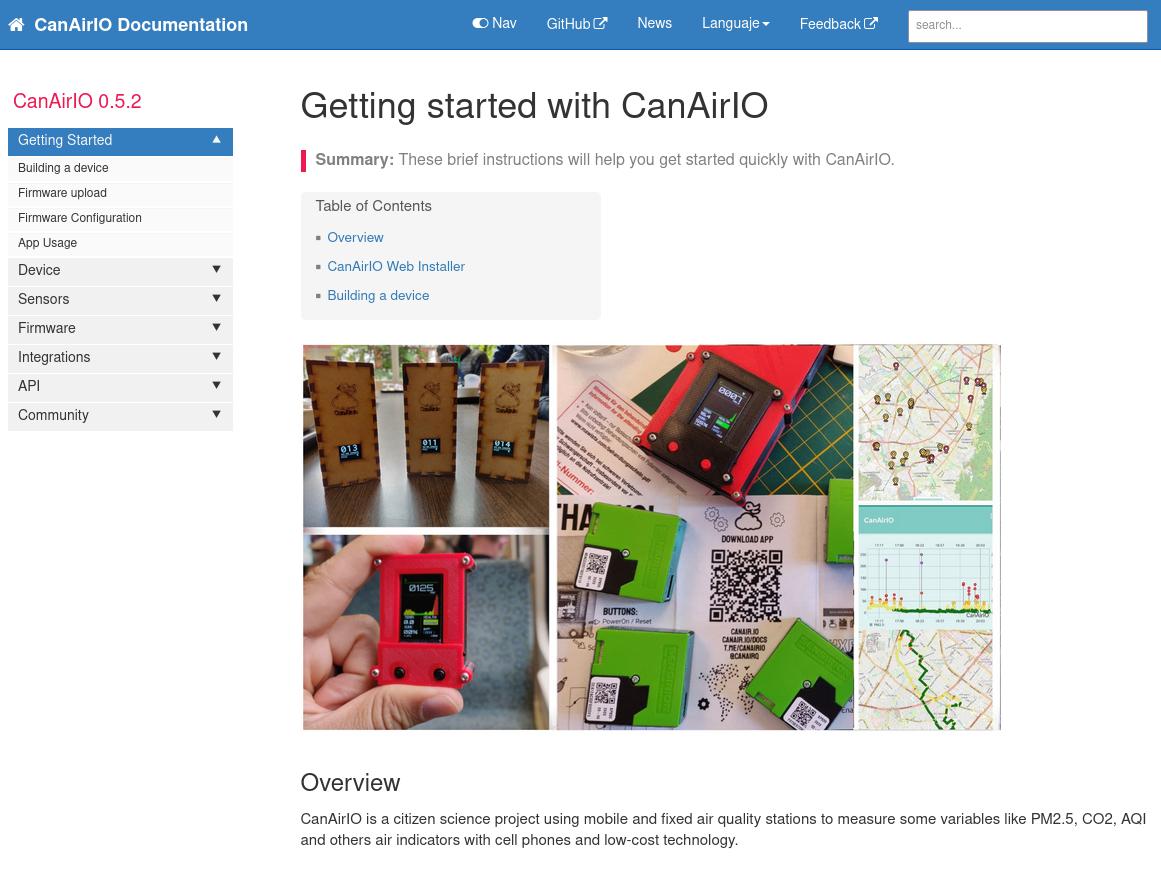
CanAirIO es una red de monitoreo de calidad del aire y un proyecto de ciencia ciudadana con sensores móviles y fijos para medir la calidad del aire (PM 2.5) usando sensores de bajo costo y celulares.
Con esta guía podrás construir un dispositivo para medir la calidad del aire, por medio de un sensor Honeywell HPMA115s0 que mide partículas PM 2.5 y PM 10 y asi compartir estos datos desde tú celular a la nube de CanAirIO o a un servidor personal por medio de la app CanAirIO
| Description | Store link |
|---|---|
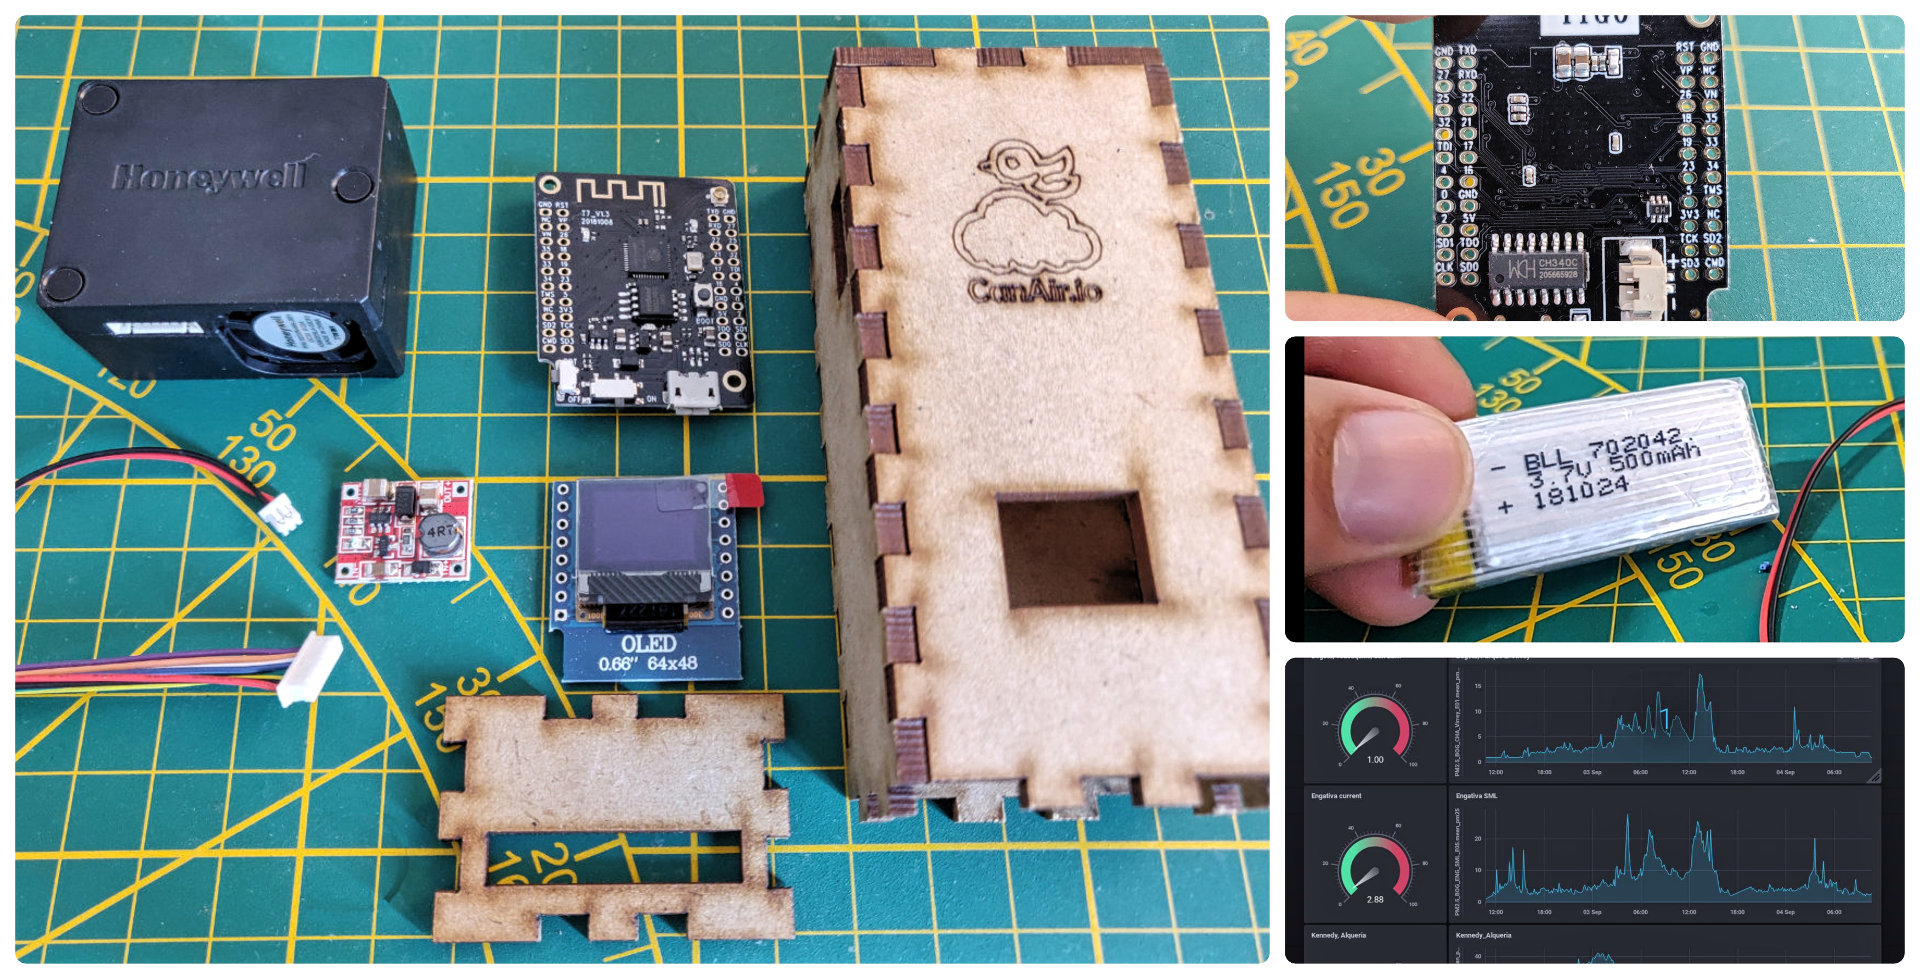
| ESP32 main board D1 mini v2 | http://bit.ly/2wKBZnf |
| Honeywell Sensor HPMA 115S0XX | http://bit.ly/2wOtDLL |
| OLED Display Module D1 mini | http://bit.ly/2wFVo8W |
| DC-DC Power Supply Converter Booster | http://bit.ly/37uc6Jy |
| Battery connector (PH 2.0mm 2pin leadwire) | http://bit.ly/2HumSUZ |
| Lipo Battery 3.7 500mAh ** | https://amzn.to/2FtzE5c |
| [Optional] Heat Shrink Tubing kit | http://bit.ly/34kvZRL |
** For reference only, please choose any similar battery with same dimensions:
8.8x47x19.7 mm ~500mAh
AliExpress Notes:
- For all Aliexpress items please choose "Ali Express Standard Shipping" method always
- Some shipments are cheaper in big quantities or with the same seller and same shipping service.
| Tools | Details |
|---|---|
| Soldering iron | ~25w or similar |
| Solder wire | 0.7mm or similar |
| Hot Gun Glue | or UHU glue |
| Side cutter | for electronic tasks or similar |
| Pc | Linux, Windows or Mac are supported |
| Android device | with Bluetooth 4 or above |
Please watch the next video to get a general idea of how to build your device:

According to the video these are the main steps to follow:
- Step 1: ESP32 - Soldering Female Headers
- Step 2: Display - Soldering Break Away Headers
- Step 3: Honeywell wire - cutting and preparing
- Step 4: Connecting DC-DC boost module
- Step 5: Connecting sensor and boost to display module
- Step 6: Battery connector adjustment
- Step 7: Testing connections
- Step 8: Introducing electronic parts into the box
- Step 9: Upload firmware
- Step 10: Using CanAirIO app
Always keep in mind that OLED display is very delicate, and can easyly get broken

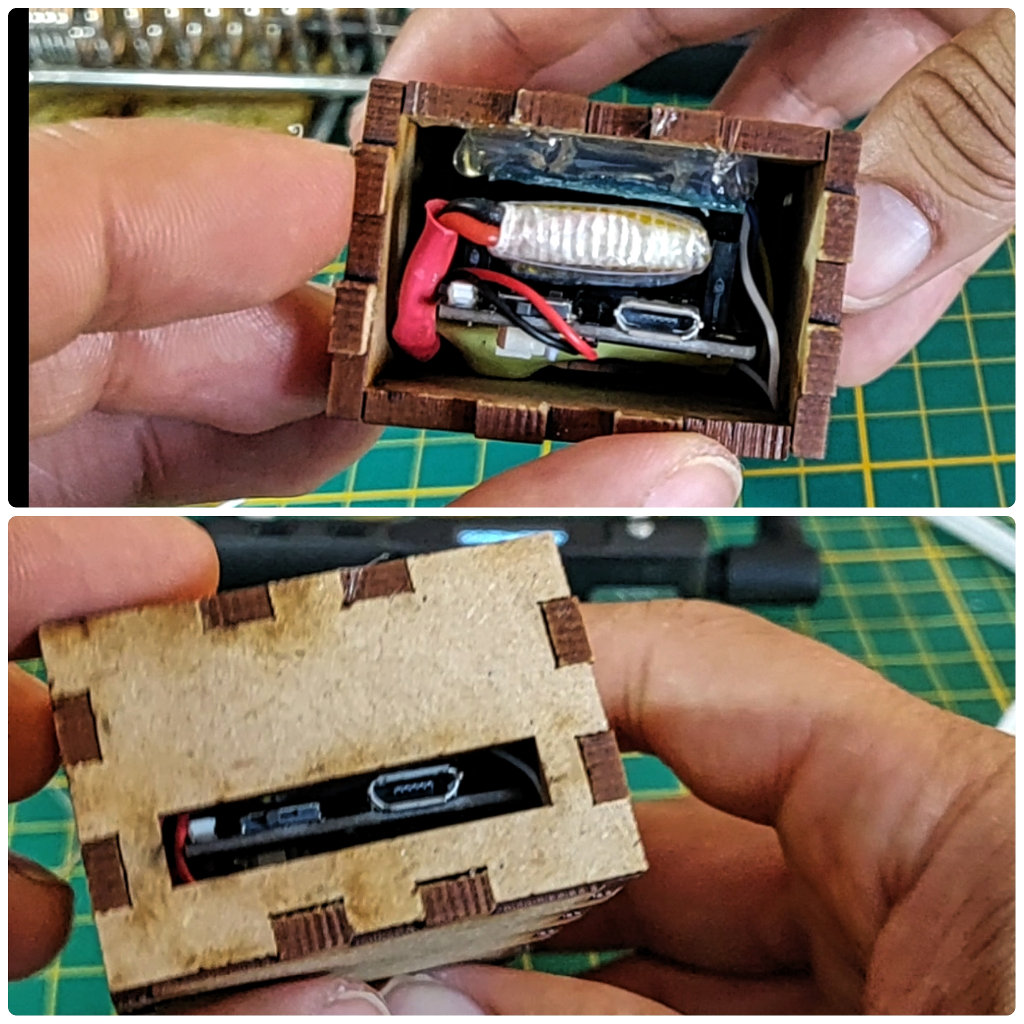
With this file you can make a lasercut box. Also in the same directory we have a svg file for put multiple boxes at the same print file.
For do a box you only need assemble it. If you wish to fix the display into the box you can use hot gun glue.
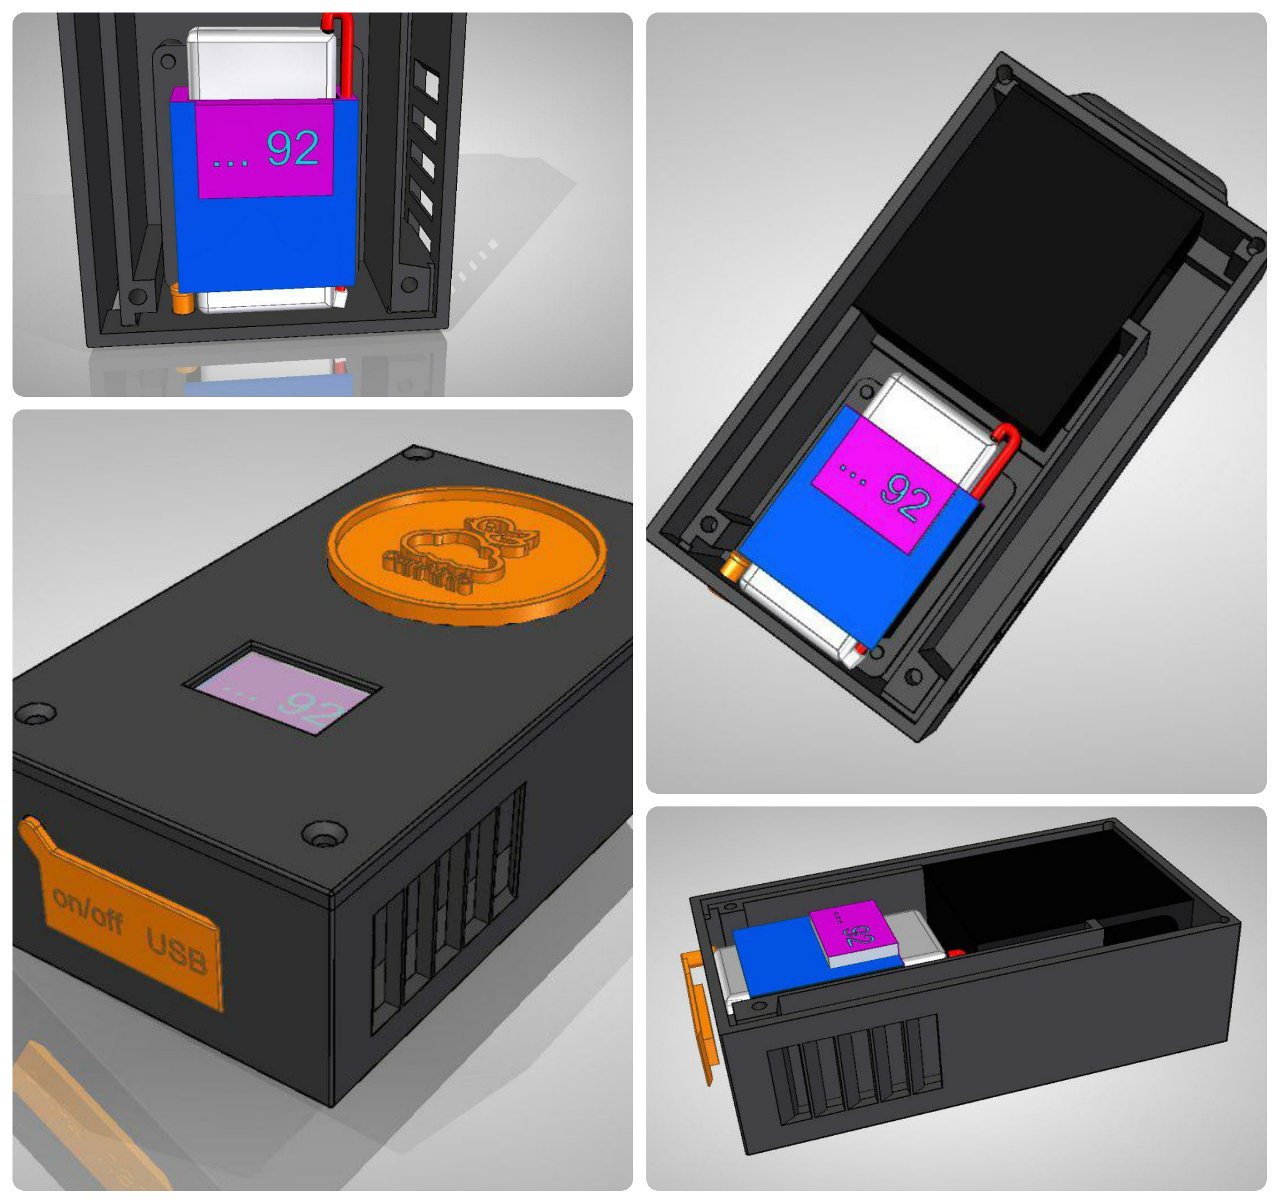
The current state is experimental but you can test the last 3d printing box development here.
You can download the last firmware version in releases section. Download the last release from assets section in releases and please uncompress zip file, connect your device and execute the next command for your model board (D1Mini, WemosOLED, Heltec) like this:
unzip canairio_rev414_20190829.zip
cd canairio_installer
./install.sh canairio_d1mini_rev414_20190829.bin
Note: you need python2 or python3 with pyserial in your system.
Tip: if you want clear all preferences and flash variables, please execute before:
esptool.py --port /dev/ttyUSB0 erase_flashPlease read procedure on our HacksterIO Guide for details for load firmware via oficial Espressif Download Tool
You can rebuild complete firmware flavors for different boards like is described in the source code documentation section.
For now you need any Android device with Bluetooth 4 or above. You can download the CanAirIO app from GooglePlay, keep in mind that it is in continuos development then please any feedback, report errors, or any thing please let us knowed it via our contact form or on our Telegram chat
You have two configuration options of your CanAirIO device from the app:
For record tracks on your device (Sdcard) or publish it to the cloud (share), please follow the next steps:


NOTE: Also all recorded tracks will be saved in the /sdcard/canairio/ directory on json format.

Also, you can connect your CanAirIO device to the WiFi and leave this like a static station. For this you need configure it in settings section:
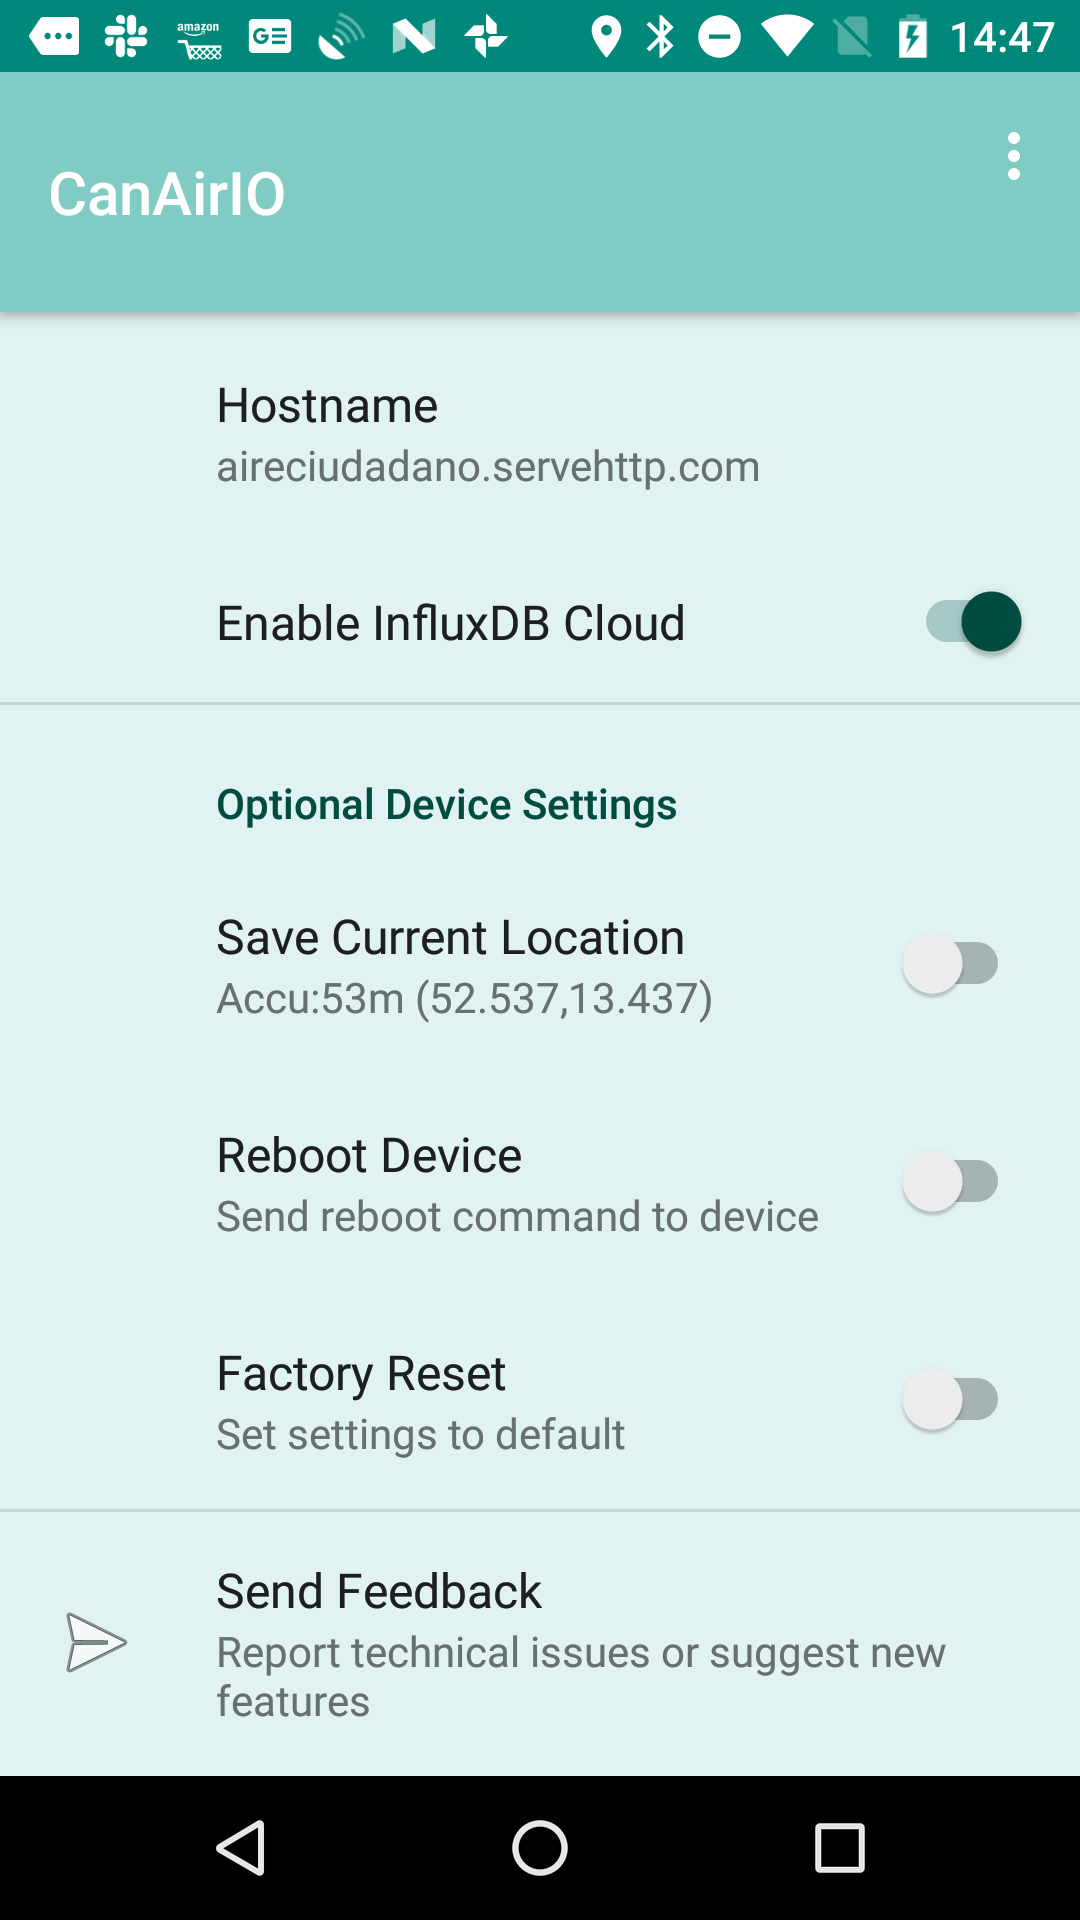
-
Station Name: for example:
PM25_Berlin_Pankow - Wifi Name and Password: Your credentials for connecting to your Wifi network
-
CanAirIO Cloud: For configure the
CanAirIO API, you can get a username and password doing registration in this link and view captures here. For details please see the firmware documentation CanAirIO API section.
Some optional fields:
- InfluxDb Cloud fields: Your personal instance of InfluxDB server
- Current Location: The current position of your static station
- Reboot device: Only for restart your CanAirIO device
- Factory Reset: For set all settings to default on your CanAirIO device
Please let us know about your questions on our forum, contact form or on our Telegram chat.