Server guide
-
Getting started
- Server configuration
- Tunnel configuration
- Port forwarding
- Creating a remote user
- Authenticating a remote user
- Creating, connecting, and dropping a database
- Set up database backups (in development)
-
Authentication backend details
- How authentication works
- Possible vulnerabilities
- DDoS
- Packet sniffing and man-in-the-middle attacks
-
Clone this repo's source code:
- Option 1)
git clone https://github.com/jonnyhyman/ResolveCollaboration.git - Option 2) Download and unzip this
- Open a shell (Powershell/Terminal) and change directory to the
rmcfoldercd /path/to/ResolveCollaboration/rmc
- Option 1)
-
Server on macOS
- Install Homebrew
- Run in Terminal:
brew install wireguard-tools-
brew install python3(if you don't already have Python 3) pip install PyQt5==5.15.2 cryptography psycopg2-binary elevatesudo python rmc_server.py
-
Server on Windows
- Install Python 3.9
- Install Wireguard for Windows
- Run in Powershell/Command Prompt:
pip install PyQt5==5.15.2 cryptography psycopg2-binary pywin32 elevatepython rmc_server.py
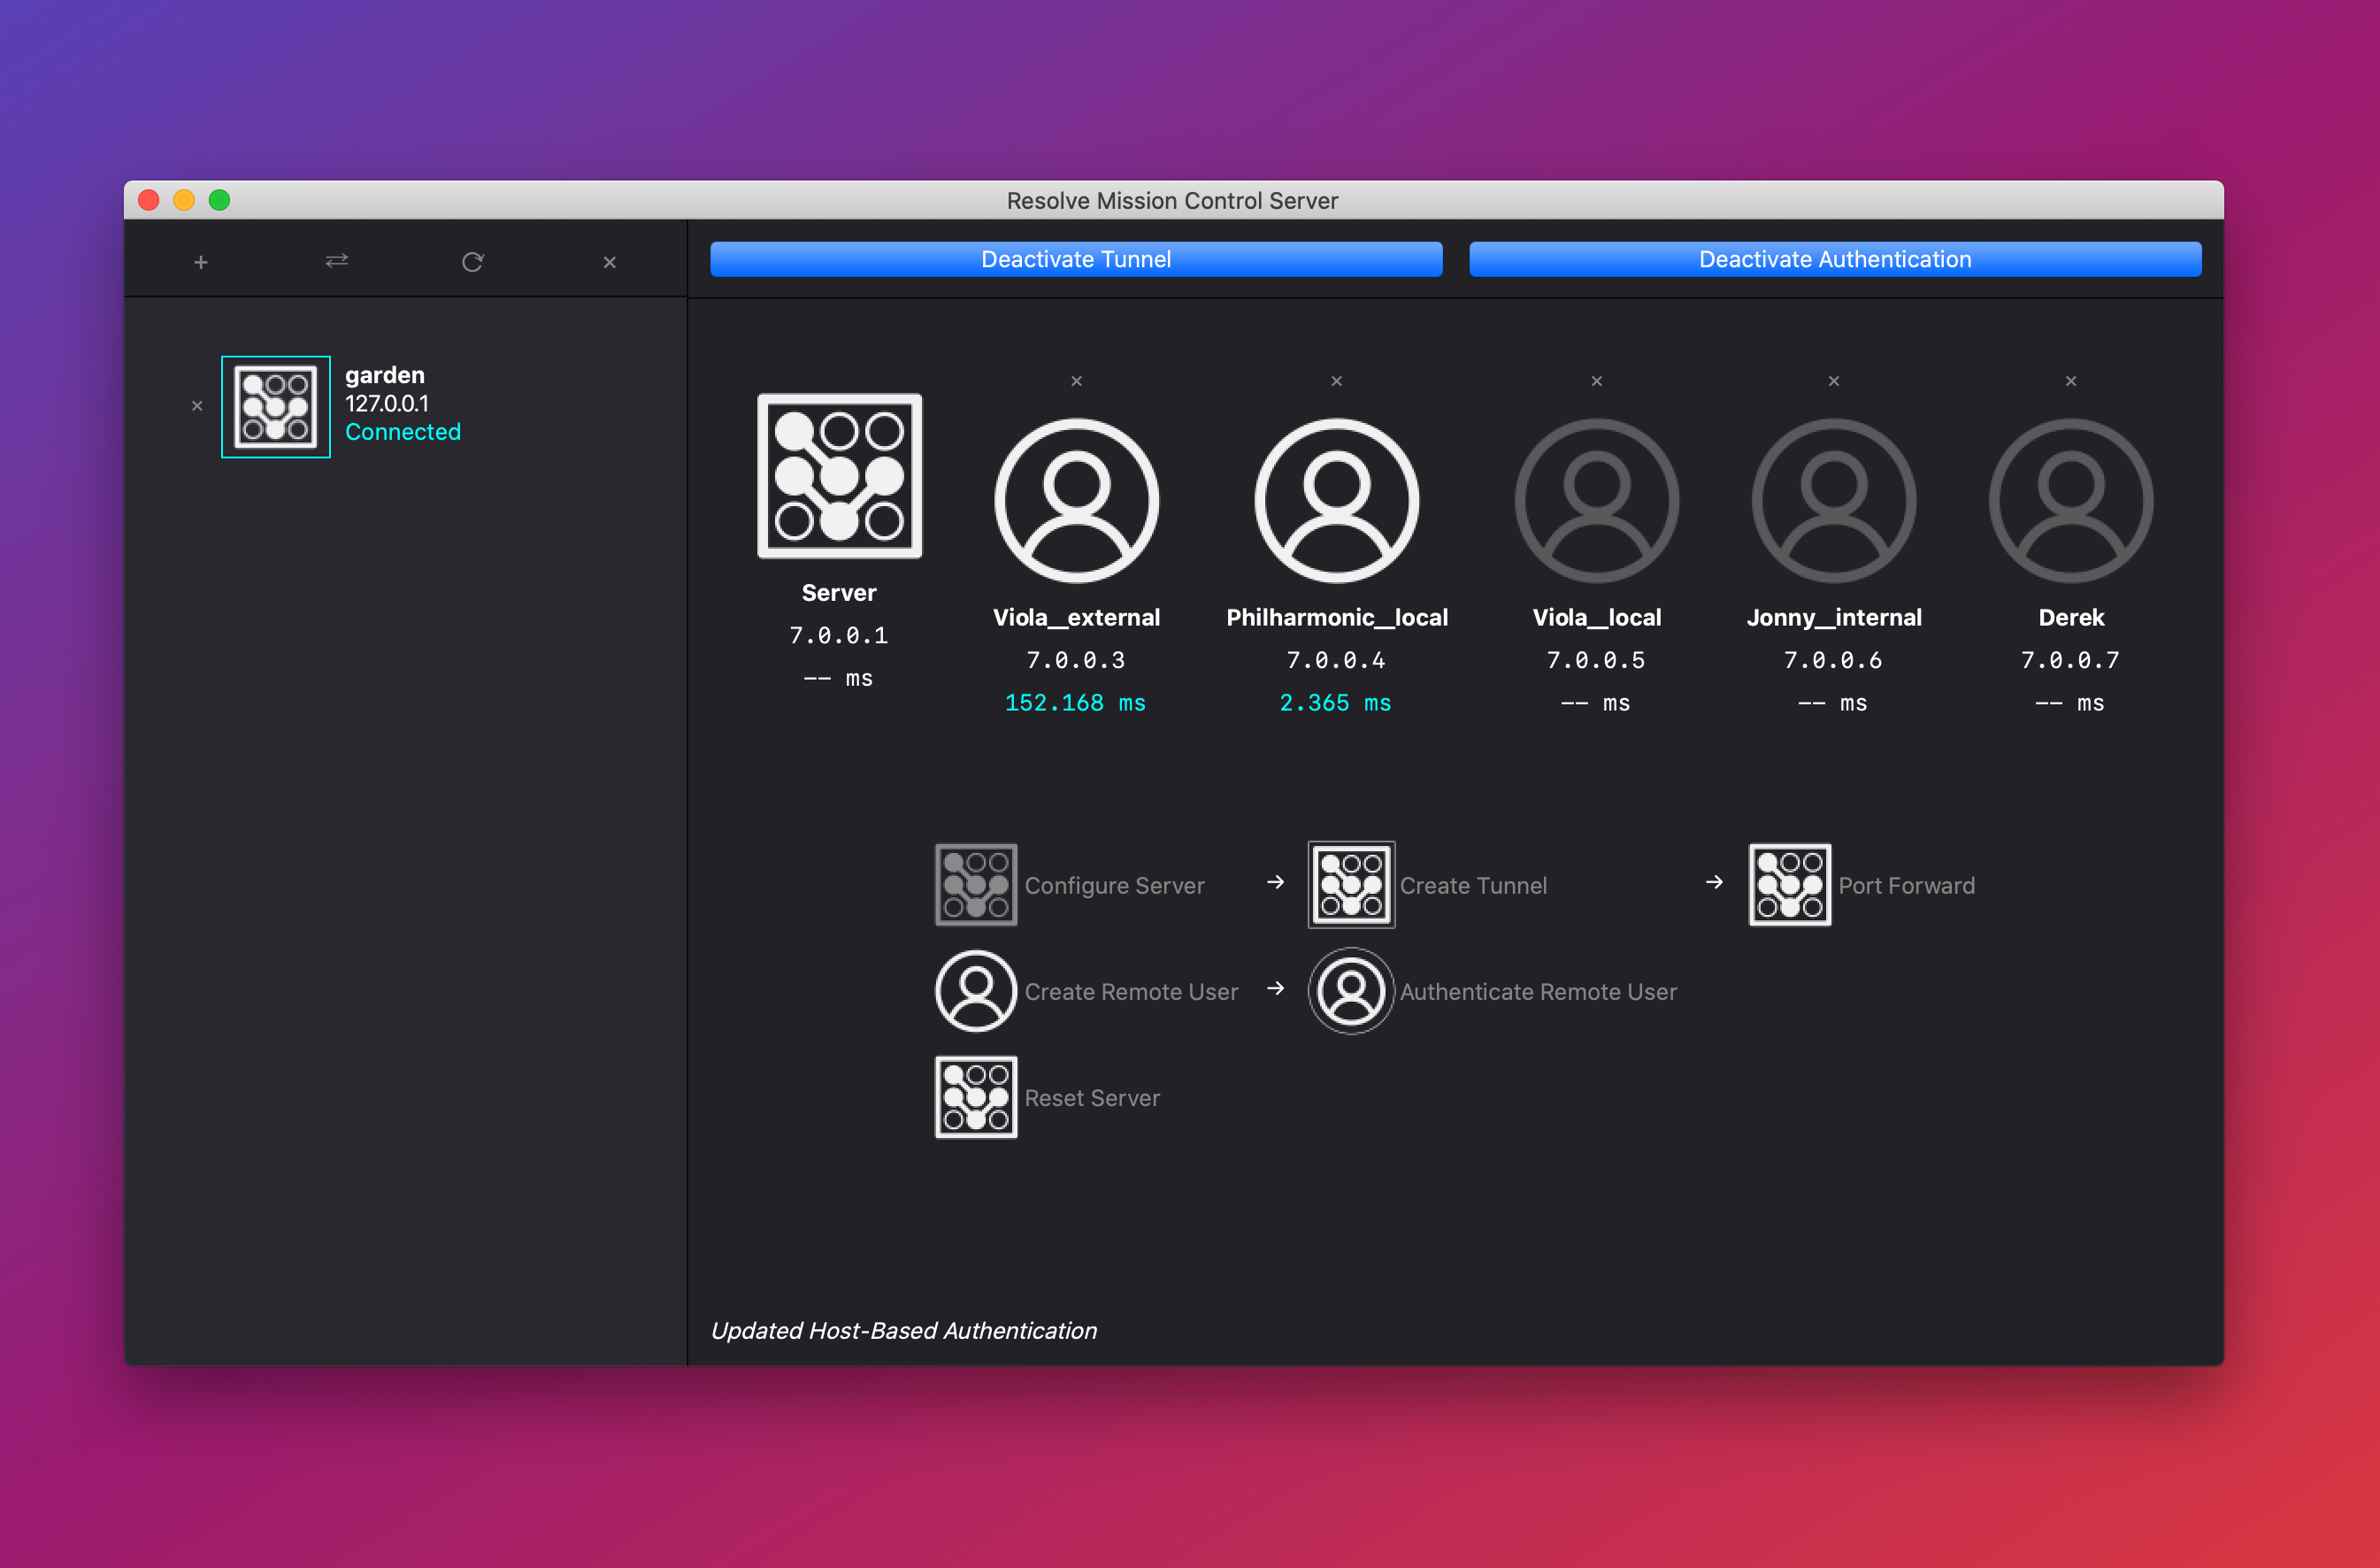
On launching rmc_server.py you'll be greeted by this UI.
Click "Configure Server"
-
Server password:
- This password will be prompted for every remote user upon kakig an authentication request
- Passwords are not stored and thus can't be given back (there is no "Forgot My Password" feature)
- It will be turned into a non-reversible sequence of seemingly random letters, a hash.
- For security reasons, resetting the password entails deleting the entire server configuration (all users, Wireguard configuration, etc...), so make sure you type it right the first time!
-
Server TCP port:
- This TCP port is where all authentication communication will pass through
- This is the TCP port you will open for port forwarding later
-
Wireguard subnet:
- Choose a subnet for the VPN Tunnel which is not currently in use by your system.
- If your local network ip looks like
10.0.0.X, don't use10.0.0.0/24, use something like8.0.0.0/24!
- If your local network ip looks like
- A calculator like this one can help you understand the subnet notation of
V.W.X.Y/Z
- Choose a subnet for the VPN Tunnel which is not currently in use by your system.
This feature doesn't exist yet. Check this issue for updates!
- DDoS
- Packet sniffing and man-in-the-middle attacks