

Doorman is an osquery fleet manager that allows administrators to remotely manage the osquery configurations retrieved by nodes. Administrators can dynamically configure the set of packs, queries, and/or file integrity monitoring target paths using tags. Doorman takes advantage of osquery's TLS configuration, logger, and distributed read/write endpoints, to give administrators visibility across a fleet of devices with minimal overhead and intrusiveness.
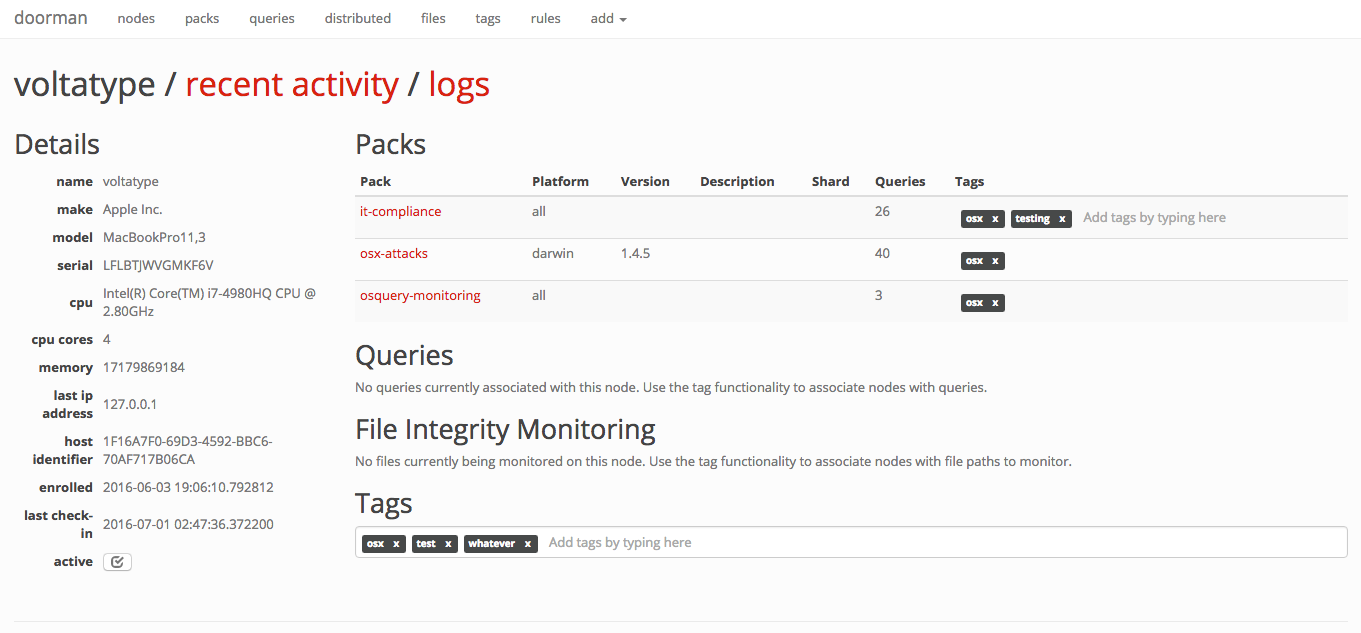
Doorman makes extensive use of tags. A node's configuration is dependent on the tags it shares with packs, queries, and/or file paths. As tags are added and/or removed, a node's configuration will change.
For example, it's possible to assign a set of packs and queries a baseline tag. To ensure all nodes then receive this baseline configuration, you simply assign the baseline tag to the nodes you wish to include.
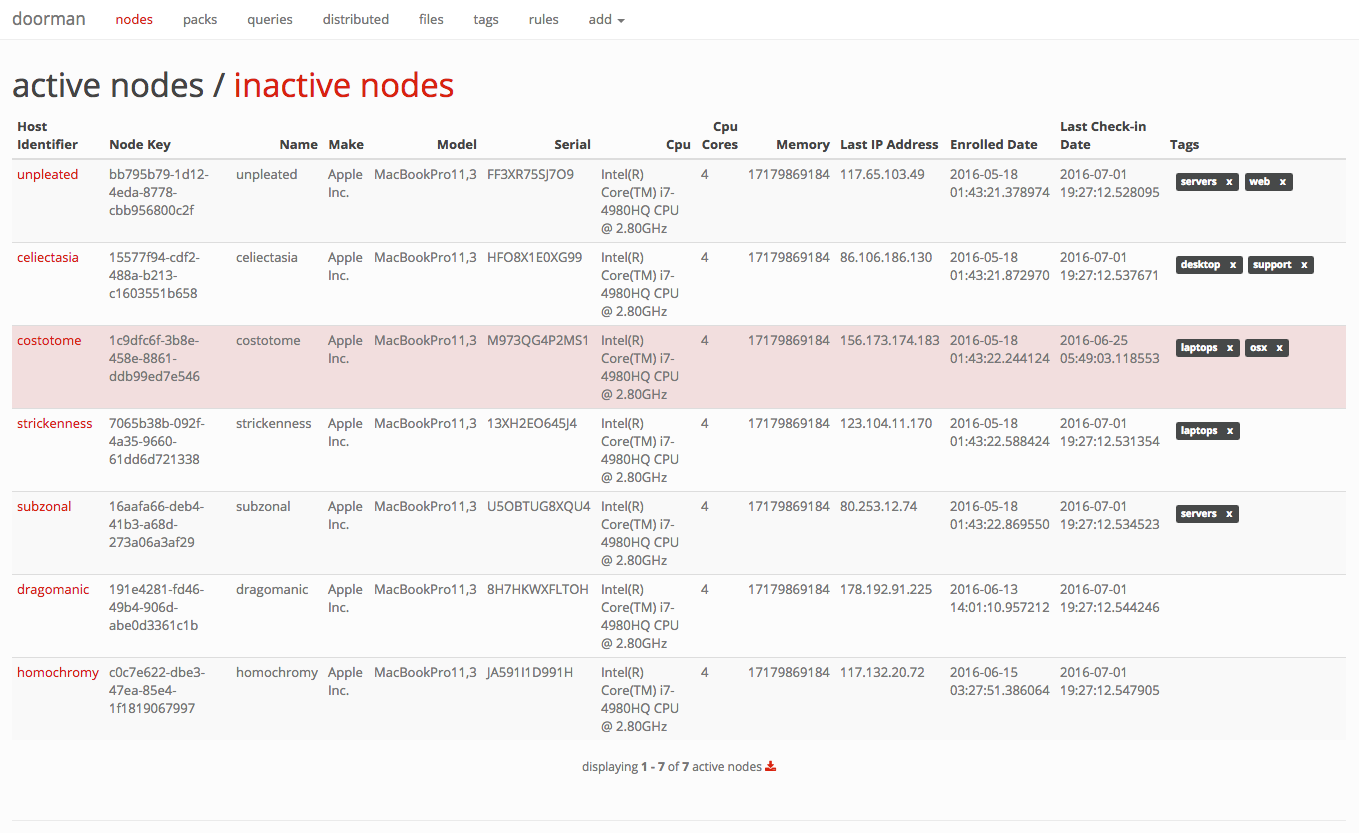
Click on any node to view its recent activity, original enrollment date, time of its last check-in, and the set of packs and queries that are configured for it. This view provides an "at-a-glance" view on the current state of a node.
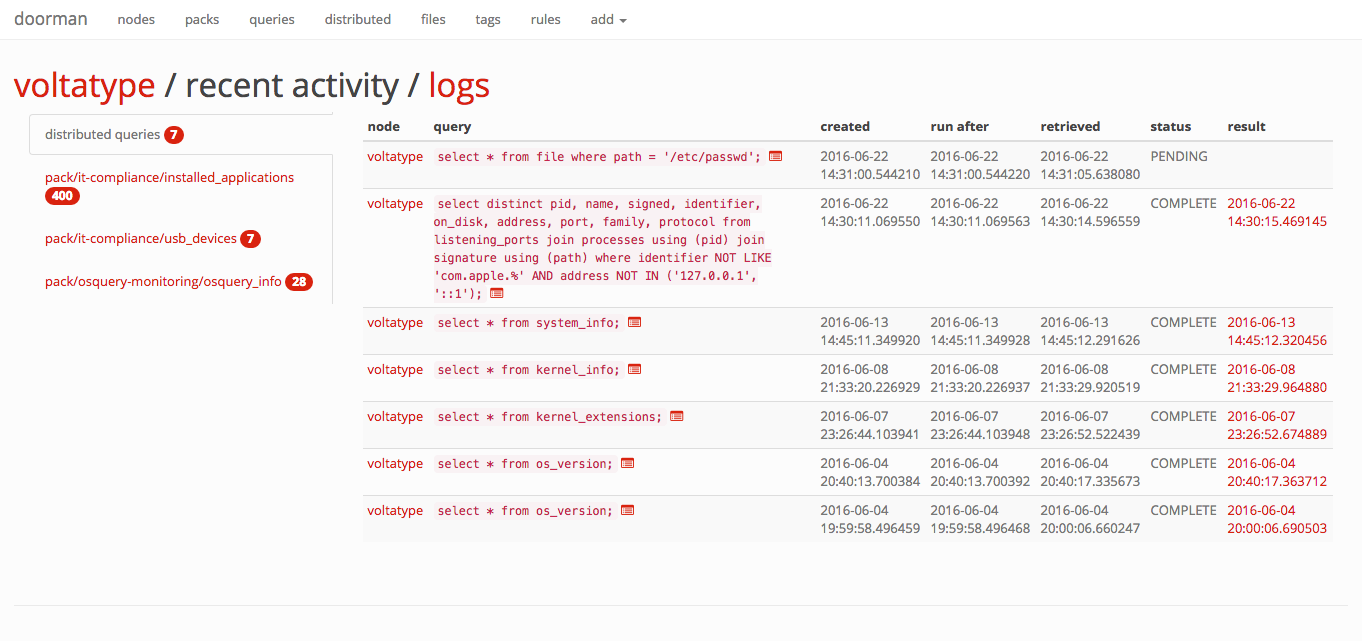
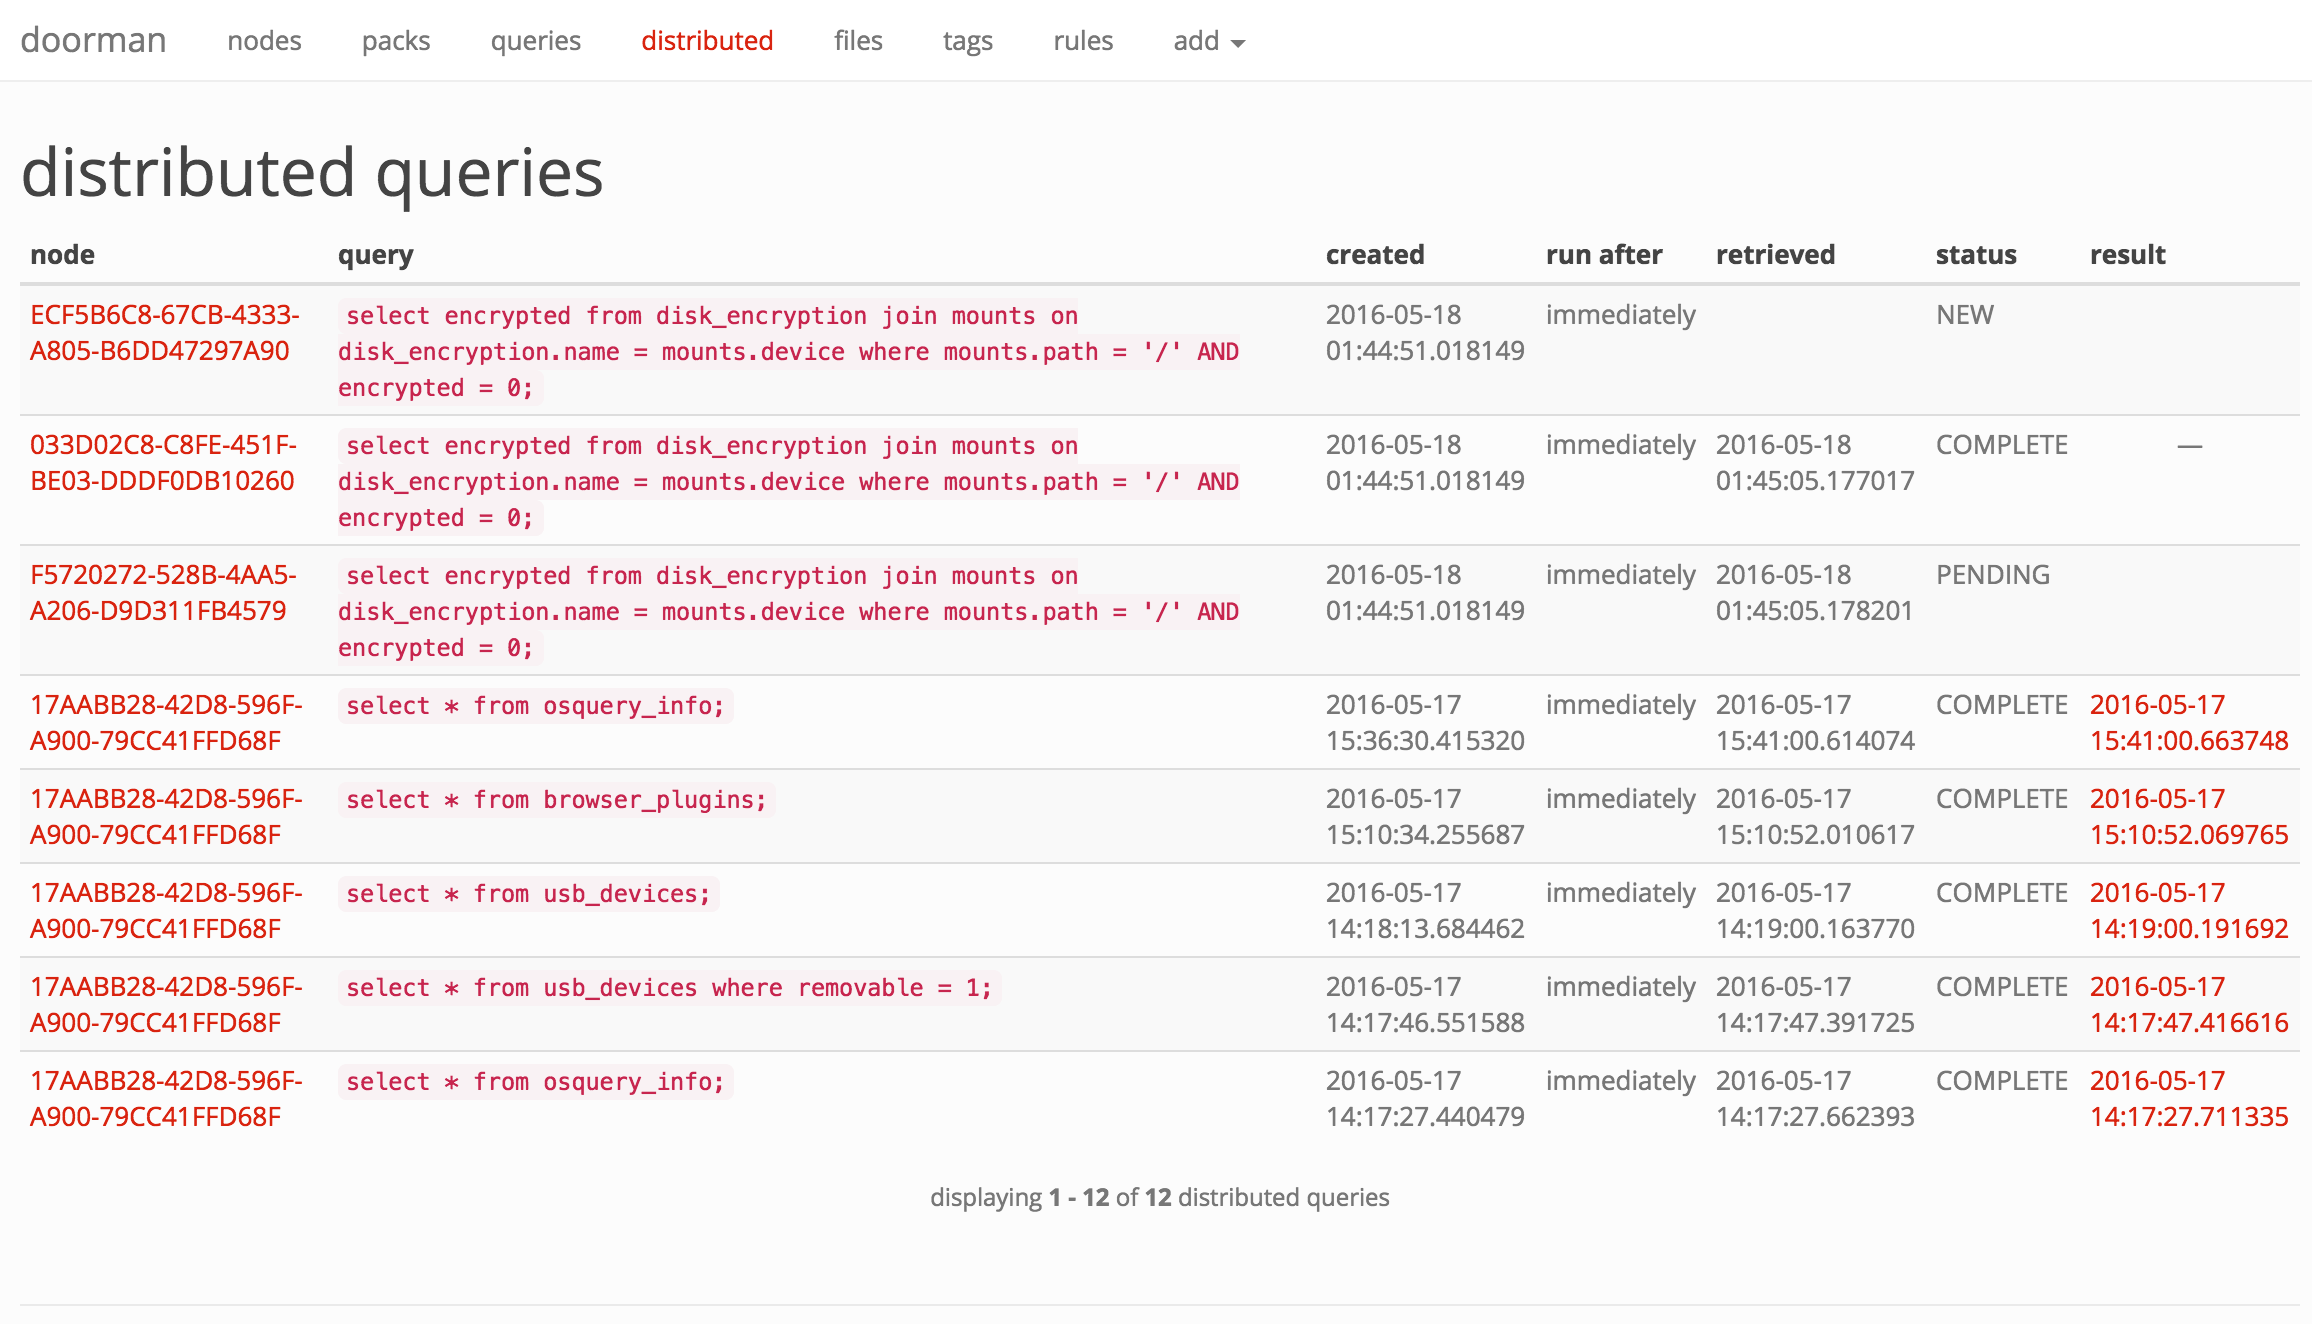
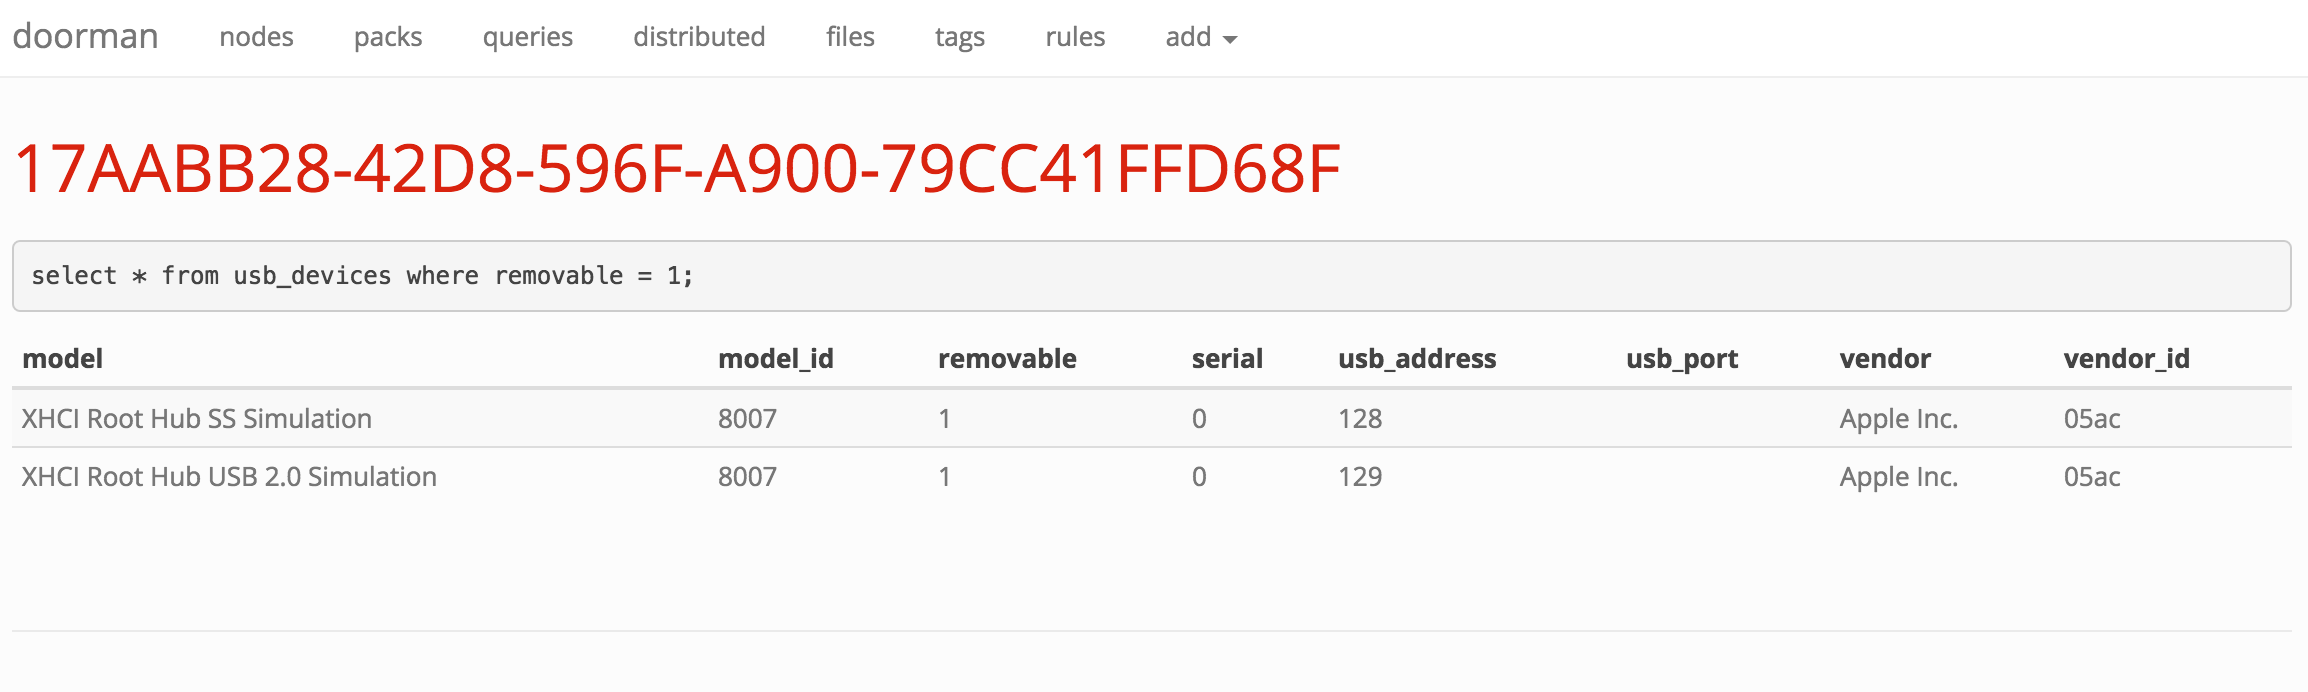
With Doorman, you can distribute ad-hoc queries to one, some, or all nodes. A distributed query's status in Doorman is tracked based on whether the node has picked up the query and/or returned its results.
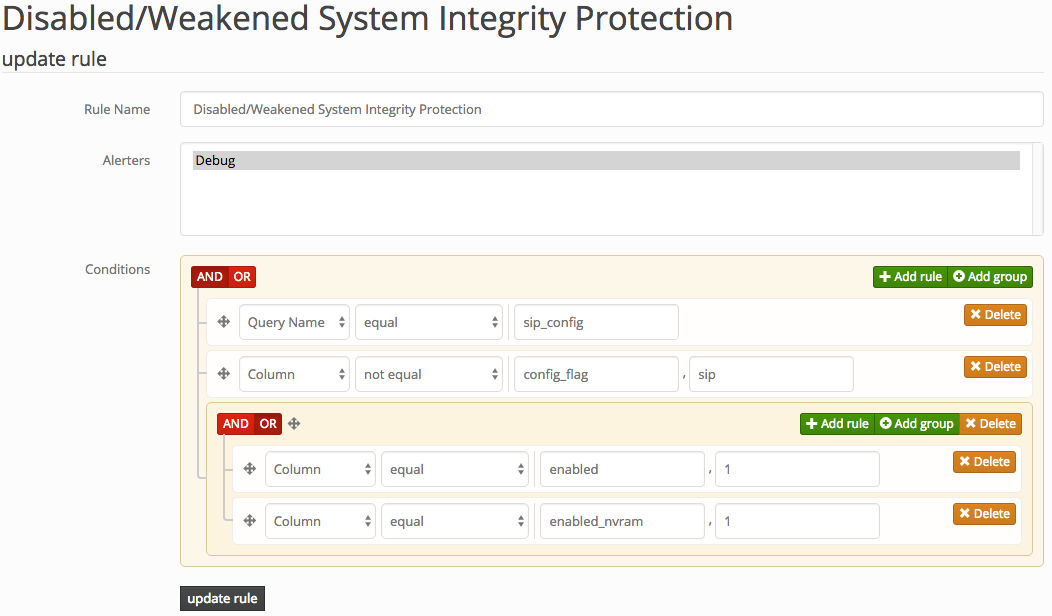
If you're not acting on the information you collect, what's the point? Doorman allows fleet managers to configure custom rules to trigger alerts on specific events (for example, an unauthorized browser plugin is installed, or a removable USB storage device is inserted). Doorman allows building complex rule sets that can use arbitrary boolean logic and a variety of operators to test the results of a query. For example:
Doorman allows supports alerting via the following methods:
- PagerDuty
- Slack (coming soon!)
- Log file (primarily for development)
Doorman is intended to be configured to receive results from nodes via the osquery tls logging plugin. Results are saved in a Postgres database for easy access to recent events. Doorman also supports development of custom plugins to handle event data, allowing Doorman to send data elsewhere, such as to a separate file, rsyslog, Elasticsearch, etc.
Doorman exposes the following osquery tls endpoints:
| method | url | osquery configuration cli flag |
|---|---|---|
| POST | /enroll | --enroll_tls_endpoint |
| POST | /config | --config_tls_endpoint |
| POST | /log | --logger_tls_endpoint |
| POST | /distributed/read | --distributed_tls_read_endpoint |
| POST | /distributed/write | --distributed_tls_write_endpoint |
Authenticating to Doorman can be handled several ways:
DOORMAN_AUTH_METHOD = NoneDOORMAN_AUTH_METHOD = 'doorman'DOORMAN_AUTH_METHOD = 'ldap'DOORMAN_AUTH_METHOD = 'google'
None implies no authentication, resulting in an exposed manager web interface. If you deploy the api and web interface (the manager) separately, and the manager will only be accessible from a trusted network, this may be enough for you.
doorman utilizes username and password based authentication, managed by the backend database. Passwords are stored as bcrypt hashes with a work factor of 13 log_rounds. Doorman does not support user registration, or password reset capabilities from the web interface. This must be handled by the administrator using Doorman's manage.py script.
ldap authentication relies on an LDAP server to authenticate users. See the flask-ldap3-login documentation for the configuration values required by the plugin in order to successfully bind and authenticate to your LDAP server.
google uses OAuth 2.0 to authenticate with your Google credentials. To get started, you'll need to register a new web application client in the Google API Console and obtain a client_id and client_secret, along with authorize a callback URL. The following will need to be configured:
DOORMAN_OAUTH_CLIENT_ID = "client_id"DOORMAN_OAUTH_CLIENT_SECRET = "client_secret"
The callback URL by default is https://SERVER_NAME/oauth2callback. The SERVER_NAME is populated from the environment parameters passed from your upstream web proxy (i.e., nginx's server_name).
Doorman's default configuration can be overridden by setting the DOORMAN_SETTINGS environment variable to a configuration file.
The following settings should be configured to get up and running:
| Setting | Description |
|---|---|
SECRET_KEY |
Flask's secret_key. |
SERVER_NAME |
The name and port number of the server. See Flask's Builtin Configuration Values for more details. |
PREFERRED_URL_SCHEME |
The URL scheme that should be used for URL generation if no URL scheme is available. This defaults to https. |
SQLALCHEMY_DATABASE_URI |
The database URI that should be used for the connection. Example:
|
BROKER_URL |
The Celery broker URL. Default: redis://localhost:6379/0 |
CELERY_RESULT_BACKEND |
The Celery result backend URL. Default: redis://localhost:6379/0 |
DOORMAN_ENROLL_SECRET |
A list of valid enrollment keys to use. See osquery TLS remoting settings for more information. By default, this list is empty. |
DOORMAN_EXPECTS_UNIQUE_HOST_ID |
If osquery is deployed on endpoints to start with the --host_identifier=uuid cli flag, set this value to True. Default is True. |
DOORMAN_CHECKIN_INTERVAL |
Time (in seconds) nodes are expected to check-in for configurations or call the distributed read endpoint. Nodes that fail to check-in within this time will be highlighted in red on the main nodes page. |
DOORMAN_ENROLL_DEFAULT_TAGS |
A default set of tags to apply to newly enrolled nodes. |
DOORMAN_AUTH_METHOD |
The authentication backend used to authenticate Doorman users (not osquery endpoints). May be one of:
None. See the [authentication] (#authentication) section above for more information. |
DOORMAN_ALERTER_PLUGINS |
The available AbstractAlerterPlugin implementations. This settings expects a dictionary of alerter names and tuples, where the first tuple item is the class name implemting AbstractAlerterPlugin to import, and the second value is a dictionary configuration passed to configure the Alerter class. Available Alerter plugins at time of this release are:
|
MAIL_DEFAULT_SENDER |
If using the doorman.plugins.alerters.emailer.EmailAlerter alerter above, specify the sender email address used by Doorman for the FROM: field. |
-
Install PostgreSQL.
a. Choose a directory to host the database. We'll use
~/doormandbfor these examples. b. Runinitdb ~/doormandbto initialize the database. c. Runpg_ctl -D ~/doormandb -l ~/doormandb/pg.log -o -p 5432 startto start a Postgres instance.If you reboot or otherwise, just run the pg_ctl ... start command above to resurrect the server.
-
Create the doorman database by running:
createdb -h localhost -p 5432 doorman -
Install and start Redis:
redis-server /etc/redis/redis.conf -
Install the required Python dependencies under requirements/dev.txt.
-
Initialize the database by running:
python manage.py db upgrade -
Generate a self-signed certificate for testing, or obtain one from Let's Encrypt.
openssl req -x509 -sha256 -nodes -days 365 -newkey rsa:2048 -keyout private.key -out certificate.crt -
Install Javascript dependencies with
bower:bower install -
Start the doormany celery workers:
celery worker -A doorman.worker:celery -l INFO -
Start doorman by running:
python manage.py ssl -
Launch osquery with the appropriate cli flags to configure it to use the TLS enrollment, configuration, logging, and distributed read/write API's. Below is an example bash script to be used only for testing:
#!/usr/bin/env bash

export ENROLL_SECRET=secret

osqueryd \
   --pidfile /tmp/osquery.pid \
   --host_identifier uuid \
   --database_path /tmp/osquery.db \
   --config_plugin tls \
   --config_tls_endpoint /config \
   --config_tls_refresh 10 \
   --config_tls_max_attempts 3 \
   --enroll_tls_endpoint /enroll  \
   --enroll_secret_env ENROLL_SECRET \
   --disable_distributed=false \
   --distributed_plugin tls \
   --distributed_interval 10 \
   --distributed_tls_max_attempts 3 \
   --distributed_tls_read_endpoint /distributed/read \
   --distributed_tls_write_endpoint /distributed/write \
   --tls_dump true \
   --logger_path /tmp/ \
   --logger_plugin tls \
   --logger_tls_endpoint /log \
   --logger_tls_period 5 \
   --tls_hostname localhost:5000 \
   --tls_server_certs ./certificate.crt \
   --log_result_events=false \
   --pack_delimiter /
First, build the Docker container:
$ docker build -t doorman .
Second, run the container, providing it with the credentials to access the Postgres database:
$ docker run \
    -e DOORMAN_ENROLL_SECRET=foo \
    -e DOORMAN_SECRET_KEY=secret-key \
    -e POSTGRES_USER=doorman \
    -e POSTGRES_PASSWORD=pass \
    -e POSTGRES_ENV_POSTGRES_PORT=your-host-here \
    -p host-port:5000 \
    doorman
The container will contain everything needed for Doorman to function (i.e.
Redis, the Celery worker, and the API), managed by
Runit. You can edit the service configuration
under /docker
to set additional options.
Note: The POSTGRES_ENV_POSTGRES_PORT environment variable is the same
variable that is expected when using the --link argument to docker run, so
linking a Postgres container to the Doorman container should work without
passing that environment variable.
To execute tests, simply run python manage.py test.
Doorman is written and maintained by Marcin Wielgoszewski, with contributions from the following individuals and companies:
- Andrew Dunham (Stripe)