Setup
Note: For security, it is highly recommended that your SonarQube installation be using HTTPS in conjunction with this plugin.
Before starting this process, it is recommended that you first install the plugin to your SonarQube environment. You can do this from the Marketplace inside SonarQube, or download the plugin jar file directly from the releases page and place inside the extensions/plugins directory in your SonarQube installation. After installing the plugin, you need to restart SonarQube to load the plugin.
After installing the plugin, you will need to register the SonarQube application in your Azure Active Directory to gather the values needed to configure and enable AAD authentication.
One important thing to decide is if you are going to be authenticating in a single tenant or a multiple tenant style.
A single tenant setup restricts login via Azure Active Directory to only those users that have accounts in your Azure environment. This is the most common configuration and is the default for the plugin.
A multi-tenant setup allows users in different Azure Active Directories to authenticate and login to your SonarQube installation. This can be useful if, for example, you have contractors or customers that have their own Azure setup and want to login with these accounts.
-
Sign into the Azure Management Portal. (If you are using one of the "national cloud" Azure instances, log in using the correct portal URL for your country.)
-
Open the Azure Active Directory blade from either the shortcut on the left sidebar or search in the search box at the top.
-
Inside the blade, select
Propertiesfrom the Manage category and copy down the "Directory ID". This is the "Tenant ID" you will enter in the plugin settings.
Note: In a multi-tenant configuration, anyone with an Azure login can authenticate, so you will need to take additional measures inside SonarQube to secure information there.
No steps are needed on the Azure Management Portal for a multi-tenant setup.
-
To begin, sign into the Azure Management Portal. (If you are using one of the "national cloud" Azure instances, log in using the correct portal URL for your country.)
-
Open the Azure Active Directory blade from the shortcut on the left, or if the shortcut is missing, search from the top of the page.
-
On the sidebar, under the Manage category, choose
App registrationsand then selectNew application registrationfrom the top bar. -
Fill in the form that appears and click the "Create" button once done.
a.
Nameshould be the name of your application. It may be shown to users in some cases, so pick something like "SonarQube" or "MyCompany SonarQube".b.
Application typeshould be set to "Web app / API".c.
Sign-on URLshould be the the main URL to your SonarQube server, for example "https://sonarqube.example.com/". -
Once the application is created, you should be taken to a screen with information on the new application. Copy down the "Application ID", it's used as the "Client ID" in the plugin settings.
-
Click on the
Settingsbutton at the top of the screen and then selectReply URLs. You'll need to add your main SonarQube URL and append "/oauth2/callback/aad". For example, if your main URL is "https://sonarqube.example.com/", you would enter "https://sonarqube.example.com/oauth2/callback/aad". If you like, you can delete the main URL that was already added. Make sure to selectSaveto update the Reply URLs. -
Click on
Keysand type something in the "Key Description" field, and select a 1 year expiry. (You may select a longer duration, but this lowers security.) Once you clickSave, the new key value will be shown. Copy down this value, it's used as the "Client Secret" in the plugin settings. -
Cick on
Required permissionsand then select "Windows Azure Active Directory" from the list that appears. Make sure that both "Sign in and read user profile" and "Read all users' basic profiles" under the "Delegated Permissions" section are selected. Make sure to selectSaveto update the permissions.
For more details on the application creation procedure, you can reference the Microsoft document How to: Use the portal to create an Azure AD application and service principal that can access resources
If you have not installed the plugin yet, you will need to do so before you continue with these steps.
Note: Each setting has its own save button when you modify it. Make sure to click the "Save" button after you change each setting.
-
Log into your SonarQube install with a local account that has administrative permission.
-
Click on the
Administrationheader at the top, then select theAzure Active Directorytab from the general settings area. If you do not see this section, ensure the plugin is installed and that you have restarted SonarQube to load the plugin. -
Fill in the
Client IDandClient Secretfields with the values you copied down from the Azure Management Portal. -
This step varies depending on if you are installing single or multiple tenant:
Single-tenant: If you are setting up SonarQube as a single tenant application, fill in the
Tenant IDfield with the value you copied down.Multi-tenant: If you are setting up as a multi-tenant application, toggle the setting labeled
Multi-tenant Azure Applicationto on/enabled. -
Toggle the setting labeled
Enabledto on/enabled to activate the plugin.
At this point, any users on your Azure Active Directory can sign in to SonarQube. The login page will have changed slightly, looking much like the image:
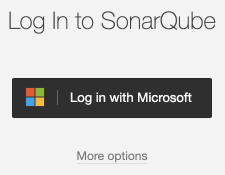
A new button labeled "Log in with Microsoft" will allow users to use AAD to log in. The username and password fields for local accounts are now behind a link labeled "More options".