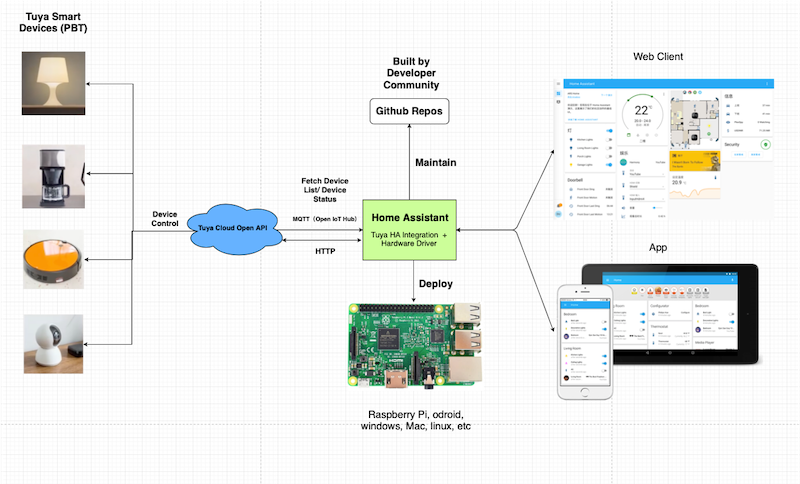
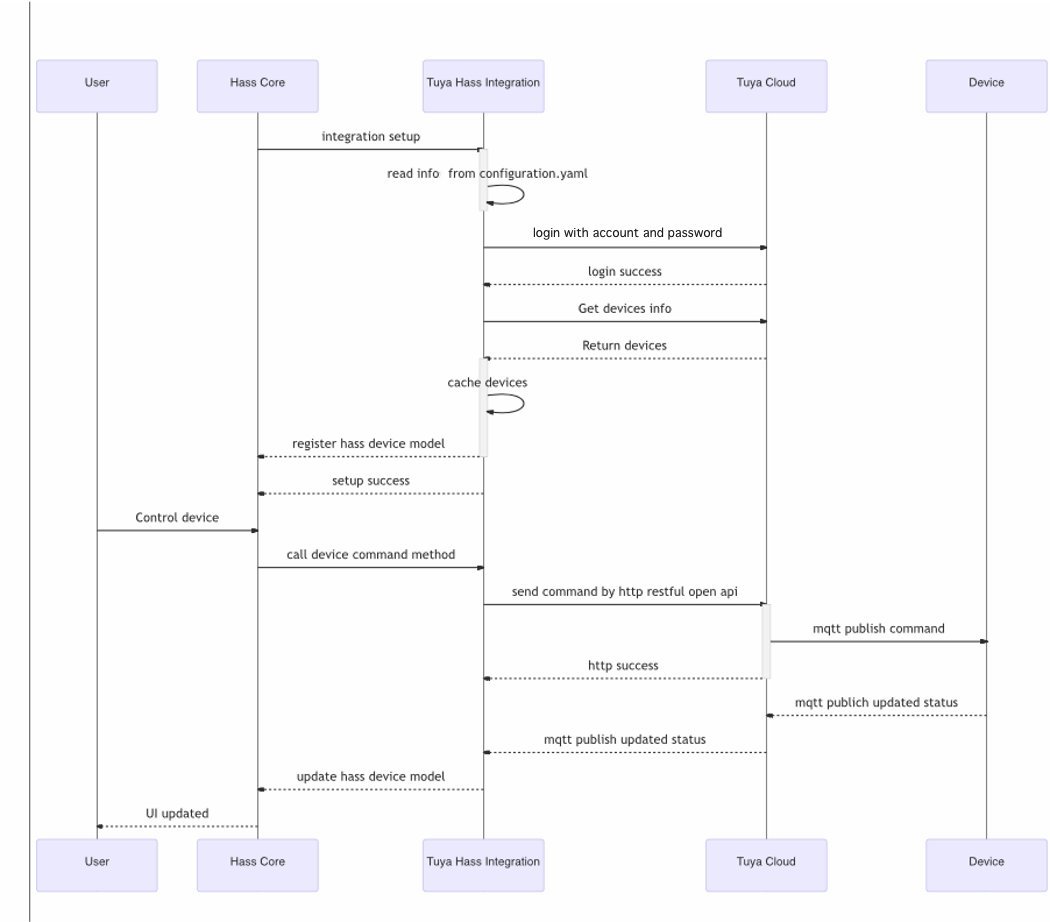
Tuya Home Assistant integration is developed for controlling Powered by Tuya (PBT) devices using Tuya Open API, officially maintained by the Tuya Developer Team.
Welcome to join the Tuya Beta Test Program to get your development gifts and make the contribution to the integration. Your feedback is valuable to the whole community.
Five first class category, 26 second category are supported now! Supported Device Category
Please check the Develop Tuya-Compatible Home Assistant Drivers and Home Assistant Entity tutorials to develop more drivers for the Tuya Home Assistant Integration and support more Tuya devices.
For more information, please check How to Use Tuya Home Assistant Integration.
Youtube tutorial:
Please refer to the Home Assistant Official Installation documentation to install Home Assistant Core.
You can also get help from Set up Home Assistant Development Environment on Raspberry Pi in Tuya Developer Demo Center.
Note:The new version of Tuya Home Assistant integration (Tuya v2) can be compatible with the old version. Both versions can be installed at the same time. You don’t need to uninstall the old version before installing the new version.
There are two methods to install the integration:
- Home Assistant Custom Components Installation
- Install by HACS
-
Download the tuya-home-assistant repo.
-
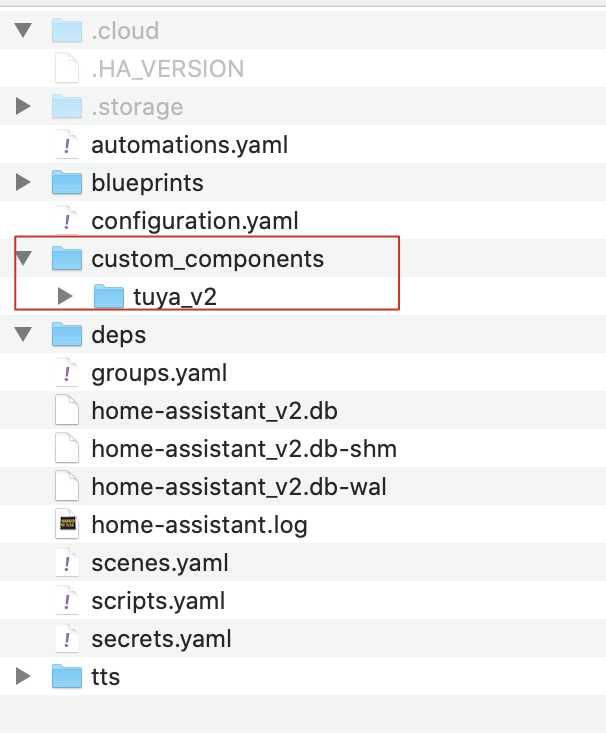
Unzip it and copy the
custom_components/tuya/folder to the Home Assistant configuration directory, for example,~/.homeassistant.
-
See HACS Official Installation Guide and install HACS.
-
See Initial Configuration Guide and complete initial configuration.
-
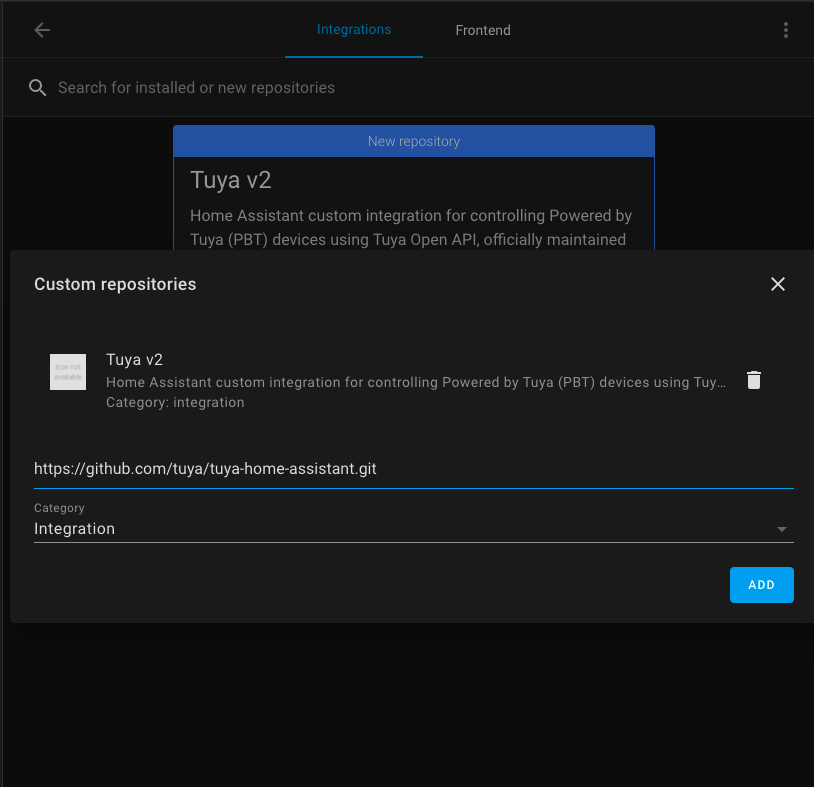
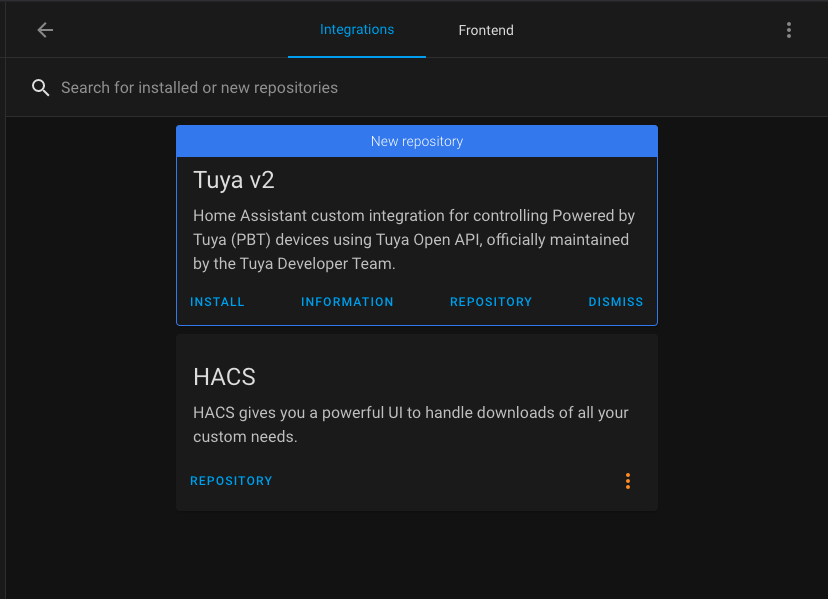
Open Home Assistant. Click HACS > Integrations > ⋮ > Custom repositories.
-
Enter
https://github.com/tuya/tuya-home-assistantin the address bar at the bottom left of the window. Select Integration from the Category list and click ADD. -
In the dialog box that appears, click INSTALL.
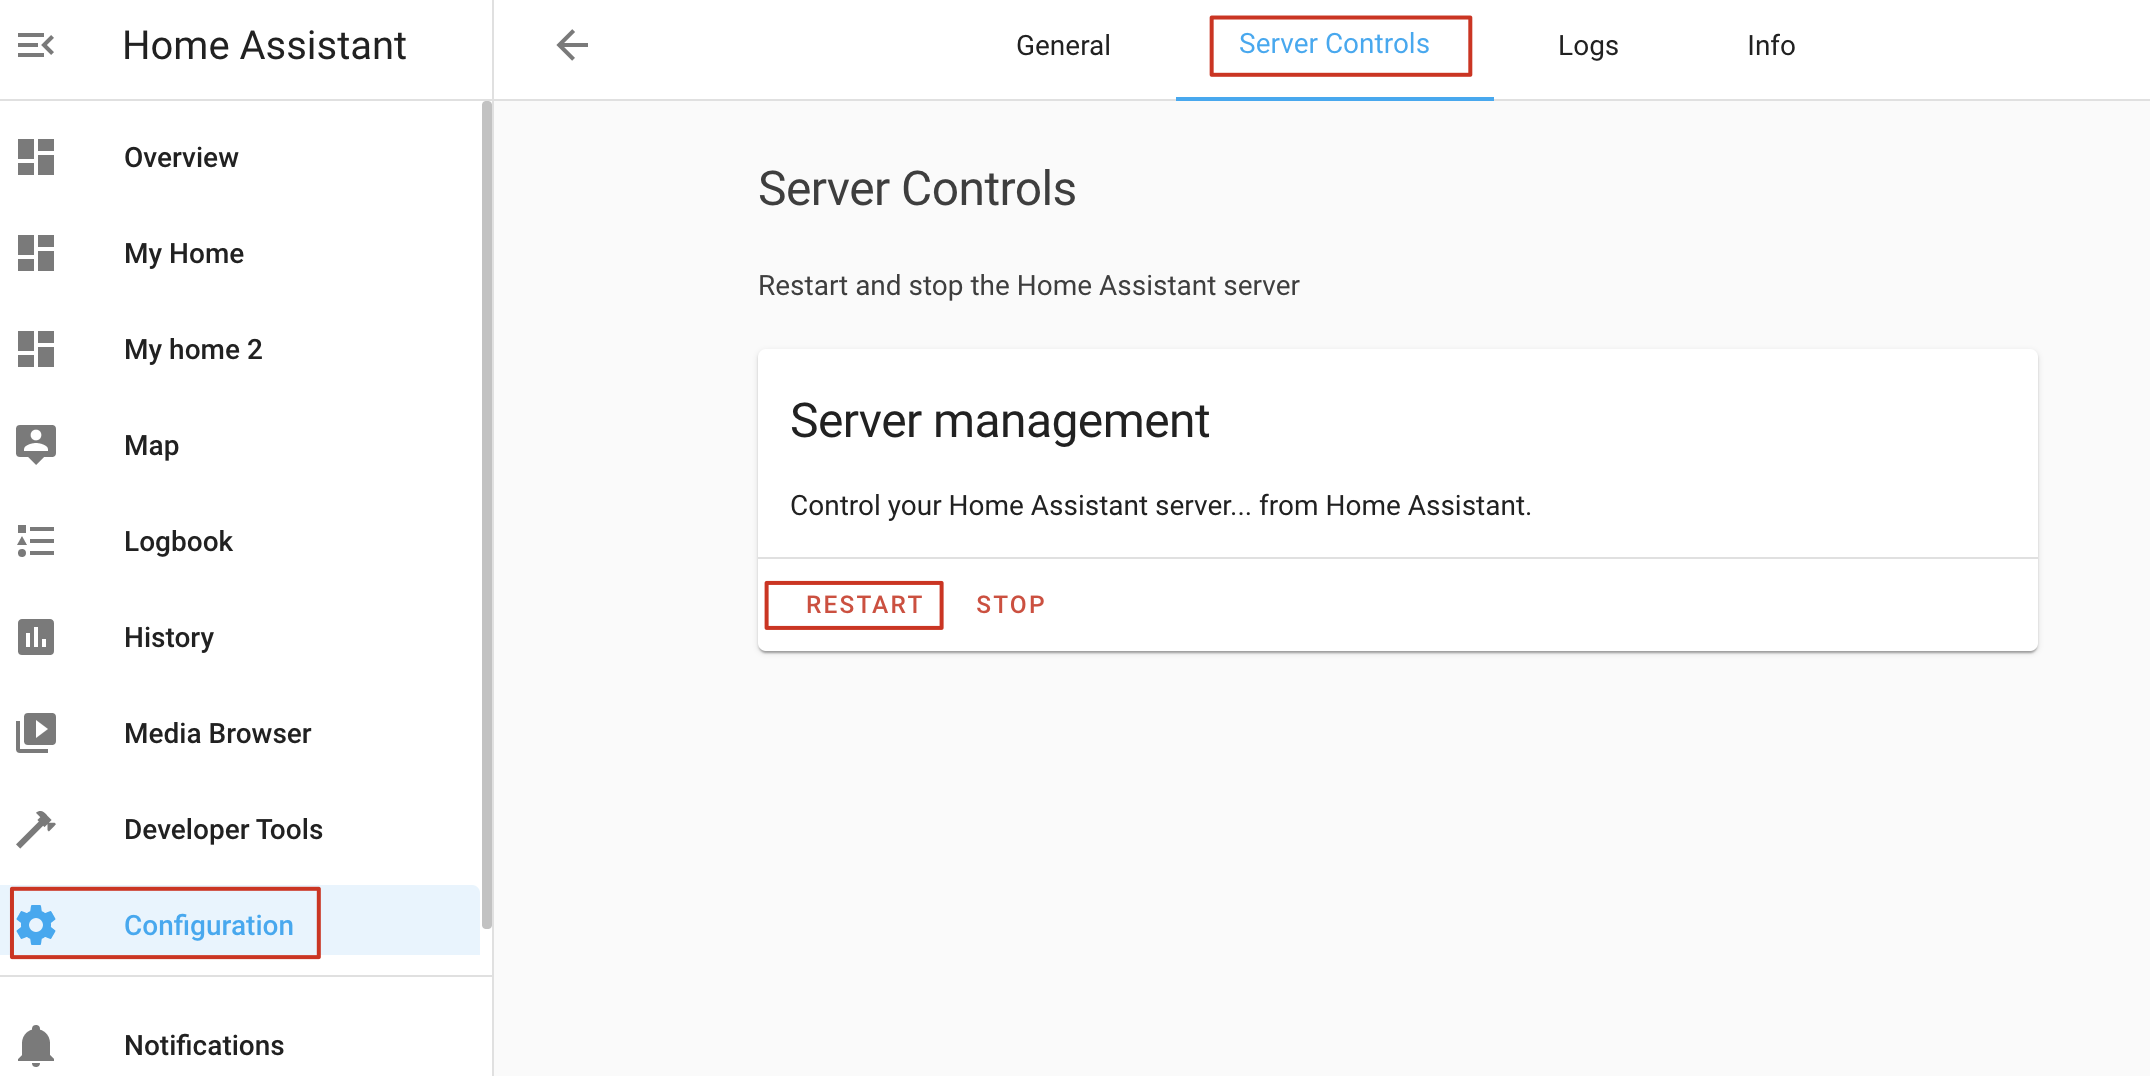
You can restart the Home Assistant server in Configuration > Server Controls > RESTART.
In Configuration > Integrations > ADD INTEGRATION > Tuya Integration, search for the keyword tuya and select Tuya v2.
In the Tuya Integration window, select Smart Home PaaS and click SUBMIT.
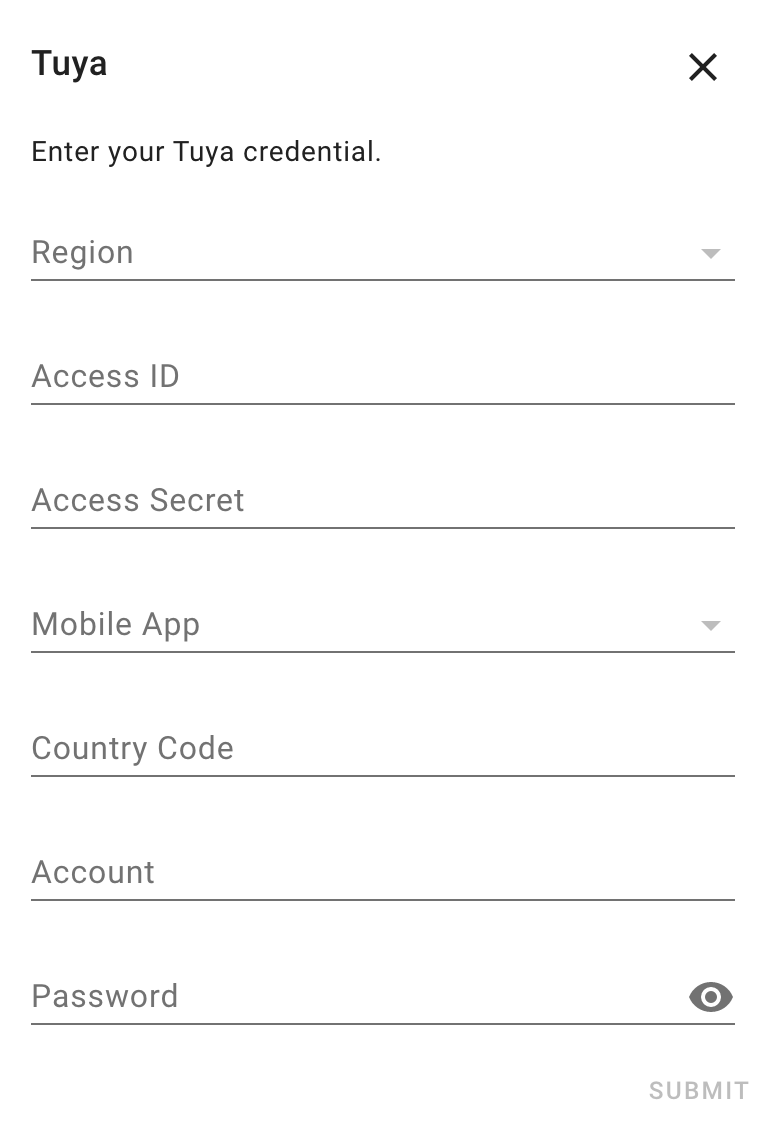
See the following table and enter your Tuya credential.
| Field | Description |
|---|---|
| Region | Open Tuya Smart or Smart Life app. Tap Me > Settings > Account and Security and find Region. Select the region accordingly. |
| Access ID and Access Secret | Go to your cloud project on Tuya IoT Platform. Find the Access ID and Access Secret on the Project Overview tab. |
| Mobile App | Must select the one you used to link devices on the Tuya IoT Platform. |
| Country Code | The country you select on logging in to Tuya Smart or Smart Life app. |
| Account | Tuya Smart or Smart Life app account. |
| Password | The password of your app account. |
Note: The app mentioned in the table must be the one you used to link devices on the Tuya IoT Platform.
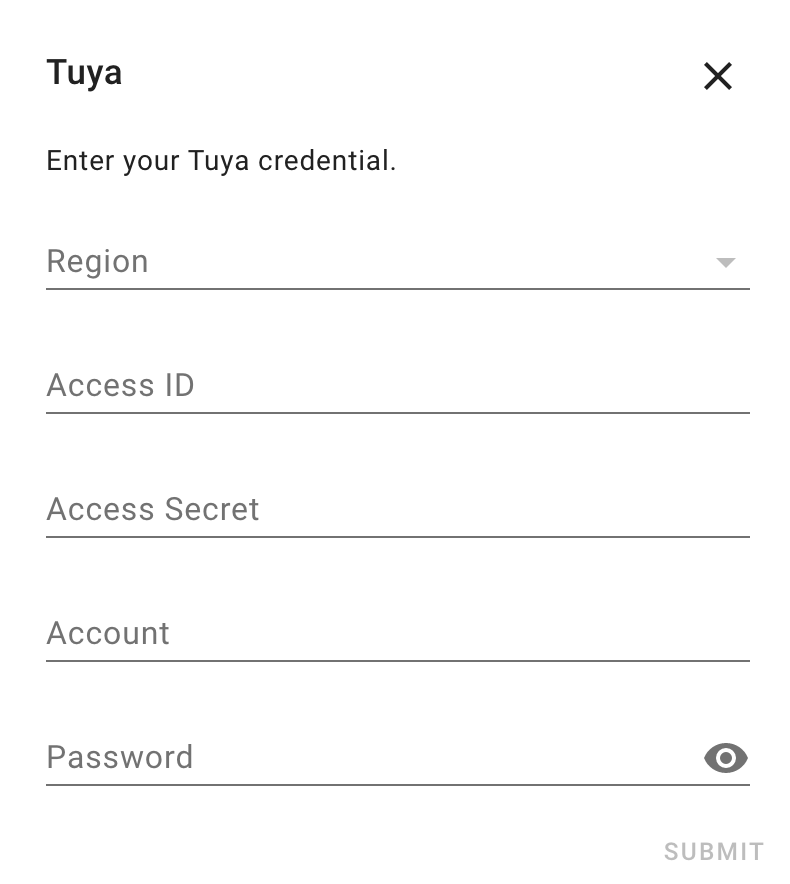
From the Tuya Integration window, select Custom Development and click SUBMIT.
See the table in 3.1 and enter your Tuya credential.
Go to the home assistant installation folder ~/hass and use the following command to activate it and run the hass service:
➜  hass source bin/activate
(hass) ➜  hass hass
For more information, please refer to the Home Assistant Core tutorial for the startup process and run hass.
Please download and use the Tuya Smart or Tuya Smart Life apps to pair Tuya devices to the Home Assistant for controlling. You can check the following links to download the apps.
- Tuya Smart App: iOS App | Android App
- Tuya Smart Life App: iOS App | Android App
For more information, please check How to Use Tuya Home Assistant Integration.
Please refer to the Contributing.md for contributing guide.
You can give feedback on issues you encounter via GitHub Issue.
For more information, please refer to the LICENSE file.

