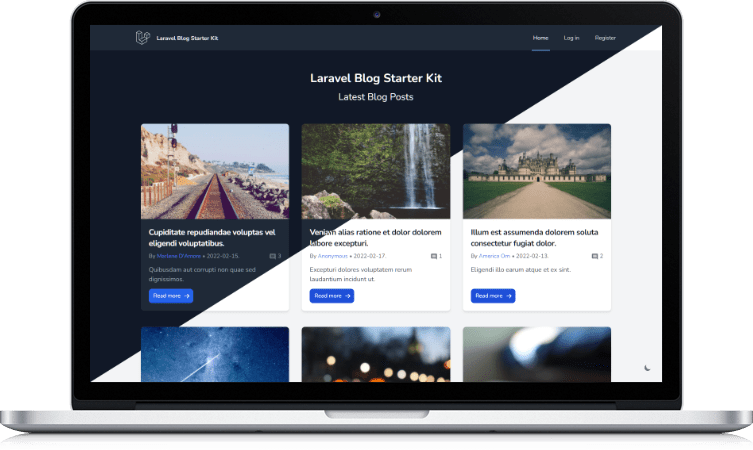
Kickstart the development of your Laravel Blog with this Starter Kit built Laravel 11, TailwindCSS, AlpineJS, and Livewire!
This project is currently not receiving new features as I am focusing on HydePHP, however, the project will continue to get security fixes as long as Laravel 11 is still supported. Open source contributions are welcome!
- Highly Customizable: Turn features on and off in the config
- Security Focused CMS: A CMS for Posts, Users, and Comments with strong and customizable security policies is included out of the box. You can easily update user's permissions as well.
- Dark Mode & Mobile Friendly: A must for the modern app: Dark mode. And of course, all parts of the site are mobile friendly, including the tables in the CMS.
- Smart Markdown Editor: Posts are made using Markdown. To aid in this, the EasyMDE editor is included by default which allows for rich text editing with autosave and markdown previews.
- Users & Comments: Users can create accounts and leave comments. If you want them too. You can even require users to verify their emails to comment.
- Semantic and data-rich SEO-minded HTML: The frontend adheres to follow the practices of Semantic HTML. Blog articles are automatically injected with Open Graph meta tags for better SEO.
Full documentation is available at https://docs.desilva.se/blogkit/. Generated using my free Laradocgen package!
Static demo of the default install: https://caendesilva.github.io/laravel-blogkit-static-demo/ Live blog (my own (customized) blog built with this kit): https://blog.desilva.se/
git clone https://github.com/caendesilva/laravel-blogkit.git
cd laravel-blogkit
composer install
npm install && npm run prod
cp .env.example .env
php artisan migrate
php artisan key:generate
php artisan storage:link
php artisan admin:create

php artisan serve
Once you have installed the Laravel app you can use the helper command to create an admin account using php artisan admin:create in your terminal.
**Important! This guide is just to demo the site. For production use you must follow the production guide as this guide allows anyone to log in as admin! **
- Clone the git repo
- In the config file
config\blog.phpchangedemoModetotrue - In your terminal, run
php artisan migrate --seed
- Clone the git repo
- In your terminal, run
php artisan migrate(Note, if you have previously set up your app using demo data, usemigrate:freshto clear demo users instead!) - In your terminal, run
php artisan admin:createand follow the on-screen instructions to create an admin account. Make sure to set a strong password or passphrase! - Next, follow the instructions in the Official Deployment Documentation to ensure you are following the best practices.
It may be useful to add more authors to your blog. First, instruct the author to create a standard account. Then, you as admin go to the dashboard and press the "manage" button and check the "Is User Author?" tick and press save.
Blog posts are a breeze to create using the Markdown editor!
Each post has a featured cover image that is dynamically cropped using CSS background properties so that it looks smooth in all widths.
For best results, ensure that your cover images are 960 by 640 pixels as that is usually the max size. However, you should also remember that the images are cropped to a much narrower format in many places. Thus you need to make sure that all primary content such as text is contained within the center 640 by 340 pixels.
PRs are very much welcome!
Current todo list:
- Unify session flashes
- Add "load more" style pagination to comments
- Add this readme as a page on the demo site
- Add Markdown caching (and clear post cache when updating post)
- Add Artisan command to generate posts from frontmatter Markdown
- Add theme color option
- Image uploads
- Write more tests
- Add option to disable the "last updated" feature in the frontend
- Add option to disable the CMS (if one just wants to use plain markdown files)
- Add drafts manager for the drafts stored in the user's localstorage
The Starter Kit is a modern TALL stack application based on Laravel Breeze (MIT) using:
- TailwindCSS 3 (MIT)
- AlpineJS 3 (MIT)
- Laravel 11 (MIT)
- Livewire 2 (MIT)
Featured images on blog posts used by the seeder come from Unsplash via picsum.photos (Image License)[https://unsplash.com/license] Some of the frontend components are from Flowbite (MIT)
In order to ensure that the Laravel community is welcoming to all, please review and abide by the Code of Conduct.
If you discover a security vulnerability within Laravel, please send an e-mail to Taylor Otwell via [email protected].
If you discover a security vulnerability within this package, please send an e-mail to the creator, Caen De Silva, via [email protected].
All security vulnerabilities will be promptly addressed.
The Laravel framework is open-sourced software licensed under the MIT license.
This starter kit is also open-sourced software licensed under the MIT license.
Credit is not required, but it is highly appreciated. If this project helped you, please leave a star and let me know! I'd LOVE to see what you build using this. I'm happy to add a link to your site in this readme if you are using it.

