Generate an interactive HTML report on your Office 365 environement. This report also allows you to interact with the data set within the report and configure how you want it ordered.
The Dashboard contains some basic information about the Office 365 tenant including the following:
- Company information
- Global Administrators
- Strong Password Enforcement
- Recent E-Mails
- Domains
One of the greatest benefits of this report is that we can interact with the data whenever we would like. If you notice the reports “Recent E-Mails” contains a search bar. If we had more recent E-mails we can either go to the next page of results by click “Next” or we can search for a keyword which will filter the existing data.
The Groups report shows us the name of each group, the type of group, members and the E-mail address of each group. Below is an interactive char that gives us an overview of what types of groups are found in our tenant. As we see above, my tenant is made up of mostly Distribution Groups.
The Licenses report displays each license in the tenant and their total counts, assigned count and unassigned count. Using a PowerShell HashTable we are able to convert the SkuID of the license and convert it to a much friendlier name. If the HashTable doesn’t have the SkuId it will default back to the SKU.
Below that we have two interactive charts that show total licenses by type of license and another chart that show licenses assigned by type. In this tenant, we have much more E3 licenses assigned than we do Office ProPlus.
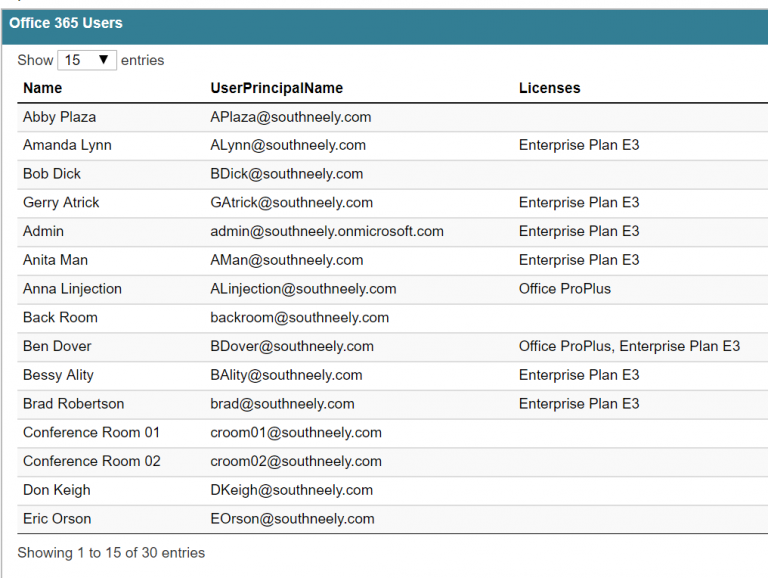
The Users report displays a wealth of information. Here you will have the Name of all your users, their UserPrincipalName, which license each user has assigned to them, the last login, If the user is disabled or not, and finally all of their alias e-mail addresses.
You can also report on users last logon timestamp by changing the $IncludeLastLogonTimestamp variable to $True
The data table will display the first 15 results, we can have it display 15, 25, 50, 100 or All the results by using the drop-down on the top left corner. We can filter the current data by using the search bar in the top right-hand corner.
The chart displays licensed users and unlicensed users. In my tenant, I have a little more users without a license than I do with them.
Shared Mailboxes will display the name of each Shared Mailbox, the primary email, and all other alias e-mail addresses.
The Contacts report has two separate reports contained within it. The first report is the Mail Contact report which will display the name of each Mail Contact and their external e-mail address. The second report is the Mail Users report which will display the name of each Mail User, the primary e-m, il and all other alias e-mail addresses.
Similarly to the Contact report, the Resources report has two reports within it. The first one is Room Mailboxes and will display each Room Mailbox Name, Primary E-Mail, and all other alias e-mail addresses.
The second report is Equipment Mailboxes and will display each Equipment Mailbox Name, Primary E-Mail and all other alias e-mail addresses.
The report contains rich interactive charts. When you hover over it you will see the values.
Using Data Tables we can filter the dataset to find exactly what we need. In my example below I want to see all groups that Brad Robertson is a member of. If I have a lot of groups I may not want to spend the time trying to find his name.
By just typing “Brad” I can see the only group he is a member of is a Distribution List named “Managers”. You can even see that as we start typing the data is already being filtered out before we even finish.
By default all the data you will automatically be ordered alphabetically by name. But if you want to order it by something else you can by clicking on that property. In my example, I want to find all users that are currently locked-out or disabled. By clicking on the “Disabled” property in the user’s report I can see which users show a “True”. It will filter against all users, even though by default I am only showing the first 15 results.
By using a HashTable we can convert the AccountSKU to a much more friendly name. If the HashTable does not have a friendly name for the SKU it will fail back and use the SKU
When the report is gathering its data, if it comes across an empty collection (no users with strong password enforemcent disabled, no resource mailboxes, etc) it will display a friendly message in the report instead of an error in the console


