This repository hosts a React project that defines a Single-Page Application (SPA). You'll secure access to some of its routes using Auth0 User Authentication.
Install the client project dependencies:
npm installRun the client project:
npm startThe application runs by on port 4040 to mitigate conflicting with other client applications you may be running.
Visit http://localhost:4040/ to access the application.
If you haven't already, sign up for a free Auth0 account.
Once you sign in, Auth0 takes you to the Dashboard. In the left sidebar menu, click on "Applications".
Then, click the "Create Application" button. A modal opens up with a form to provide a name for the application and choose its type.
-
Name: Auth0 React Sample
-
Application Type: Single Page Web Applications
Click the "Create" button to complete the process. Your Auth0 application page loads up.
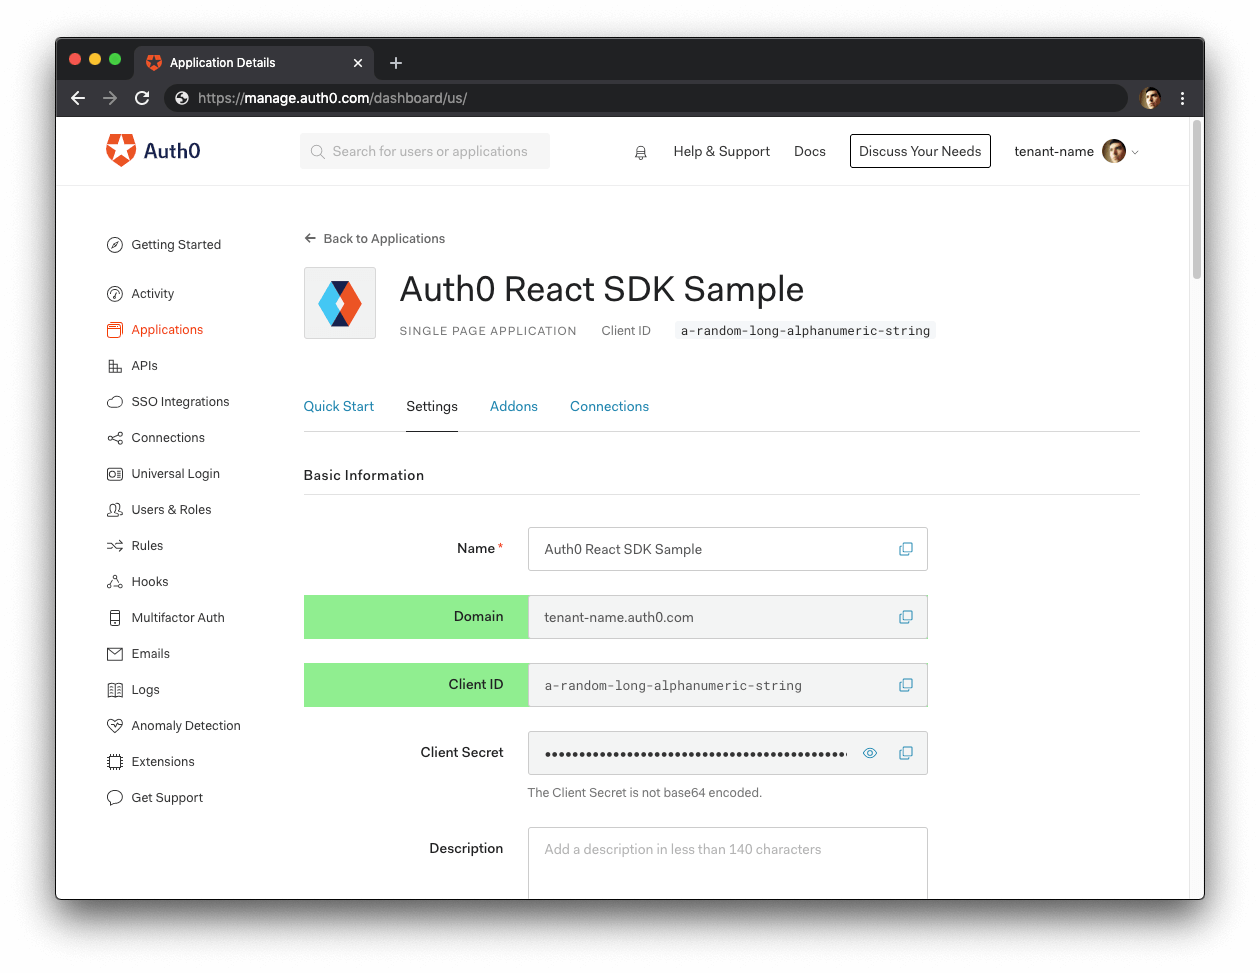
Click on the "Settings" tab of your Auth0 Application page and fill in the following values:
🛠 Allowed Callback URL
http://localhost:4040The above value is the URL that Auth0 can use to redirect your users after they successfully log in.
🛠 Allowed Logout URL
http://localhost:4040The above value is the URL that Auth0 can use to redirect your users after they log out.
🛠 Allowed Web Origins
http://localhost:4040Using the Auth0 React SDK, your React application will make requests under the hood to an Auth0 URL to handle authentication requests. As such, you need to add your React application origin URL to avoid Cross-Origin Resource Sharing (CORS) issues.
Scroll down and click the "Save Changes" button.
Do not close this page yet. You'll need some of its information in the next section.
From the Auth0 Application Settings page, you need the Auth0 Domain and Client ID values to allow your React application to use the communication bridge you created.
Open the React starter project, auth0-react-sample-classes, and create a .env file under the project directory:
touch .envPopulate .env as follows:
REACT_APP_AUTH0_DOMAIN=
REACT_APP_AUTH0_CLIENT_ID=
REACT_APP_AUTH0_AUDIENCE=https://express.sample
REACT_APP_SERVER_URL=http://localhost:6060
The value of REACT_APP_AUTH0_DOMAIN is the "Domain" value from the "Settings".
The value of REACT_APP_AUTH0_CLIENT_ID is the "Client ID" value from the "Settings".
These variables let your React application identify itself as an authorized party to interact with the Auth0 authentication server.
You need this Express server to test making secure API calls from the React application sample.
Open a new terminal window and clone the auth0-express-js-sample repo somewhere in your system. Ensure that you clone it outside of your React project directory.
git clone [email protected]:auth0-blog/auth0-express-js-sample.gitOnce you clone this repo, make the auth0-express-js-sample directory your current directory:
cd auth0-express-js-sampleInstall the Node.js project dependencies:
npm installThis process is similar to how you connected React with Auth0.
Head to the APIs section in the Auth0 Dashboard, and click the "Create API" button.
Then, in the form that Auth0 shows:
-
Add a Name to your API: Auth0 Express Sample
-
Set its Identifier value: https://express.sample
-
Leave the signing algorithm as
RS256as it's the best option from a security standpoint.
The Identifier is the same as the REACT_APP_AUTH0_AUDIENCE value in the .env file from your React application.
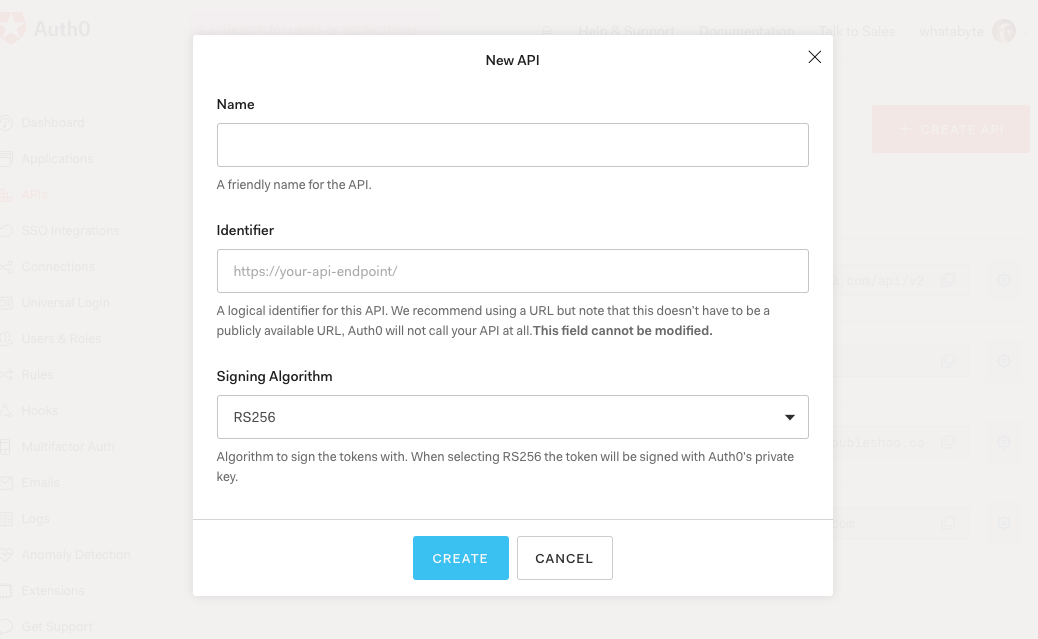
With these values in place, hit the "Create" button.
Now, click on the "Quick Start" tab of your Auth0 API page. This page presents instructions on how to set up different APIs. From the code box, choose "Node.js". Keep this page open as you'll be using the values next.

Create a .env file for the API Server under the auth0-express-sample directory:
touch .envPopulate this auth0-express-sample/.env file as follows:
SERVER_PORT=6060
CLIENT_ORIGIN_URL=http://localhost:4040
AUTH0_AUDIENCE=
AUTH0_ISSUER_URL=
Head back to the "Node.js" code snippet from the Auth0 API "Quick Start" page. Locate the definition of jwtCheck:
var jwtCheck = jwt({
  secret: jwks.expressJwtSecret({
    cache: true,
    rateLimit: true,
    jwksRequestsPerMinute: 5,
    jwksUri: "https://<TENANT-NAME>.auth0.com/.well-known/jwks.json",
  }),
  audience: "https://express.sample", // 👈 AUTH0_AUDIENCE value
  issuer: "https://<TENANT-NAME>.auth0.com/", // 👈 AUTH0_ISSUER_URL value
  algorithms: ["RS256"],
});
Look at the object that the jwt function takes as an argument and use the following properties to complete the values of your .env file:
The audience property is the value of AUTH0_AUDIENCE.
The issuer property is the value of AUTH0_ISSUER_URL.
With the .env configuration values set, run the API server by issuing the following command:
npm start