This project is a GitHub template for creating web projects that use the Zola static site generator, in conjunction with Tailwindcss. The project's website is also built from the same repository. It currently works for zola v0.19.x and tailwind v3.4.x.
Below are some details that will help you get started. Link to Project README.
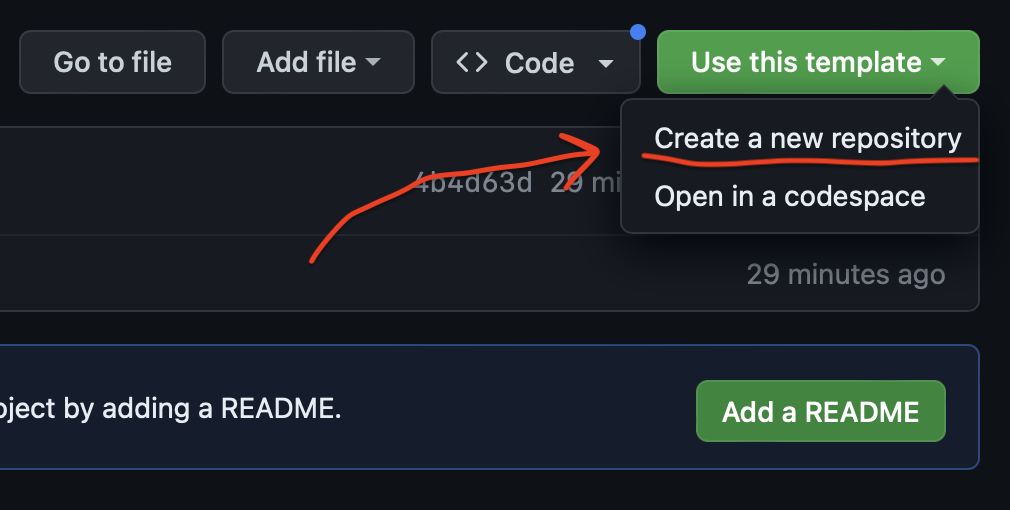
Start by visiting the project's GitHub repository, and then click use the template and "create a new repository".
Then, run npm install to download the tailwind dependencies. The project is now ready to be used.
Most people who are interested in starting a project from scratch will want to begin using Tailwind 4 right away. However, there are other Tailwind versions available in different branches. Just pick the branch you want and use the same installation instructions as before.
| Zola | Tailwind | Branch |
|---|---|---|
| 0.19.2 | 4.0.0 | main |
| 0.19.2 | 3.4.17 | tailwind-3.4.17 |
Here's how you do stuff:
# installs everything
# that you need
npm install

# build builds once,
# output in `./public`
npm run build

# starts a local server
# that watches/rebuilds
npm run serve

## Use can also use `BUILD_OPTS` or `SERVE_OPTS`
## To specifiy options for those commands, e.g.
BUILTS_OPTS="--drafts" npm run build
SERVE_OPTS="--port 1234" npm run serve
For example, you can run npm run serve and then go to localhost:1111 in your browser to see the websites. As you make changes to the code or content, the website will be updated.
To use this for your own project you will probably want to take the following steps to customize (since GitHub doesn't yet support templating variables for GH template repos):
- Change
base_urlinconfig.tomlto your website's URL - Use whatever
LICENSEfile that you want (default is MIT) - Add anything you might want in the
package.jsonfile, i.e.name,author, andlicenseare the bare minimum
Here's an example
{
  "name": "<YOUR_PROJECT>",
  "version": "1.0.0",
  "description": "<DESCRIPTION_OF_YOUR_PROJECT>",
  "scripts": {
    "build": "zola build && npx tailwindcss -i ./public/input.css -o ./public/style.css -m",
    "serve": "zola serve --interface 0.0.0.0 & npx tailwindcss -i ./public/input.css -o ./public/style.css --watch && wait",
    "test": "echo \"Error: no test specified\" && exit 1"
  },
  "repository": {
    "type": "git",
    "url": "<YOUR_PROJECT_REPO>"
  },
  "author": "<YOUR_NAME>",
  "license": "<LICENSE_NAME>",
  "devDependencies": {
    "@tailwindcss/typography": "^0.5.9",
    "tailwindcss": "^4.0.0"
  }
}
Content is stored in markdown text files located within the content directory. Files named _index.md are called "sections", and files by any other name ending in .md are called "pages". For more information you can read the zola documentation. The markdown is inserted into the html via the specified "template", which is indicated at the top of the content's "front matter".
Templates are html files stored in the templates directory. Their purpose is to decide where in the html the content goes. The content is accessible to the template as a variable named either section.content or page.content, depending on the context. Within the template file, you can use a templating language called tera. There are examples throughout this document of templating, wherever you see the {{ template_variable }}.
This website uses tailwindcss for most of its styling. Separate CSS can be added either in the sass directory or in static for just plain css. Since Tailwind 4.x.y, configuration happens now in input.css instead of tailwind.config.css.
Since Zola generates content from markdown files, the Typography plugin is more or less mandatory.
The tailwind typography plugin is used to style content that is generated from markdown. Any child elements that are nested within an element that has the class prose will receive the styling. The default styling can further be customized in the tailwind.config.js file.
- zola
brew install zola - node, npm
- The
npm run servescript runs two long-running tasks in parallel and allows both to write simultaneously to STDOUT by using a mixture ofwaitand sending jobs to the background