The goals / steps of this project are the following:
- Use the simulator to collect data of good driving behavior
- Build, a convolution neural network in Keras that predicts steering angles from images
- Train and validate the model with a training and validation set
- Test that the model successfully drives around track one without leaving the road
- Summarize the results with a written report
Here I will consider the rubric points individually and describe how I addressed each point in my implementation.
My project includes the following files:
- model.py containing the script to create and train the model
- data.py containing the script to load and distribute the data
- config.py defines global parameters for the project
- drive.py for driving the car in autonomous mode
model.h5the trained convolution neural network- video.mp4 video of the recordings by drive.py. while the car is driving track-1 in the simulator.
README.mdsummarizing the results
Using the Udacity provided simulator and my drive.py file, the car can be driven autonomously around the track by executing
python drive.py model.h5The model.py file contains the code for training and saving the convolution neural network. The file shows the pipeline I used for training and validating the model, and it contains comments to explain how the code works.
The data.py file contains the code to load the simulator data from the driving_log.csv file and to compensate the distribution of the data.
The config.py is used to define some project wide parameters, such as batch size, number of epochs, ect.
My model architecture is bases on the NVIDIA model (End to End Learning for Self-Driving Cars Paper), because it has a fairly simple architecture and because it demonstrably provides good results for use with self-driving cars. It is a feed-foward layered architecture in which the output of a layer is fed into the overlying layer. The network consists of a normalization layer, 5 convolutional layers, a dropdown layer, followed by 3 fully connected layers and a final output layer. Since this is a regression problem, the output layer is a single continuous value that provides the predicted steering angle.
NVIDIA Model Architecture

Final Model Architecture
For this project I have made some modifications to the original NVIDIA model. The final model architecture is described here:
First I used two layers for preprocessing. The lambda layer normalizes and mean-centers the image data between +/- 0.5. The following cropping layer removes the sky and the car front from the image, which have no relevance to driving behavior.
Each of the 5 convolutional layers has a 1x1 stride, and a 2x2 max pooling operation to reduce spatial resolution. The first 3 convolutional layers use a 5x5 filter while the final 2 use a 3x3 filter as the input dimensionality is reduced.
After the convolutional layers, a 50% dropout layer was added to prevent overfitting.
For non-linearity, ELU activations are used for each convolutional and each fully connected layer.
The original NVIDIA model uses an input size of 66x200x3. I tried that, but with that I did not manage to drive the car a full round in the simulator (currently I do not know exactly why!). So I use the original image size of 160x320x3 as input size for my network. The cropping layer will reduce the size to 80x320x3 before the image is fed to the convolutional layers.
Here the final model architecture:

The implementation can be found in model.py lines 140-176.
The model was trained and validated on different data sets to ensure that the model was not overfitting (model.py line 39). And the model was tested by running it through the simulator and ensuring that the vehicle could stay on the track.
I used image normalization, image cropping and a dropout layer for regularization (model.py lines 140-176). Also I used L2-regularisation on each convolutional and each fully connected layer to combat overfitting (model.py lines 157-173).
Further I used an EarlyStopping-callback to stop the training process automatically if the value-loss has not improved over some epochs. And a ModelCheckpoint-callback to save only the best trained model (model.py lines 179-188).
Here are the parameters for tuning the model and the training process. The tuning parameters can be adjusted in the config.py file.
NUM_EPOCHS= 20 (Max number of epochs, since early stopping is used)BATCH_SIZE= 128LERNING_RATE= 1.0e-4L2_WEIGHT= 0.001STEERING_CORRECTION= 0.25STEERING_THRESHOLD= 0.15NUM_DATA_BINS= 21
I used an adam optimizer with an learning rate of 1.0e-4 (model.py line 211).
Since this is a regression problem I used the MSE (Mean Squared Error) loss function (model.py line 211).
The STEERING_CORRECTION parameter is used to adjust the steering angles for the left (+) or right (-) camera images.
The STEERING_THRESHOLD parameter is used to split the driving samples where the car is driving straight ahead or cornering. This is needed for the alignment of the data distribution, explained later.
I used the dataset provided by Udacity to train the model, but this data set contains some pitfalls that make it difficult to train a model that lets the car drive a complete lap in the simulator without a breakdown.
A big problem is the extremely uneven number of records in which the car drives straight ahead (steering angle between -STEERING_THRESHOLD and +STEERING_THRESHOLD) versus the data sets where the car is cornering.
The following diagram shows the distribution of the data by the steering angle:

Another problem is that for some difficult situations, e.g. the bridge with another road surface, few sharp curves or the curve without roadside, only very few records are available compared to the normal cases. Unfortunately, it is hardly possible to identify these records.
To fix the extremely unequal number of data sets with straight-ahead driving and cornering, one could simply delete a randomly selected part of the data records with straight-ahead driving. However, there is the risk that the rare special cases will be deleted, which would mean that the car leaves the road in such a special case. So that's not the solution!
To avoid this problem, I group the data sets based on the steering angle in NUM_DATA_BINS areas between -1 and +1 using a histogram.
After that, I'll find the group with the most records (that's where the car is driving straight ahead) and fill up each of the other groups with records randomly selected from the same group, up to the number of items of largest group * 0,75. Thus, the distribution of steering angles in the data set is compensated without losing the rare records. However, the disadvantage is that the number of data to be trained has increased massively.
The following diagram shows the distribution of the data by the steering angle, after the compensation has been made:

The data compensation is done in data.py lines 52-72.
In the first step, I load the data from the driving_log.csv file.
Hereby I decide on the basis of the steering angle which of the 3 camera images (center, left, right) I use.
For this I use the following rules:
-
If steering angle is between -
STEERING_THRESHOLDand +STEERING_THRESHOLD(car drives straight ahead), I use only the center image. -
If steering angle is greater than +
STEERING_THRESHOLD(card drifts left), then I use the center and the left image. The steering angle for the left image is corrected by addingSTEERING_CORRECTIONto it. -
If steering angle is less than -
STEERING_THRESHOLD(car drifts right), then I use the center image and the right image. The steering angle for the right image is corrected by subtractingSTEERING_CORRECTIONfrom it.
The STEERING THRESHOLD was determined by evaluating the steering distribution histogram.
The STEERING_CORRECTION value was determined by a lot of trial and error.
This step is done in data.py lines 9-49.
After loading the data it is shuffled and split into a train set and a validation set. I use only 20% of the records for validation to avoid losing too many special training records. After the train-test spilt, the train dataset contains 58914 items and the validation dataset contains 14729 items.
This step is done in model.py line 39.
In the preprocessing step the images are normalized and mean-centered between -/+0.5. In addition, image parts that do not contribute to driving behavior, such as the sky and the car front, are cut off. This reduces the image size from 160x320x3 to 80x320x3. Both preprocessing steps are done inside the network architecture using a lambda- and a cropping-layer data.py lines 146-149.
| Original Image | Cropped Image (ROI) |
|---|---|
 |
 |
In order to obtain a large variance of training data, I apply various augmentation techniques to the training data:
Random Brightness
I apply a random brightness to the images, to simulate various lighting conditions such as sunlight, darkness, shadows, ect.

Random horizontal and vertical shift
I randomly move the pictures a little bit horizontally and vertically to simulate camera wobbles.

Horizontal Flip
I flip every 2nd image horizontally to simulate the mirrored situation.

Train Batch Generator
I use a generator to randomly create new images from the train dataset for each batch. The generator combines all the image augmentations described above and shuffles the data again after each epoch.
Here are a few examples of what the train generator delivers:

This implementation is done in model.py lines 83-107.
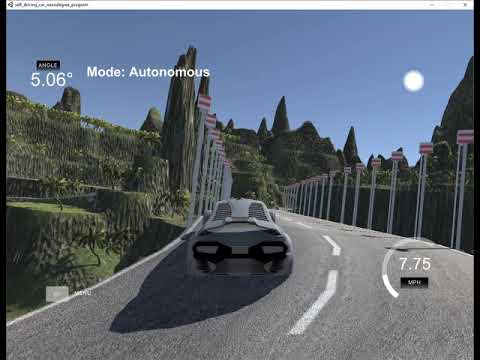
Here are the result videos that I recorded while the car is driving the predetermined tracks in the simulator autonomously.
The videos were created on my computer with an Nvidia GeForce GTX 1050 GPU. Unfortunately, the videos have periodic short hangs, but this is because my computer does not have enough power.
Track 1
| Simulator View | Camera View |
|---|---|
 |
 |
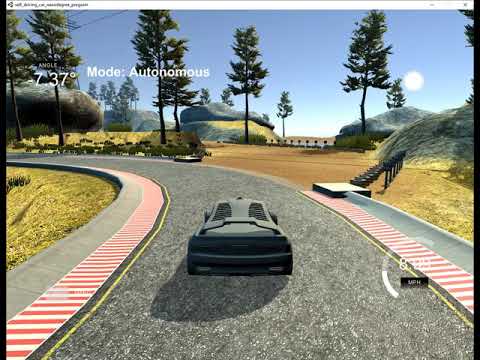
Challenge Track 2
There are the one or the other dangerous situation here, but if one considers that the model has been trained exclusively with data of the simple track 1, the result is surprisingly good!