Quiza is an online platform whereby organizers, administrator or even tutors can setup and schedule quizzes for their students. The students can in turn signin and take the quizes scheduled.
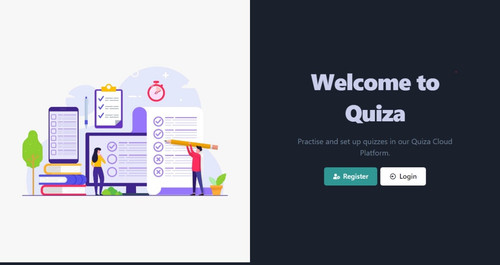
HomePage
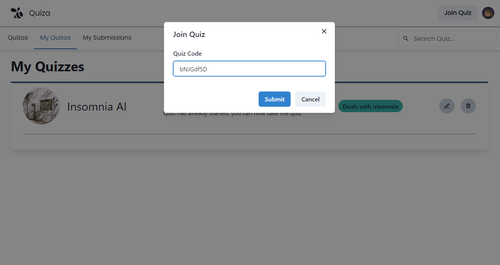
Join a private quiz using a Code
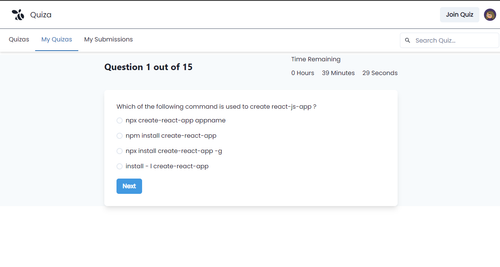
Taking a quiz
Here a short video that explains how the quiz app works
An organizer or a tutor first registers with our app. There after he/she can login. An organizer can create a new quiz, schedule when the quiz will allow students to take and also if they the quiz is private or public.
A public quiz allows any student to enroll and take the quiz. For a private quiz, a student can only enroll to quiz if they have a unique quiz code.
After a quiz is created, an organizer adds new questions to the quiz and options with correctAnswer. Then after submission, the questions are saved on Redis Database.
A student can also create an account with quiza and login. A student can enroll to new quiz and also unenroll to existing quiz. A student can view all public quizzes and enroll and also enroll to a private quiz using a unique quiz code.
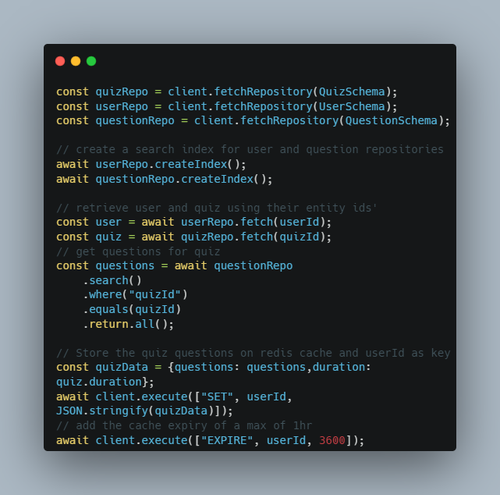
Once a student is enrolled, now can be able to take the quiz. Student clicks the start button, the api confirms if the quiz is open, the api collects all the questions for quiz and stores in Redis Cache. Then UI redirects student to take quiz page. The Student starts attempting the questions with a time set. Once the student submits the questions, the api creates a score for the student. The api also saves all the responses in Redis Database.
Thereafter the student can view quiz attempt results. Also the student can attempt a quiz multiple times and results stored separately.
The app has a private leaderboard for each quiz inregardless of quiz attempts by each student.
Quiza is built using Next JS, which is the framework for React JS library. Next JS is used to manage the frontend and also the server side via its awesome server-side rendering features.
In Next JS we take advantage of dynamic routing for routing various pages in the frontend UI and also in the server side when managing api routes.
In the project, we utilized a number of third party libraries for faster development and improved auth security.
During the development of UI, used Chakra-UI to build the frontend UI, SWR a library for client side data fetching. SWR was used mostly in fetching data from the api (backend) which in turn retrieved data from Redis Database.
For the app authentication, used Next-Auth, an authentication solution for Next JS. Next-Auth was utilized in managing user logged sessions both in frontend and backend thus only allowing authenticated users can perform some actions in the web app.
For the database, our app used Redis Database as the primary database for storage of information of users and quizzes. In order to interact with the redis database, we utilized Redis-OM, a Node JS library for redis that enables storage of JSON objects in Redis database. It also gives access to native redis-cli commands such as saving cache in redis directly which was pretty handy when storing questions in Redis cache whenever a student is taking a quiz and marking correct responses from a student.
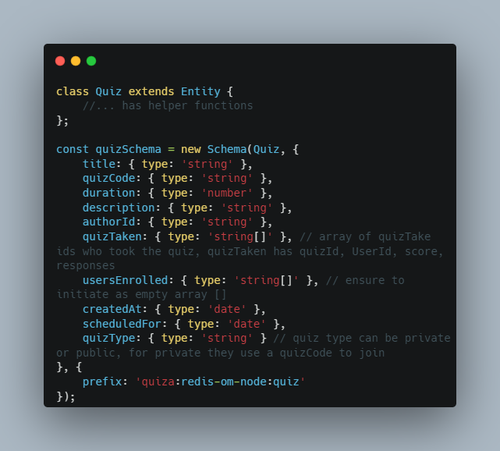
In Quiza, Redis-OM for Node JS was utilized for handling JSON documents.
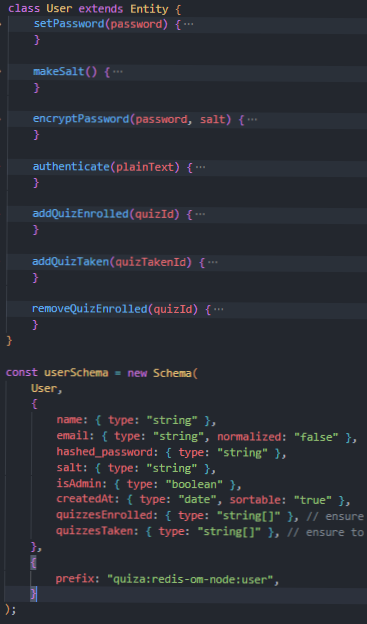
Schema
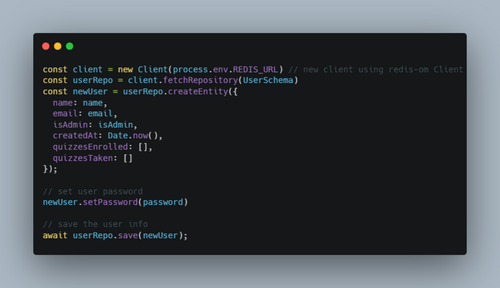
Saving User Info
Here we initiliaze an instance of redis-om Client and fetch user schema which was created. Then create an new entity of user. We then populate it with details received from frontend.
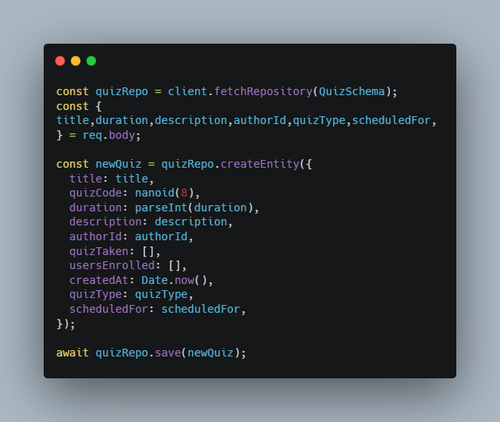
Creating New Quiz
We receive quiz details from frontend then save them and also who created the quiz.
Quiz code is generated by nanoid for uniqueness.
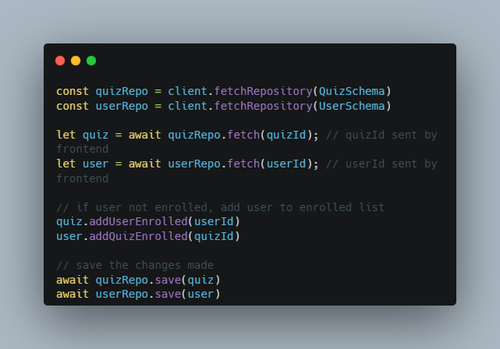
Enrolling To Quiz
Here we receive quizId and userId from frontend and confirm if user is enrolled, if not we add user to our quiz enrollment list
Taking the Quiz
When student clicks start quiz button, questions of a quiz are fetched and they are stored on redis cache using userId as the key.
They be retrieved when marking the questions against the answers.
Marking The Quiz
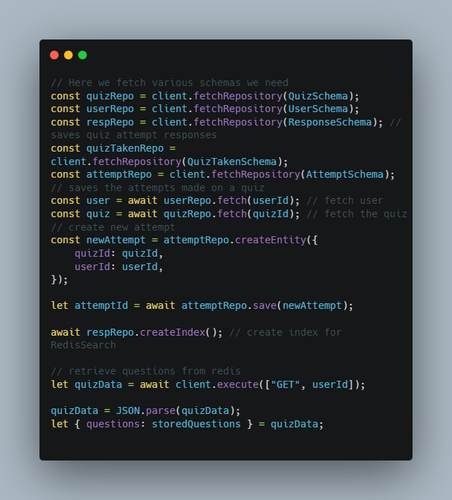
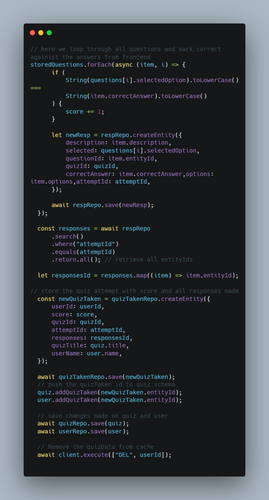
Here when we mark correct all responses made on the questions,
We retrieved stored questions from redis cache and for each response we create a new entity for it.
Once done, we retrieve all responses entity ids and store them in quiz taken entity to allow storage of new attempts.
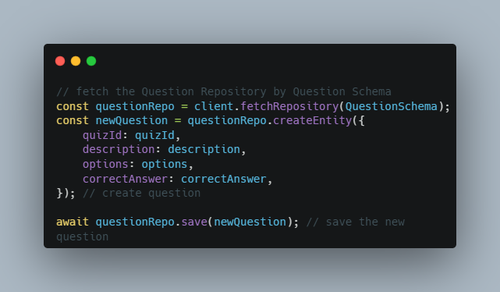
Creating Question
We get question details from frontend and save the question on Redis Database.
- Authentication (Login)
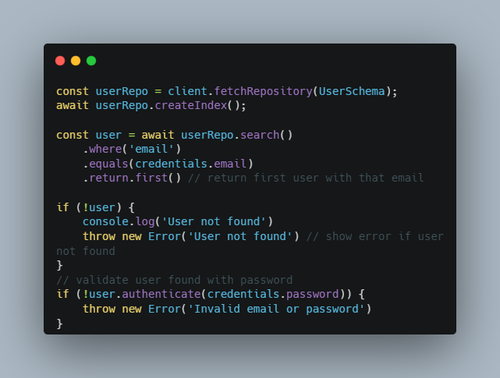
For login, next auth was utilised to facilitate user login sessions. For one to login, user has to provider email and password.
Using RedisSearch we retrieve user with that email and validate with the provided password.
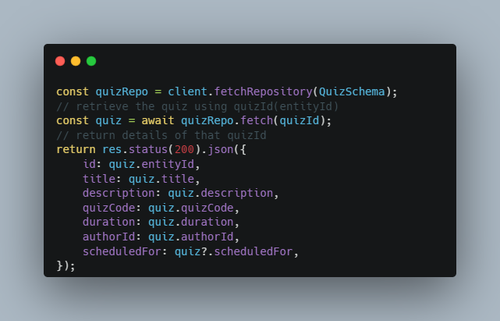
- Quiz Detail and fetch questions
In order to get quiz detail, we provided quizId(entityId) so that we can fetch that quiz and return its details.
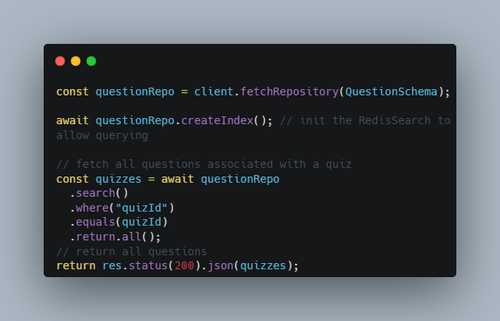
For questions, we use quizId provided to get all questions associated with that quiz.
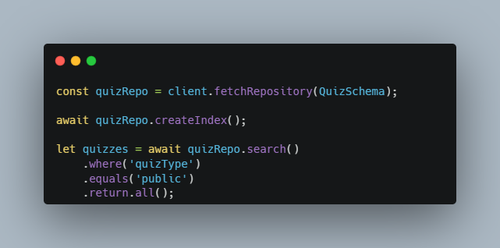
- All Public Quizzes
Fetched by searching all quizzes whose type is public.
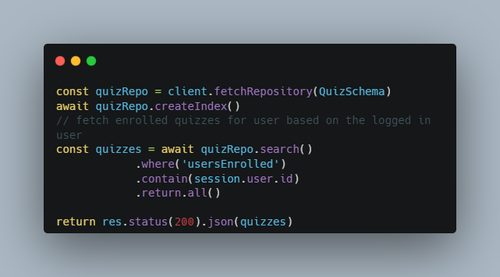
- User enrolled quizzes;
Use Next-Auth user session to get their enrolled quizzes;
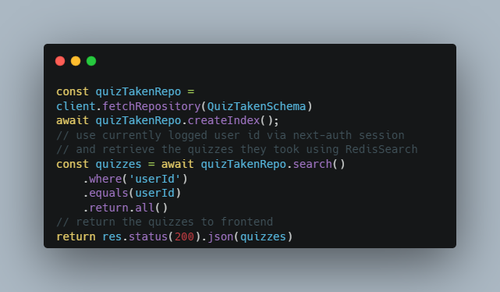
- User Quiz Submissions
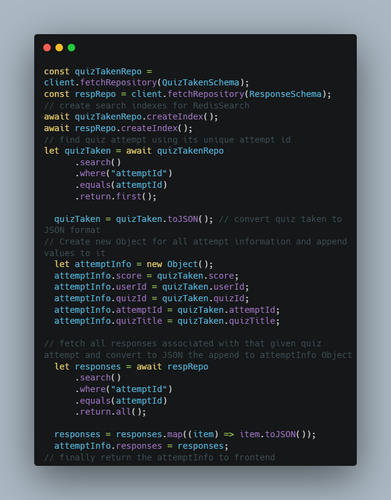
- Quiz Attempt Results
Here we use the unique attemptId to retrieve that quiz attempt information.
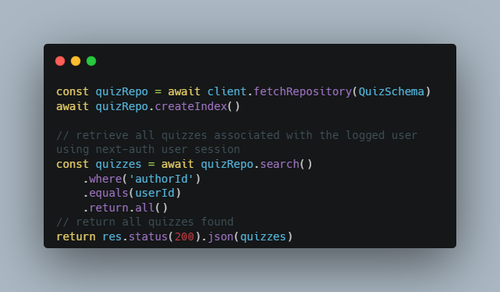
- Quiz Author Quizzes
Here we use userId of logged user via next-auth and fetch all quizzes they authored.
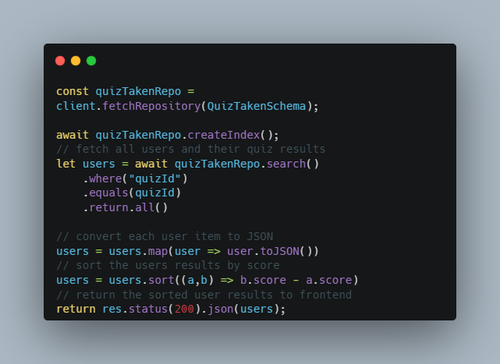
- Quiz Leaderboard Results
Here retrieve all results of each user who took the quiz test. We use quizId to get the results.
For most part of how data was accessed, I made use of RedisSearch, you can refer to its docs
- Node JS v16.16.0
- Yarn (v1.22.19) or NPM latest version
- Redis Stack Server (optional for cloud)
- Redis CLI (optional for cloud)
- Git
Clone the project
git clone https://github.com/VinGitonga/quiza_redis.gitGo to the project directory
cd quiza_redisOpen .env file using your text editor and add REDIS_URL path either for local enviroment(Redis Stack Server)
If you have Redis Stack Server installed, add this line on .env file
REDIS_URL = redis://localhost:6379
For if you prefer redis cloud, kindly refer on Redis Cloud to obtain redis cloud url which you'll setup like this.
REDIS_URL = redis://<redis_cloud_username>:<password>@<redis_host>:<redis_port>
Values for connecting to Redis remotely are provided on Redis Cloud platform.
Install dependencies
yarn or npm installStart the server
yarn dev or npm run devTo make deployments you have to use Vercel and also use Redis Cloud Server
