Clustering
CARTO Mobile SDK can dynamically cluster point data if large amounts of points need to be shown without cluttering the MapView. Clusters are formed based on the map zoom level and spatially close points are placed into the same cluster.
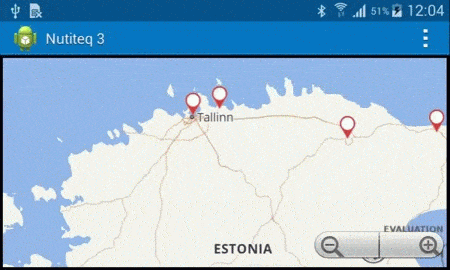
Clusters are usually markers which display a location of several objects, and typically indicate the number of markers within each object.
CARTO Mobile SDK has built-in cluster feature, which is highly customizable. You can define the following options in your app code:
- Styling the cluster objects
- Dynamically generate cluster object styles. For example, automatically display the number of objects in each cluster
- Define the minimum zoom level for clusters
- Set the minimum distance between objects, before it becomes a cluster
- Indicate the action when clicking on marker. For example, zoom in, or expand cluster (i.e. open the points without zooming). The expand feature is useful for small clusters (containing up to four objects inside)
Depending on the device, the Mobile SDK can cluster 100,000 points in less than a second.
Clusters are generated dynamically, based on VectorDataSource data that loads the map layer. If using an API, it works as a unique layer with the ClusteredVectorLayer method, and includes the following parameters in the a hierarchal order:
- Select the layer
DataSourceIn most cases, theLocalVectorDataSourcefunction contains all the elements to request the data. It is important that the DataSource displays all elements in a layer, and does not limit it to the current map visualization bbox (bounding box) -
ClusterElementBuilderdefines a single methodbuildClusterElement
    // 1. Initialize a local vector data source
    LocalVectorDataSource vectorDataSource1 = new LocalVectorDataSource(mapView.getOptions().getBaseProjection());

    // 2. Create Marker objects and add them to vectorDataSource
    // **Note:** This depends on the _app type_ of your mobile app settings. See AdvancedMap for samples with JSON loading and random point generation

    // 3. Initialize a vector layer with the previous data source
    ClusteredVectorLayer vectorLayer1 = new ClusteredVectorLayer(vectorDataSource1, new MyClusterElementBuilder(this.getApplication()));
    vectorLayer1.setMinimumClusterDistance(20);

    // 4. Add the previous vector layer to the map
mapView.getLayers().add(vectorLayer1);The Cluster Element Builder takes set of original markers (map objects) as input, and returns one object (or another VectorElement, such as a Point or BalloonPopup) which dynamically replaces the original marker.
Note: It is highly recommended to reuse and cache styles to reduce memory usage. For example, a marker style with a specific number is only created once. Android and iOS samples use platform-specific graphic APIs to generate the bitmap for the marker. .NET example only uses BalloonPopup, which is slower but works the same across all platforms.
    private class MyClusterElementBuilder extends ClusterElementBuilder {

        @SuppressLint("UseSparseArrays")
        private Map< Integer, MarkerStyle > markerStyles = new HashMap< Integer, MarkerStyle >();
        private android.graphics.Bitmap markerBitmap;

        MyClusterElementBuilder(Application context) {
            markerBitmap = android.graphics.Bitmap.createBitmap(BitmapFactory.decodeResource(context.getResources(), R.drawable.marker_black));
        }

        @Override
        public VectorElement buildClusterElement(MapPos pos, VectorElementVector elements) {
            // 1. Reuse existing marker styles
            MarkerStyle style = markerStyles.get((int) elements.size());

            if (elements.size() == 1) {
                style = ((Marker) elements.get(0)).getStyle();
            }

            if (style == null) {
                android.graphics.Bitmap canvasBitmap = markerBitmap.copy(android.graphics.Bitmap.Config.ARGB_8888, true);
                android.graphics.Canvas canvas = new android.graphics.Canvas(canvasBitmap);
                android.graphics.Paint paint = new android.graphics.Paint(android.graphics.Paint.ANTI_ALIAS_FLAG);

                paint.setTextAlign(Paint.Align.CENTER);
                paint.setTextSize(12);
                paint.setColor(android.graphics.Color.argb(255, 0, 0, 0));

                canvas.drawText(Integer.toString((int) elements.size()), markerBitmap.getWidth() / 2, markerBitmap.getHeight() / 2 - 5, paint);

                MarkerStyleBuilder styleBuilder = new MarkerStyleBuilder();
                styleBuilder.setBitmap(BitmapUtils.createBitmapFromAndroidBitmap(canvasBitmap));
                styleBuilder.setSize(30);
                styleBuilder.setPlacementPriority((int)-elements.size());

                style = styleBuilder.buildStyle();

                markerStyles.put((int) elements.size(), style);
            }

            // 2. Create marker for the cluster
            Marker marker = new Marker(pos, style);
            return marker;
        }
    }