Getting Started
In this tutorial, you will configure Visual Studio Code to use the GCC Ada compiler (GNAT) and GDB debugger on Linux, Windows or Mac OS X. GCC stands for GNU Compiler Collection; GNAT is GNU Ada Translator in GCC; GPRbuild is a multi-language builder; GDB is the GNU debugger.
After configuring VS Code, you will compile and debug a simple Ada project in VS Code. This tutorial does not teach you GCC, GDB, Ubuntu or the Ada language. For those subjects, there are many good resources available on the Web.
If you have trouble, feel free to file an issue for this tutorial in the ada_language_server repository.
To successfully complete this tutorial, you must do the following:
-
Install Visual Studio Code.
-
Install the Ada & SPARK extension for VS Code. You can install the extension by searching for 'adacore' in the Extensions view (
Ctrl+Shift+X).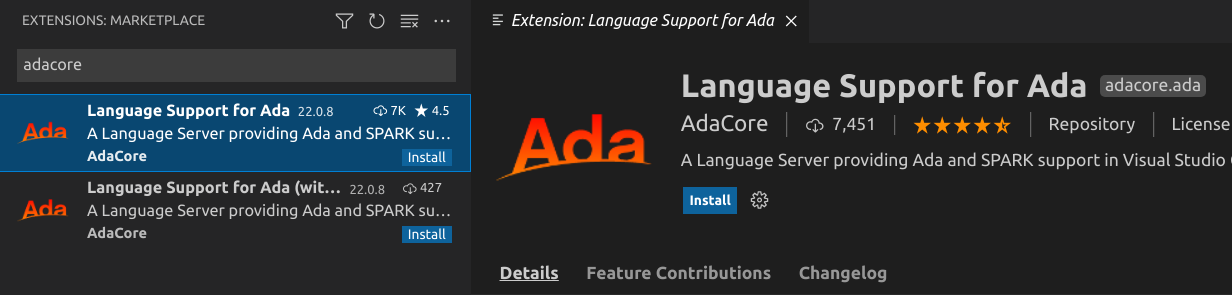
Although you'll use VS Code to edit your source code, you'll compile the source code using the GNAT compiler. You'll also use GDB to debug and gprbuild to build applications or libraries. These tools are not installed by default, so you have to install them. Fortunately, that's easy.
If you are an AdaCore customer, log into your account on GNAT Tracker to download the tools available in your subscription.
Otherwise, Ada & SPARK tools are available to the community through different channels listed here.
From the terminal window, create an empty folder called projects to
store your VS Code projects. Then create a subfolder called helloworld,
navigate into it, and open VS Code in that folder by entering the following
commands:
mkdir projects
cd projects
mkdir helloworld
cd helloworld
code .
The code . command opens VS Code in the current working folder, which
becomes your "workspace".
The GNAT project file allows you to manage complex builds involving a number of source files, directories, and options for different system configurations. It is recommended to create a project file even for the simplest Ada project.
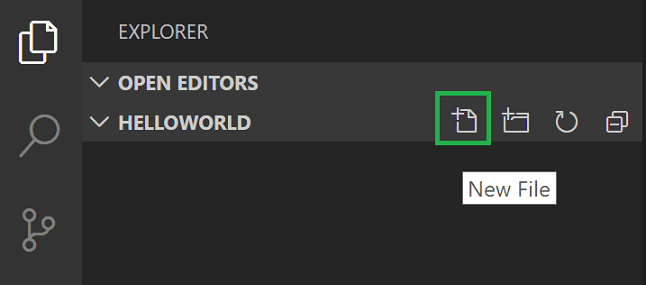
In the File Explorer title bar, select New File and name the file
hello_world.gpr.
Paste in the following source code:
project Hello_World is
   for Main use ("hello_world.adb");
   for Object_Dir use ".objs";

   package Compiler is
      for Default_Switches ("Ada") use ("-g");
   end Compiler;
end Hello_World;
Now press Ctrl+S to save the file.
In the File Explorer title bar, select New File and name the file
hello_world.adb.
Paste in the following source code:
with Ada.Text_IO;
procedure Hello_World is
begin
Ada.Text_IO.Put_Line ("Hello Ada World!");
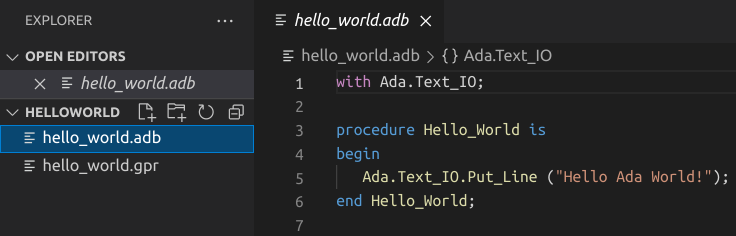
end Hello_World;Now press Ctrl+S to save the file. Notice that your files are listed
in the File Explorer view (Ctrl+Shift+E) in the side bar of VS Code:
You can also enable Auto Save to automatically save your file changes, by checking Auto Save in the main File menu.
The Activity Bar on the edge of Visual Studio Code lets you open different views such as Search, Source Control, and Run. You'll look at the Run view later in this tutorial. You can find out more about the other views in the VS Code User Interface documentation.
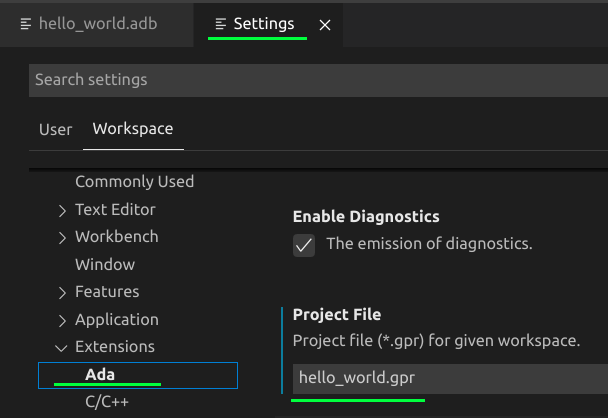
It's important to configure the current project file setting. Open
Settings View with menu File > Preferences > Settings
(Ctrl+Comma), select Workspace tab, click Extensions/Ada & SPARK
and find the Project File input field. Type hello_world.gpr
value.
On first use, you may see the following warnings:
The project was loaded, but no Ada runtime found. Please check the installation of the Ada compiler.
can't find a toolchain for the following configuration: language 'Ada', target 'x86_64-linux', default runtime
This means that the GNAT compiler installation is not visible to VS Code. You can address this by setting up the PATH environment variable prior to opening VS Code, or by using the VS Code setting terminal.integrated.env.[linux|windows|osx]. Both methods are documented on the extension's main page.
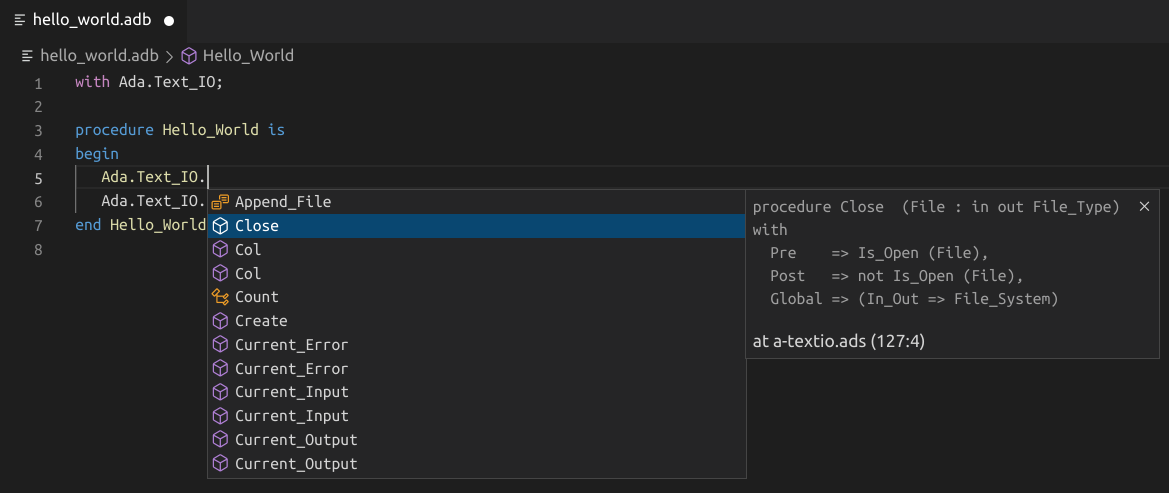
In the hello_world.adb file, hover over Put_Line to see subprogram
information. After the begin keyword, start typing Ada.Text_IO. as
you would when calling a package procedure. You should immediately see
a completion list that shows all the subprograms in the package, and
a window that shows the entity information:
You can press the Tab key to insert the selected name. Then, when you
add the opening parenthesis, you'll see information about arguments that
the subprogram requires.
To build a simple project, you can use the ada: Build current project
predefined task. Predefined tasks are VS Code tasks that are created
by the extension itself.
To do that, just invoke the VS Code Command Palette via the 'Ctrl+Shift+B'
shortcut (or Cmd+Shift+B on Mac OS): then search for the Run Task
command and type ada. Clicking on the ada entry will show
you all the Ada related tasks, in particular the ada: Build current project
one. Select it and press ENTER (or click on it) to actually build your project.
If your are dealing with a complex project, that requires different build steps or
more advanced options, you can create a custom tasks.json file to tell VS Code
how to build (compile) the program. This task will invoke the gprbuild tool to
create an executable file from the source code.
From the main menu, choose Terminal > Configure Default Build Task. A dropdown appears showing various predefined build tasks for Ada compilers. Choose ada: Build current project.
This will create a tasks.json file in a .vscode folder and open it
in the editor.
Your new tasks.json file should look similar to the JSON below:
{
   "version": "2.0.0",
   "tasks": [
      {
         "type": "ada",
         "command": "gprbuild",
         "args": [
            "${command:ada.gprProjectArgs}",
            "-cargs:ada",
            "-gnatef"
         ],
         "problemMatcher": [
            "$ada"
         ],
         "group": {
            "kind": "build",
            "isDefault": true
         },
         "label": "ada: Build current project"
      }
   ]
}
Note: You can learn more about
tasks.jsonvariables in the variables reference.
The command setting specifies the program to run; in this case that
is gprbuild. The args array specifies the command-line arguments
that will be passed to gprbuild. These arguments must be specified
in the order expected by the tool.
This task tells gprbuild to take the project filename and associated scenario variables from the VS Code settings
(${command:ada.gprProjectArgs}), compile the project, and create an executable file
according to project file rules, resulting in hello_world for our example.
The label value is what you will see in the tasks list; you can name
this whatever you like.
The "isDefault": true value in the group object specifies that this
task will be run when you press Ctrl+Shift+B. This property is for
convenience only; if you set it to false, you can still run it from
the Terminal menu with Tasks: Run Build Task.
-
To run the build task defined in
tasks.json, pressCtrl+Shift+Bor from the Terminal main menu choose Run Build Task. -
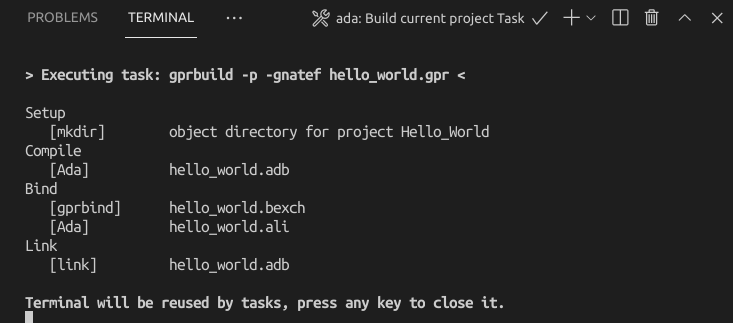
When the task starts, you should see the Integrated Terminal panel appear below the source code editor. After the task completes, the terminal shows output from the compiler that indicates whether the build succeeded or failed. For a successful g++ build, the output looks something like this:
- Create a new terminal using the
+button and you'll have a terminal running your default shell with thehelloworldfolder as the working directory. Runls .objsand you should now see the executable hello_world (no file extension).
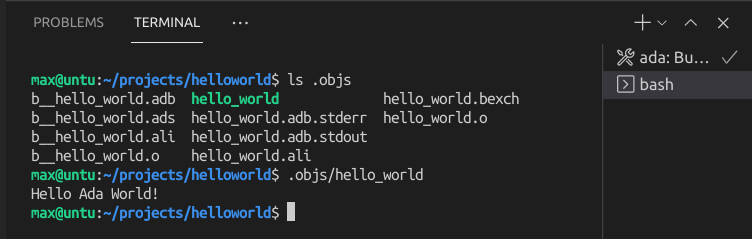
- You can run
helloworldin the terminal by typing.objs/helloworld.
Another task (ada: Check current file) could be used to
quickly check syntax and semantic of the current file in the editor.
If the compiler finds some errors VS Code will populate Problems view
and highlight corresponding lines in the editor. It's handy to have
a keyboard shortcut for this task. To create one:
-
Click View > Command Palette... (
Ctrl+Shift+P) and type Preferences: Open Keyboard Shortcuts (JSON) -
Append this to the shortcut list:
  {
      "key": "alt+v",
      "command": "workbench.action.tasks.runTask",
      "args": "ada: Check current file",
      "when": "editorLangId == ada"
  },
Let's try to debug our program now.
The ms-vscode.cpptools extension is automatically installed along with this extension, allowing to use its integration for GDB to debug Ada code.
The extension provides default debug configurations for all the mains of your
project. You can debug the executable of your choice by opening the
Run and Debug panel and then by clicking on the Run and Debug button.
You can also run directly the Debug: Start Debugging command instead of using the UI. In some circumstances the UI may offer a selection of languages, in which case select Ada.
The extension will then propose you to select the main you want to debug if your project contains several mains.
If you want to customize GDB's behavior or if you need to add custom arguments, you
will have to create a launch.json file: this can be done by click the gear icon
on the right side of one of the debug configurations proposed by the menu.
Alternatively, you can click the
create a launch.json file link button in the Run and Debug panel or use
the Debug: Add Configuration command.
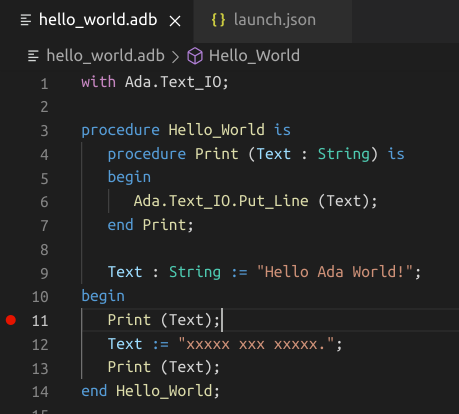
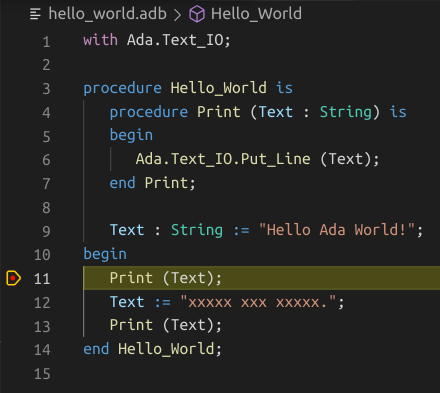
Now let's replace hello_world.adb with something more complex:
with Ada.Text_IO;

procedure Hello_World is
   procedure Print (Text : String) is
   begin
      Ada.Text_IO.Put_Line (Text);
   end Print;

   Text : String := "Hello Ada World!";
begin
   Print (Text);
   Text := "xxxxx xxx xxxxx.";
   Print (Text);
end Hello_World;
By default, no breakpoints are added to
your source code. Let's put a breakpoint on the line with Print call.
To do this switch to the hello_world.adb tab in the code editor,
putting the insertion point somewhere on the Print statement,
and pressing F9. A red dot appears in the gutter on the left
to indicate that a breakpoint has been set on this line.
-
Go back to
hello_world.adbso that it is the active file. -
Press
F5or from the main menu choose Run > Start Debugging. Before you start stepping through the code, let's take a moment to notice several changes in the user interface:-
The Integrated Terminal appears at the bottom of the source code editor. In the Debug Output tab, you see output that indicates the debugger is up and running.
-
The editor highlights the statement where debugger stops on the breakpoint:
-
The Run view on the left shows debugging information. You'll see an example later in the tutorial.
-
At the top of the code editor, a debugging control panel appears. You can move this around the screen by grabbing the dots on the left side
-

Now you're ready to start stepping through the code.
-
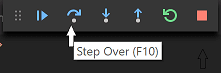
Click
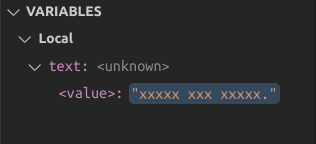
F10or press the Step over icon in the debugging control panel.This will advance program execution to the assignment statement, and skip over the Print procedure call. See value of the
Textvariable on the left panel. Also take a look at Debug Console to see thePut_Lineoutput. -
Press Step over again to advance to the next statement in this program (skipping over assignment statement execution). Notice the change in the Variables window on the side.
-
To quickly view the value of any variable while execution is paused on a breakpoint, you can hover over it with the mouse pointer.
-
Try Step Into button to step in the
Printprocedure.
VS Code is now configured to use Ada. The configuration applies to
the current workspace. To reuse the configuration for another project, just copy
the .vscode folder into the other project folder
(workspace) and change the names of the project file and
executables as needed.
Note that you can convert your .vscode folder into a workspace file (.code-workspace extension) if
you need a Multi-root Workspace.
Multi-root workspaces allow to have workspaces containing multiple root folders: this is really useful for projects
that import other projects for instance. When loading such a project, the Ada extension will display a popup offering to automatically add all the source directories coming
from imported projects to the workspace.
That would then allow you to navigate quickly among imported sources via the Ctrl+P key shortcut.
If you encounter issues while using Ada in VS Code, you may find useful information in the logs available in the Output view of VS Code. The logs can be accessed using the following commands:
Ada: Show extension outputAda: Show Ada Language Server outputAda: Show GPR Language Server output
Verbosity of the language server outputs can be increased with the following settings:
{
   "ada.trace.server": "verbose",
   "gpr.trace.server": "verbose"
}
You can report bugs via the Help: Report Issue command in VS Code, or by opening an issue on GitHub.
- Explore the VS Code User Guide.