Installation
Online interactive step by step tutorial by @jLynx:
🎓 http://deauth.me
$3 WiFi Jammer/Deauther using ESP8266 | Deauther 2.0 Flashing/Installation by @PwnKitteh:
🎬 https://youtu.be/wKhSlIYQ5jA
You can find precompiled .bin files on the release page. Be sure to download the latest version. The 1 MB file should be good for most devices. If you have a NodeMCU with an ESP-12 you can also use the 4MB file. But all in all, it shouldn't matter that much.
Use one of the following software to flash your ESP8266 with the .bin file.
If you're beginner, have a look at Node2Deauther.
Using the NodeMCU (or any similar development board), the flash location is 0x0000 and the mode is dout.
esptool.py -p /dev/ttyUSB0 write_flash -fm dout 0x0000 esp8266_deauther.ino.nodemcu.bin
Where /dev/ttyUSB0 is the COM port of your device, write_flash is telling the program to write to flash memory, -fm dout is the flash mode and esp8266_deather.ino.nodemcu.bin is the name of your .bin file.
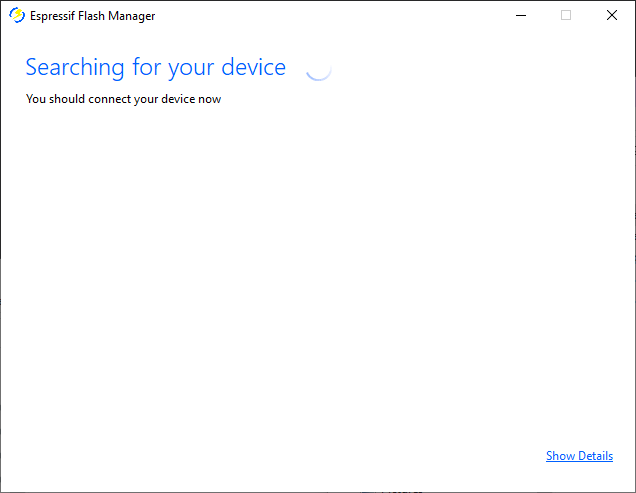
Espressif has an official GUI tool for Windows.
It has a lot of options and can be used for the ESP8266, ESP8285 and ESP32.
You can find it on Espressif's download page here: https://www.espressif.com/en/support/download/other-tools
(if the link changed, just search for esp flash download tool)
realmrvodka created this user friendly all-in-one flasher tool.
It helps you go through the process step by step and also provides the drivers you'll need.
https://github.com/realmrvodka/n2d/
An easy to use GUI flasher for Windows and Mac: esptool-gui.
Select the COM Port and the .bin file (firmware), then just press upload.
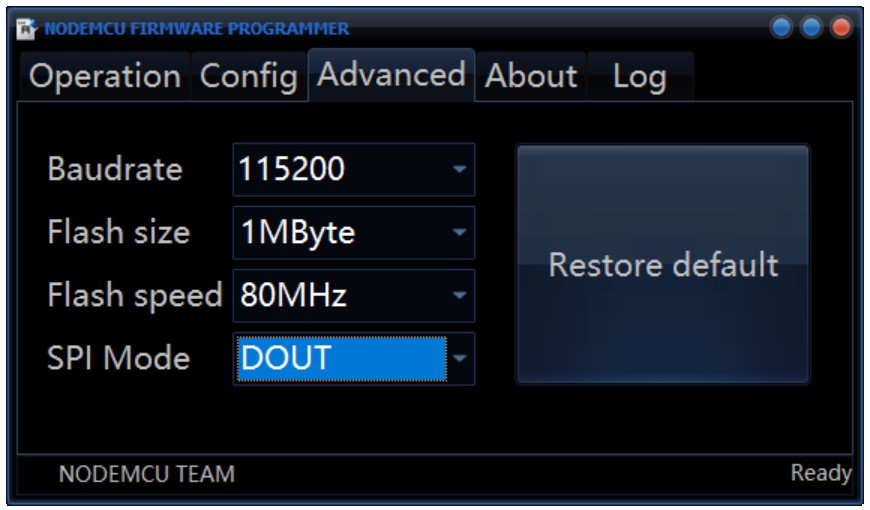
Another easy to use GUI flasher, but this time only for Windows: nodemcu-flasher.
Select the COM port, go to config and select your .bin file at 0x000000.
Go back to Operation and click Flash.
-
First you have to install and open the Arduino IDE.
-
Download the source code for this project.
-
Extract the whole .zip file, navigate to esp8266_deauther and open
esp8266_deauther.inowith Arduino. -
In Arduino go to
File>Preferencesadd this URL to theAdditional Boards Manager URLs:https://raw.githubusercontent.com/SpacehuhnTech/arduino/main/package_spacehuhn_index.json -
Go to
Tools>Board>Boards Manager, searchdeautherand installDeauther ESP8266 Boards -
Select your board at
Tools>Boardand be sure it is atDeauther ESP8266 Boards(and not atESP8266 Modules)! -
Depending on your board, you might have to select a configuration setting at
Tools>Deauther Config -
If you need to reset the settings from a prior installation, make sure to select
Tools>Erase Flash>All Flash Contents -
If you like to add a display, LED or buttons, follow the Setup Display & Buttons guide.
-
Check your upload settings and press upload!
These are some small tips that are beneficial for first time users of this software, and hopefully will make it more accessible and cause less headache when flashing the board.
We recommend the esptool for flashing .bin files, because it works on all platforms. You can read more about how esptool works on their github page.
For customized versions, we highly recommend using Arduino IDE and our Deauther SDK (see Compiling using Arduino IDE).
💥❗️❓❗️❗️💢 Sometimes everything is right but it won't upload and you may get an error like error: espcomm_open failed.
What you have to do is hold the flash button down, start uploading and only release it when you see that it's started uploading.
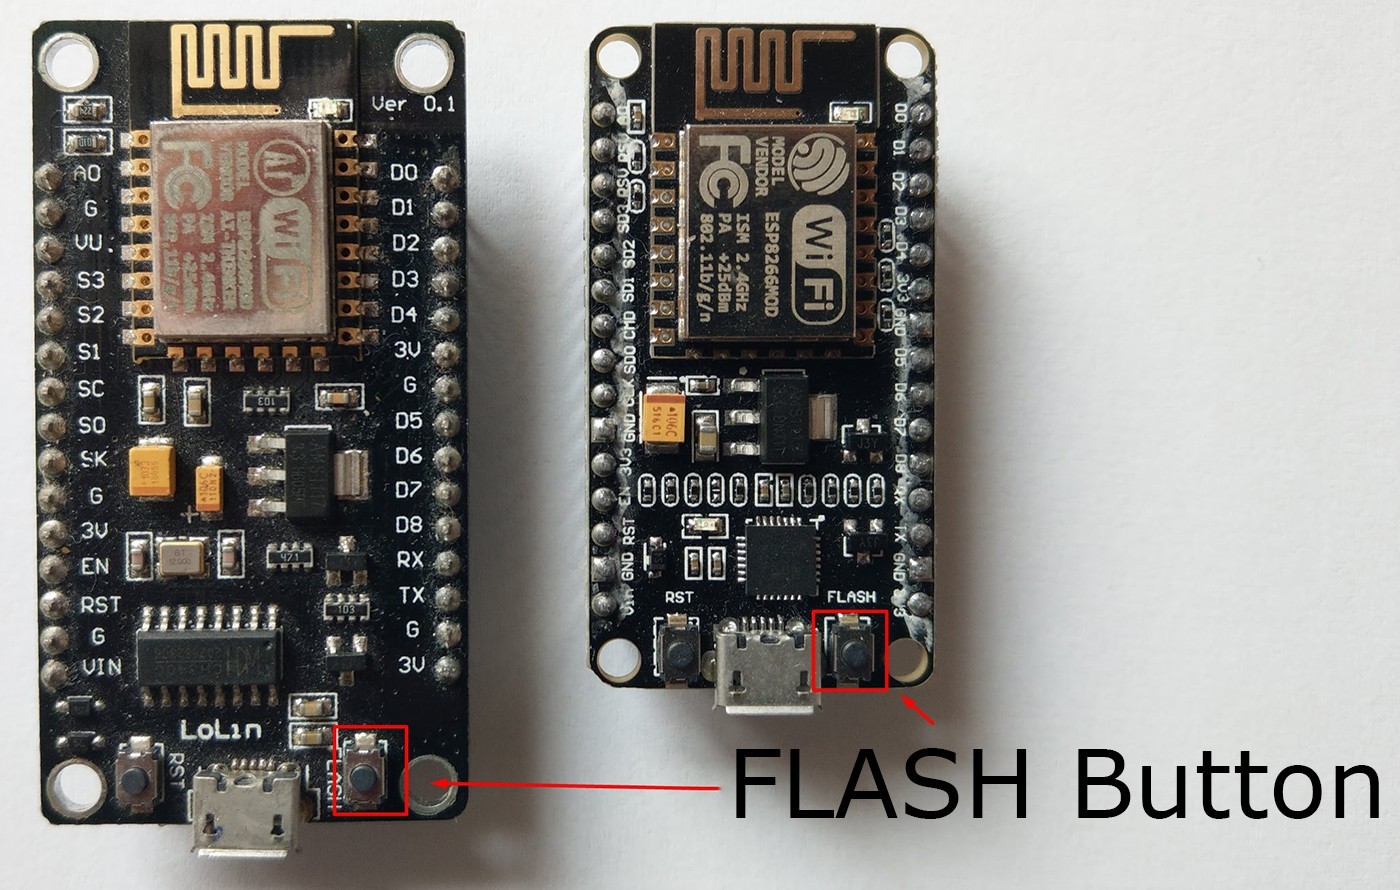
Most development boards feature a auto-reset method and sometimes it doesn't work properly and it fails to go into flashing mode automatically. To manully force it into the flashing mode, you have to hold down the button.
In order to upload successfully, you must select the correct COM port. You can think of it as the address with that your computer accesses the ESP8266. The best way to find the correct port is to open the Arduino IDE and see what ports are listed there. This looks the same for every OS, including Linux. On Windows, COM1 is usually never the correct port. On Windows you can also have a look at your device manager, there you can also see if a device is not recognized.
If none of the COM ports work correctly or you can't find any COM Port, you might need to install the drivers.
The driver you need depends on the UART (USB to Serial) chip that is used on your development board.
Those are the drivers of the most used chips:
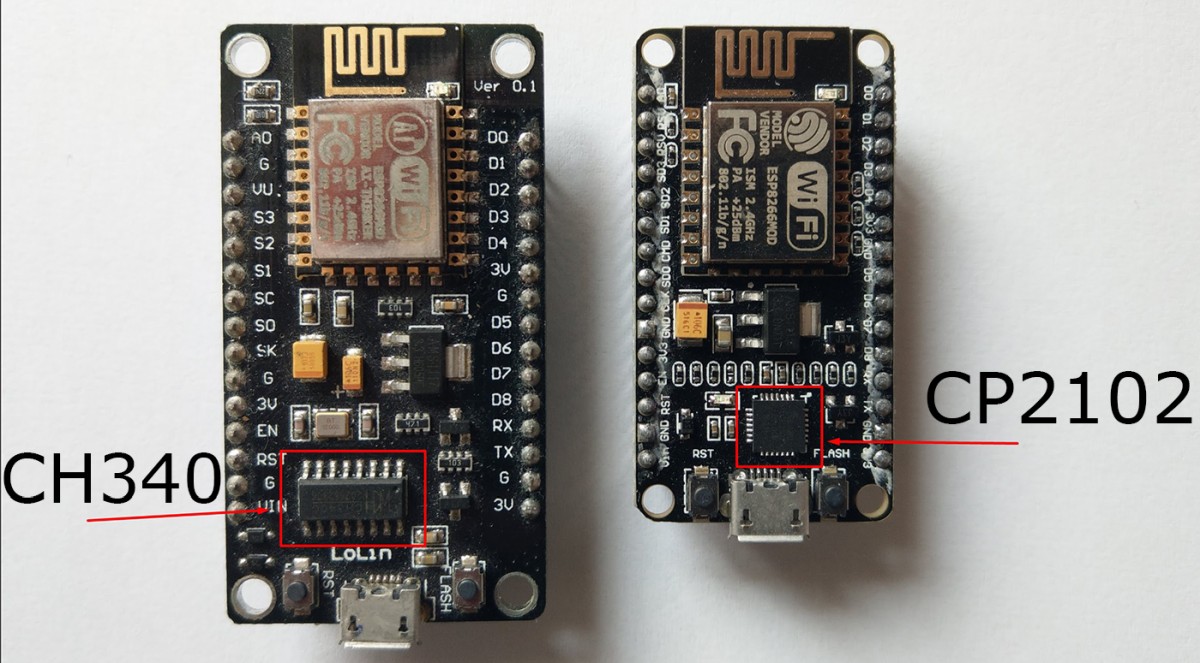
If you're not sure which chip your board is using, just try both.
If this doesn't help, try out different cables (some USB cables are only for charging and don't have data lines) or plug it to a different USB port.
Those are the recommended upload/compile settings for Arduino:
Board: Generic ESP8266 Module
Flash Mode: DOUT
Flash Frequency: 80 MHZ
CPU Frequency: 160 MHz
Flash Size: 1M (256K SPIFFS)
Reset Method: nodemcu
Upload Speed: 115200
Port: <com port of your device>
Most NodeMCUs and other development boards have 4MB Flash so you can set the Flash Size to 4M (3M SPIFFS) or select NodeMCU 1.0 as the board.
A bigger Flash size can give you more memory in the SPIFFS for saving data, scripts or other files. Increasing the SPIFFS can also make it a bit slower, as the ESP8266 has to maintain a bigger file system.
If you have a board with the ESP-07 (the one with the connector for an external antenna) it probably has only 1MB of flash, so keep the recommended settings above.
Putting the Upload Speed to 921600 (or other baud rates) gives you a higher upload speed but doesn't always work.
DOUT should always work. It means Dual Output.
QIO (quad I/O) uses 4 instead of 2 pins and will make the flash faster. However, you won't be able to use GPIO 9 and 10 (SD2, SD3)! If you flash it with QIO and use those pins, it will crash without a warning.
More details on the different modes are descripted here: https://github.com/espressif/esptool/wiki/SPI-Flash-Modes
A higher flash frequency should increase the speed, but it doesn't always work with every module.
Try out what works the best.
We strongly recommend to use 160MHz to get the extra performance out of the chip.
Again, try out what works and use that.
The recommended baud rate for uploading is 115200. You can try higher baud rates for faster uploading or slower ones if 115200 isn't working very reliable.
The flash size is an important factor!
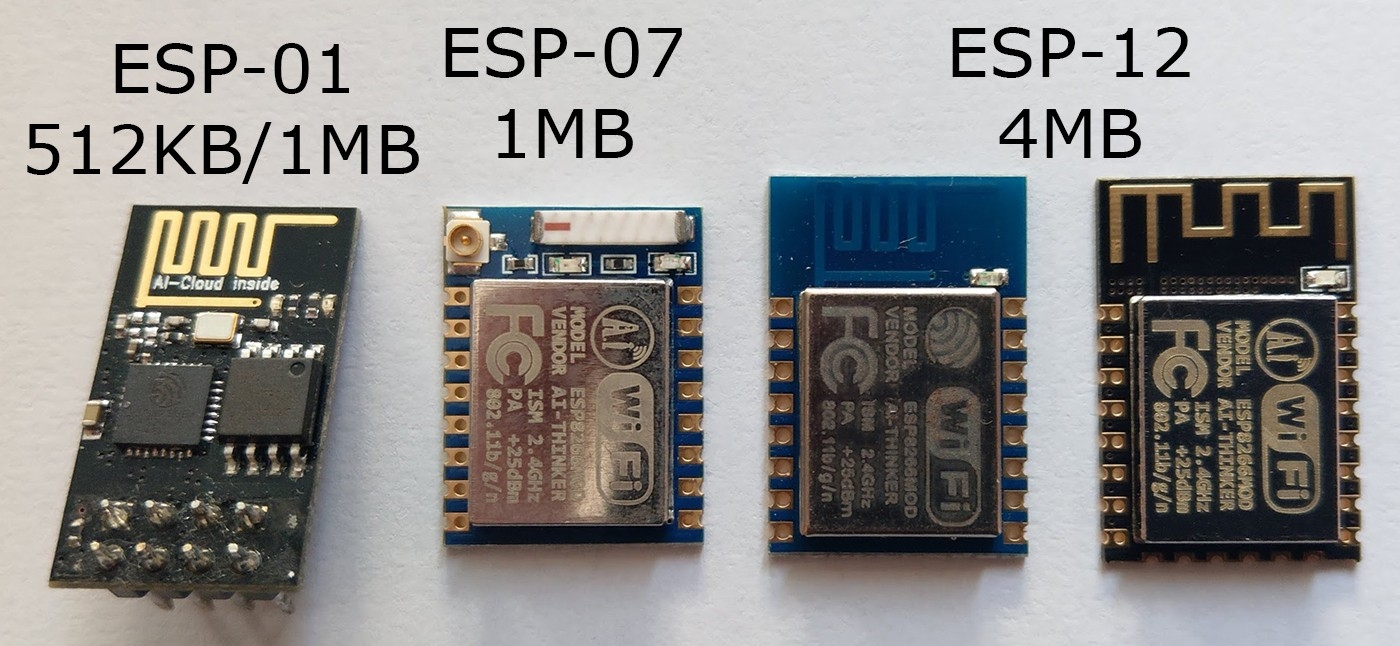
The ESP-12 (which is used on most development boards like the NodeMCU) has 4MB of flash memory.
Other Modules like the ESP-01 and ESP-07 (the one with the antenna connector) come with only 1MB of memory.
You have to change your upload settings depending on the module you're using.
For compiling we recommend to use either 1M (256K SPIFFS) or 4M (3M SPIFFS).
It is also very important to note, that you must give the SPIFFS some memory. This software will only work with the SPIFFS enabled, otherwise you will see something like Initializing SPIFFS...ERROR on startup.