Arch Linux Install Script (or alis, also known as the Arch Linux executable installation guide and wiki) installs an unattended, automated and customized Arch Linux system.
alis is a simple Bash script developed from many Arch Linux Wiki pages that fully automates the installation of an Arch Linux system after booting from the original Arch Linux installation media.
It contains the same commands that you would type and execute one by one interactively to complete the installation. The only user intervention needed is to edit a configuration file to choose the installation options and preferences from partitioning, to encryption, bootloader, file system, language and keyboard mapping, desktop environment, kernels, packages to install and graphic drivers. This automation makes the installation easy and fast, as fast as your internet connection allows.
If some time later after a system update, for any reason the system does not boot correctly, a recovery script is also provided to enter into a recovery mode that allows you to downgrade packages or execute any other commands to restore the system. Also, a log of the installation can be taken with asciinema.
A simple powerful Bash based script for an unattended, easy and fast way to install Arch Linux.
Boot. Get. Configure. Install. Enjoy.
Warning! This script can delete all partitions of the persistent storage. It is recommended to test it first in a virtual machine like VirtualBox.
Currently these scripts are for me, but maybe they are useful for you too.
Follow the Arch Way of doing things and learn what this script does. This will allow you to know what is happening.
Please, don't ask for support for this script in Arch Linux forums, first read the Arch Linux wiki, the Installation Guide and the General Recommendations, later compare those commands with the commands of this script.
For new features, improvements and bugs, fill an issue in GitHub or make a pull request. You can test it in a virtual machine (strongly recommended) like VirtualBox before you run it in real hardware. If you test it in real hardware, please send me an email to [email protected] with the machine description and tell me if something goes wrong or all works fine. Pull request and new feature request are welcome!
Arch Linux Install Script (alis) is based on Arch Linux but is NOT approved, sponsored, or affiliated with Arch Linux or its related projects.
- Principles
- Features
- System installation
- Package installation
- Recovery
- SSH install and cloud-init
- Screenshots
- Video
- How you can help
- Media reference
- Alternatives
- Test in VirtualBox with Packer
- Arch Linux Installation Media
- Reference
- Use the original Arch Linux installation media
- As unattended and automated as possible, requires as little interactivity as possible
- Allow to customize the installation to cover the most common cases
- Provide support for system recovery
- Provide support for installation log
- Use sane configuration default values
- System: UEFI, BIOS
- Storage: SATA, NVMe and MMC
- Encryption: root partition encrypted and no encrypted
- Partition: no LVM, LVM, LVM on LUKS, GPT on UEFI, MBR on BIOS, custom partition scheme and mountpoints
- File system: ext4, btrfs (with subvols), xfs, f2fs, reiserfs
- Kernels: linux, linux-lts, linux-hardened, linux-zen. Supports Unified Kernel Image (UKI).
- Desktop environment: GNOME, KDE, XFCE, Mate, Cinnamon, LXDE, i3-wm, i3-gaps, Deepin, Budgie, Bspwm, Awesome, Qtile, Openbox, Leftwm, Dusk
- Display managers: GDM, SDDM, Lightdm, lxdm
- Graphics controller: intel, nvidia and amd with optionally early KMS start. With intel optionally fastboot, hardware video acceleration and framebuffer compression.
- Bootloader: GRUB, rEFInd, systemd-boot, efistub
- Custom shell: bash, zsh, dash, fish
- WPA WIFI network installation
- Periodic TRIM for SSD storage
- Intel and AMD processors microcode
- Optional swap file
- PipeWire support
- Secure Boot support
- Kernel compression and custom parameters
- Users creation and add to sudoers
- systemd units enable or disable
- systemd-homed support
- systemd GPT partition automounting support
- Multilib support
- Files provision support
- VirtualBox guest additions and VMware tools support
- SSH install and cloud-init support
- Arch Linux custom packages installation and repositories installation
- Flatpak utility installation and Flatpak packages installation
- SDKMAN utility installation and SDKMAN packages installation
- AUR utility installation (paru, yay, aurman) and AUR packages installation
- Packages installation after base system installation (preferred way of packages installation)
- Script for download installation and recovery scripts and configuration files
- Retry packages download on connection/mirror error
- Packer support for testing in VirtualBox
- Installation log with all commands executed and output in a file and/or asciinema video
- Wait after installation for an abortable reboot
- Use your own configuration
- Bash scripts validated by Shellcheck
Download and boot from the latest original Arch Linux installation media. After boot use the following commands to start the installation.
Follow the Arch Way of doing things and learn what this script does. This will allow you to know what is happening.
Internet connection is required, with wireless WIFI connection see Wireless_network_configuration to bring up WIFI connection before start the installation.
Minimum usage
#                         # Start the system with latest Arch Linux installation media
# loadkeys [keymap]       # Load keyboard keymap, eg. loadkeys es, loadkeys us, loadkeys de
# curl -sL https://raw.githubusercontent.com/picodotdev/alis/main/download.sh | bash       # Download alis scripts
# vim alis.conf           # Edit configuration and change variables values with your preferences (system configuration)
# ./alis.sh               # Start installation
Advanced usage
#                         # Start the system with latest Arch Linux installation media
# loadkeys [keymap]       # Load keyboard keymap, eg. loadkeys es, loadkeys us, loadkeys de
# iwctl --passphrase "[WIFI_KEY]" station [WIFI_INTERFACE] connect "[WIFI_ESSID]"          # (Optional) Connect to WIFI network. _ip link show_ to know WIFI_INTERFACE.
# curl -sL https://raw.githubusercontent.com/picodotdev/alis/main/download.sh | bash       # Download alis scripts
# # curl -sL https://git.io/JeaH6 | bash                                                   # Alternative download URL with URL shortener
# # curl -sL https://raw.githubusercontent.com/picodotdev/alis/main/download.sh | bash -s -- -h [HASH_COMMIT] # Use specific version of the script based on the commit hash
# ./alis-asciinema.sh     # (Optional) Start asciinema video recording
# vim alis.conf           # Edit configuration and change variables values with your preferences (system configuration)
# vim alis-packages.conf  # (Optional) Edit configuration and change variables values with your preferences (packages to install)
#                         # (The preferred way to install packages is after system installation, see Packages installation)
# ./alis.sh               # Start installation
# ./alis-reboot.sh        # (Optional) Reboot the system, only necessary when REBOOT="false"
After the base Arch Linux system is installed, alis can install packages with pacman, Flatpak, SDKMAN and from AUR.
#                                  # After system installation start a user session
# curl -sL https://raw.githubusercontent.com/picodotdev/alis/main/download.sh | bash       # Download alis scripts
# # curl -sL https://git.io/JeaH6 | bash                                                   # Alternative download URL with URL shortener
# ./alis-packages-asciinema.sh     # (Optional) Start asciinema video recording
# vim alis-packages.conf           # Edit configuration and change variables values with your preferences (packages to install)
# ./alis-packages.sh               # Start packages installation
Boot from the latest original Arch Linux installation media. After boot use the following commands to start the recovery, this will allow you to enter in the arch-chroot environment.
#                                  # Start the system with latest Arch Linux installation media
# loadkeys [keymap]                # Load keyboard keymap, eg. loadkeys es, loadkeys us, loadkeys de
# iwctl --passphrase "[WIFI_KEY]" station [WIFI_INTERFACE] connect "[WIFI_ESSID]"          # (Optional) Connect to WIFI network. _ip link show_ to know WIFI_INTERFACE.
# curl -sL https://raw.githubusercontent.com/picodotdev/alis/main/download.sh | bash       # Download alis scripts
# # curl -sL https://git.io/JeaH6 | bash                                                   # Alternative download URL with URL shortener
# ./alis-recovery-asciinema.sh     # (Optional) Start asciinema video recording
# vim alis-recovery.conf           # Edit configuration and change variables values with your last installation configuration with alis (mainly device and partition scheme)
# ./alis-recovery.sh               # Start recovery
# ./alis-recovery-reboot.sh        # Reboot the system
SSH install and cloud-init allows to install Arch Linux unattended and automated way in local virtual machines and cloud environments.
Build the cloud-init ISO, mount it in the VM along side the official Arch Linux installation media, start the VM and get its IP address.
$ ./alis-cloud-init-iso.sh
SSH to the VM.
$ ./alis-cloud-init-ssh.sh -i "${IP_ADDRESS}"
Or, start a unattended installation with the provided configuration.
$ ./alis-cloud-init-ssh.sh -i "${IP_ADDRESS}" -c "alis-config-efi-ext4-systemd.sh"
Once the installation ends, you will have a ready to use system with your choosen preferences including all the free software latest version you wish to do produtive task from browsing, multimedia and office programs, to programming languages, compilers and server software and tools for creative and artistic tasks.
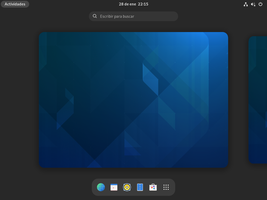
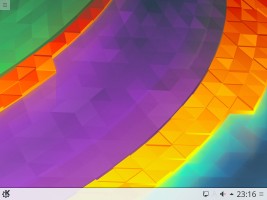
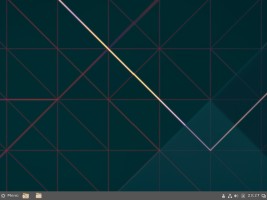
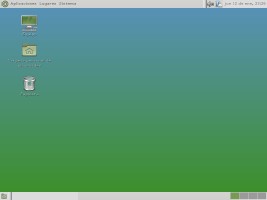
These are some desktop environments that can be installed.
Arch Linux base installation installed in less than 4 minutes with a fiber internet connection and a NVMe SSD. Don't trust me? See the video.
Type the system installation commands and wait to the installation complete. After a reboot the system is ready to use and customized with your choosen preferences.
- Test in VirtualBox and create an issue if something does not work, attach the main parts of the used configuration file and the error message
- Create issues with new features
- Send pull requests
- Share it in social networks, forums, create a blog post or video about it
- Send me an email, I like to read that the script is being used and is useful :). Which are your computer specs, which is your alis configuration, if is your personal or working computer, if all worked fine or some suggestion to improve the script
- 2022.01 Arch + Alis, Arco Linux (video playlist)
- 2020.07 Arch installer - alis
- 2019.06 Arch Linux OS Challenge: Install Arch 'The Easy Way' With These 2 Alternative Methods
There are other quite good similar projects that can be used as alternative to install a vanilla Arch Linux without any additions.
- Arch Installer (archinstall) (maybe is the most relevant as is included in the official installation media)
- archfi
- Archlinux Ultimate Installer (aui) (only accepts patches)
Also, if you prefer to install an Arch Linux using a guided graphical installer you can choose an Arch based distribution.
Also and recommended for new Arch Linux newcomers to follow the Arch Way of doing things is a good way to use and learn about Arch. There are many guides out there, the official Arch Linux installation guide the first one. These are other good ones that explains step by step from instalation media creation to first boot and programs installation, all the necessary to start.
VirtualBox and Packer are required.
- Firmware: efi, bios
- File system: ext4, btrfs, f2fs, xfs
- Partition: luks, lvm
- Bootloader: grub, refind, systemd
- Desktop environment: gnome, kde, xfce, ...
$ ./alis-packer.sh -c alis-packer-efi-ext4-systemd.sh
$ ./alis-packer.sh -c alis-packer-efi-ext4-systemd-gnome.sh
$ ./alis-packer.sh -c alis-packer-efi-ext4-luks-lvm-grub.sh
$ ./alis-packer.sh -c alis-packer-efi-btrfs-luks-lvm-systemd.sh
$ ./alis-packer.sh -c alis-packer-efi-f2fs-luks-lvm-systemd.sh
$ ./alis-packer.sh -c alis-packer-efi-ext4-grub-gnome.sh
$ ./alis-packer.sh -c alis-packer-efi-ext4-grub-kde.sh
$ ./alis-packer.sh -c alis-packer-efi-ext4-grub-xfce.sh
https://www.archlinux.org/download/
- https://archlinux.org/pacman/pacman.conf.5.html#_repository_sections
- https://gitlab.archlinux.org/archlinux/archiso/-/blob/master/configs/releng/packages.x86_64
- https://tldp.org/LDP/abs/html/
- https://tldp.org/LDP/Bash-Beginners-Guide/html/
- https://wiki.archlinux.org/title/AMDGPU
- https://wiki.archlinux.org/title/Arch_User_Repository
- https://wiki.archlinux.org/title/ATI
- https://wiki.archlinux.org/title/Awesome
- https://wiki.archlinux.org/title/Bluetooth
- https://wiki.archlinux.org/title/Bspwm
- https://wiki.archlinux.org/title/Btrfs
- https://wiki.archlinux.org/title/Budgie
- https://wiki.archlinux.org/title/Category:Boot_loaders
- https://wiki.archlinux.org/title/Cloud-init
- https://wiki.archlinux.org/title/Command-line_shell
- https://wiki.archlinux.org/title/Deepin_Desktop_Environment
- https://wiki.archlinux.org/title/Desktop_environment
- https://wiki.archlinux.org/title/Dm-crypt
- https://wiki.archlinux.org/title/Dm-crypt/Device_encryption
- https://wiki.archlinux.org/title/Dm-crypt/Encrypting_an_entire_system
- https://github.com/bakkeby/dusk
- https://wiki.archlinux.org/title/EFI_System_Partition
- https://wiki.archlinux.org/title/Ext4
- https://wiki.archlinux.org/title/F2FS
- https://wiki.archlinux.org/title/File_systems
- https://wiki.archlinux.org/title/Fstab
- https://wiki.archlinux.org/title/General_recommendations
- https://wiki.archlinux.org/title/GNOME
- https://wiki.archlinux.org/title/GRUB
- https://wiki.archlinux.org/title/Hardware_video_acceleration
- https://wiki.archlinux.org/title/I3
- https://wiki.archlinux.org/title/Install_Arch_Linux_via_SSH
- https://wiki.archlinux.org/title/Installation_guide
- https://wiki.archlinux.org/title/Intel_graphics
- https://wiki.archlinux.org/title/Intel_NUC
- https://wiki.archlinux.org/title/KDE
- https://wiki.archlinux.org/title/Kernel_mode_setting
- https://wiki.archlinux.org/title/Kernel_parameters
- https://wiki.archlinux.org/title/Kernels
- https://wiki.archlinux.org/title/LeftWM
- https://wiki.archlinux.org/title/List_of_applications
- https://wiki.archlinux.org/title/LVM
- https://wiki.archlinux.org/title/Main_page
- https://wiki.archlinux.org/title/Microcode
- https://wiki.archlinux.org/title/Mirrors
- https://wiki.archlinux.org/title/Mkinitcpio
- https://wiki.archlinux.org/title/Network_configuration
- https://wiki.archlinux.org/title/NetworkManager
- https://wiki.archlinux.org/title/Nouveau
- https://wiki.archlinux.org/title/NVIDIA
- https://wiki.archlinux.org/title/Openbox
- https://wiki.archlinux.org/title/Pacman
- https://wiki.archlinux.org/title/Partitioning
- https://wiki.archlinux.org/title/Persistent_block_device_naming
- https://wiki.archlinux.org/title/PipeWire
- https://wiki.archlinux.org/title/Qtile
- https://wiki.archlinux.org/title/REFInd
- https://wiki.archlinux.org/title/Reflector
- https://wiki.archlinux.org/title/Unified_Extensible_Firmware_Interface/Secure_Boot
- https://wiki.archlinux.org/title/Solid_state_drive/NVMe
- https://wiki.archlinux.org/title/Solid_State_Drives
- https://wiki.archlinux.org/title/Swap
- https://wiki.archlinux.org/title/Systemd
- https://wiki.archlinux.org/title/Systemd#GPT_partition_automounting
- https://wiki.archlinux.org/title/Systemd-boot
- https://wiki.archlinux.org/title/Systemd-homed
- https://wiki.archlinux.org/title/Unified_Extensible_Firmware_Interface
- https://wiki.archlinux.org/title/VirtualBox
- https://wiki.archlinux.org/title/Wayland
- https://wiki.archlinux.org/title/Wireless_network_configuration
- https://wiki.archlinux.org/title/Wireless_network_configuration#Connect_to_an_access_point
- https://wiki.archlinux.org/title/Xfce
- https://wiki.archlinux.org/title/XFS
- https://wiki.archlinux.org/title/Xorg


