- Review sound classifier
- Understand the communication between p5 sketch, Teachable Machine models and the Arduino board.
- What is serial communication?
void setup() {
  // initialize digital pin LED_BUILTIN as an output.
  pinMode(2, OUTPUT);
}

// the loop function runs over and over again forever
void loop() {
  digitalWrite(2, HIGH);   // turn the LED on (HIGH is the voltage level)
  delay(1000);                       // wait for a second
  digitalWrite(2, LOW);    // turn the LED off by making the voltage LOW
  delay(1000);                       // wait for a second
}
https://teachablemachine.withgoogle.com/models/80pkk7maP/
- Download Arduino IDE
- Download p5 serial app (Don't open the app yet)
- Run p5 code in p5 web editor sketch (Remember to update the portName and mySoundModelURL, and update class names to your own classes.)
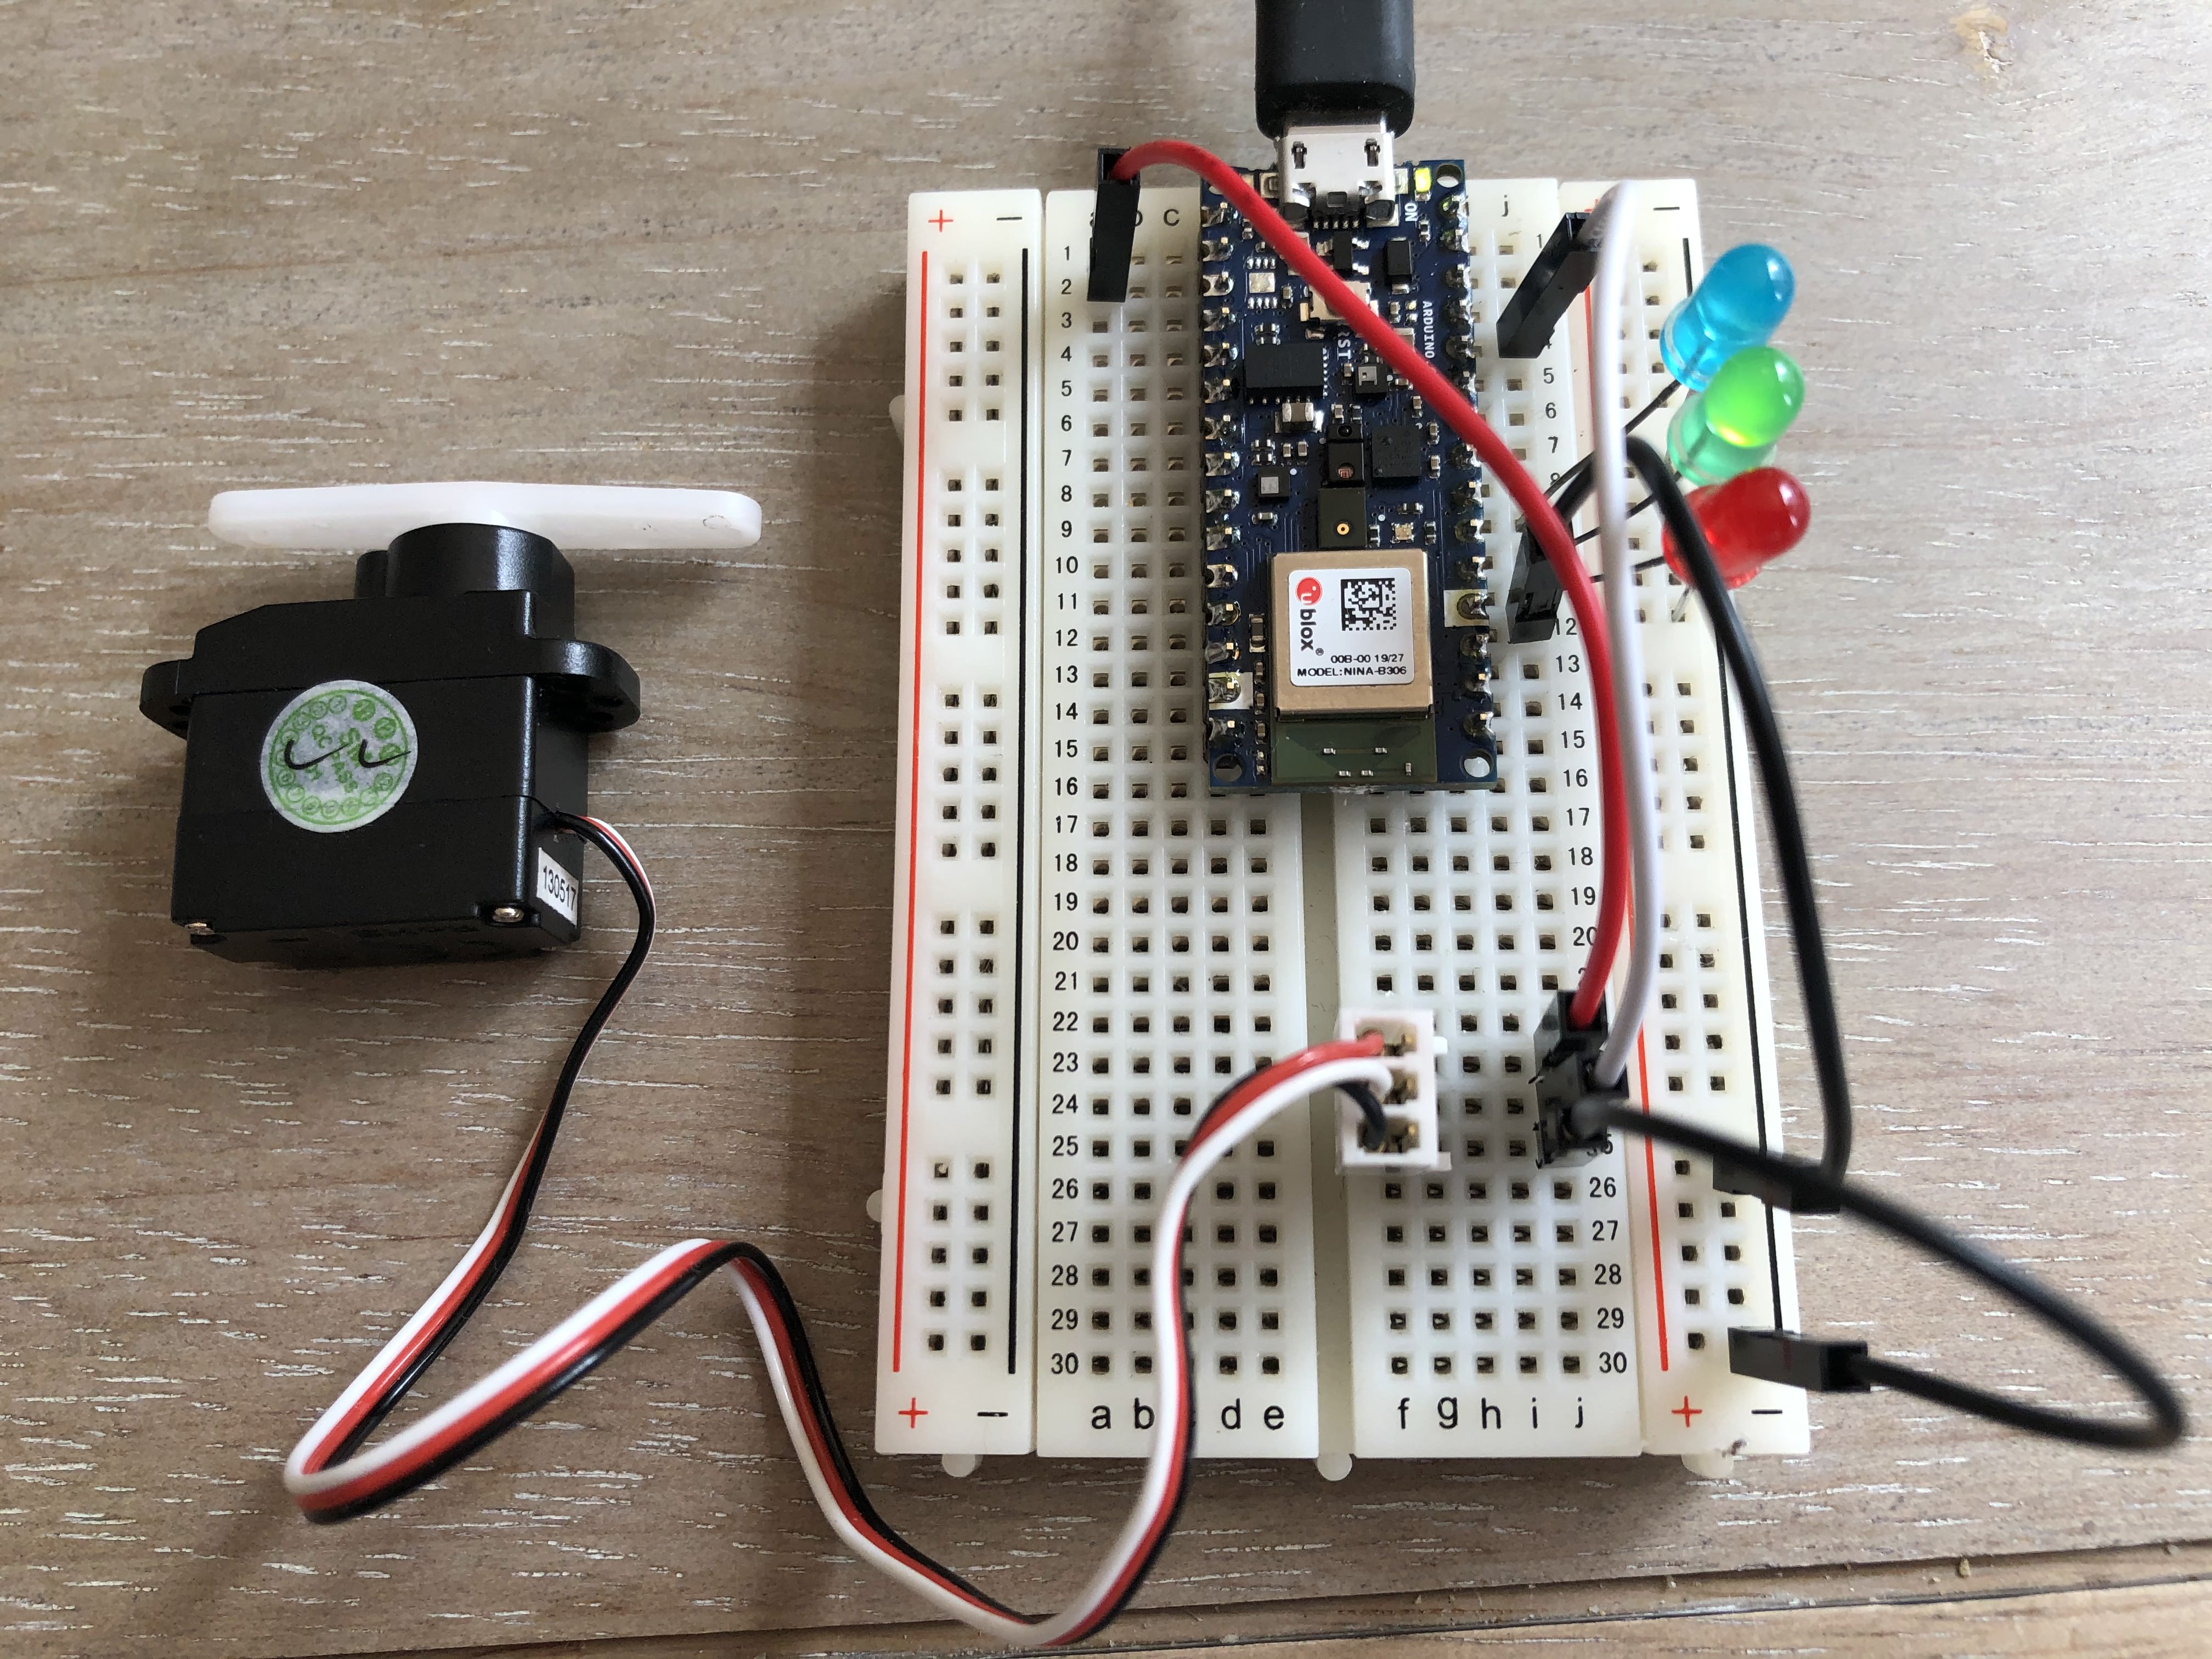
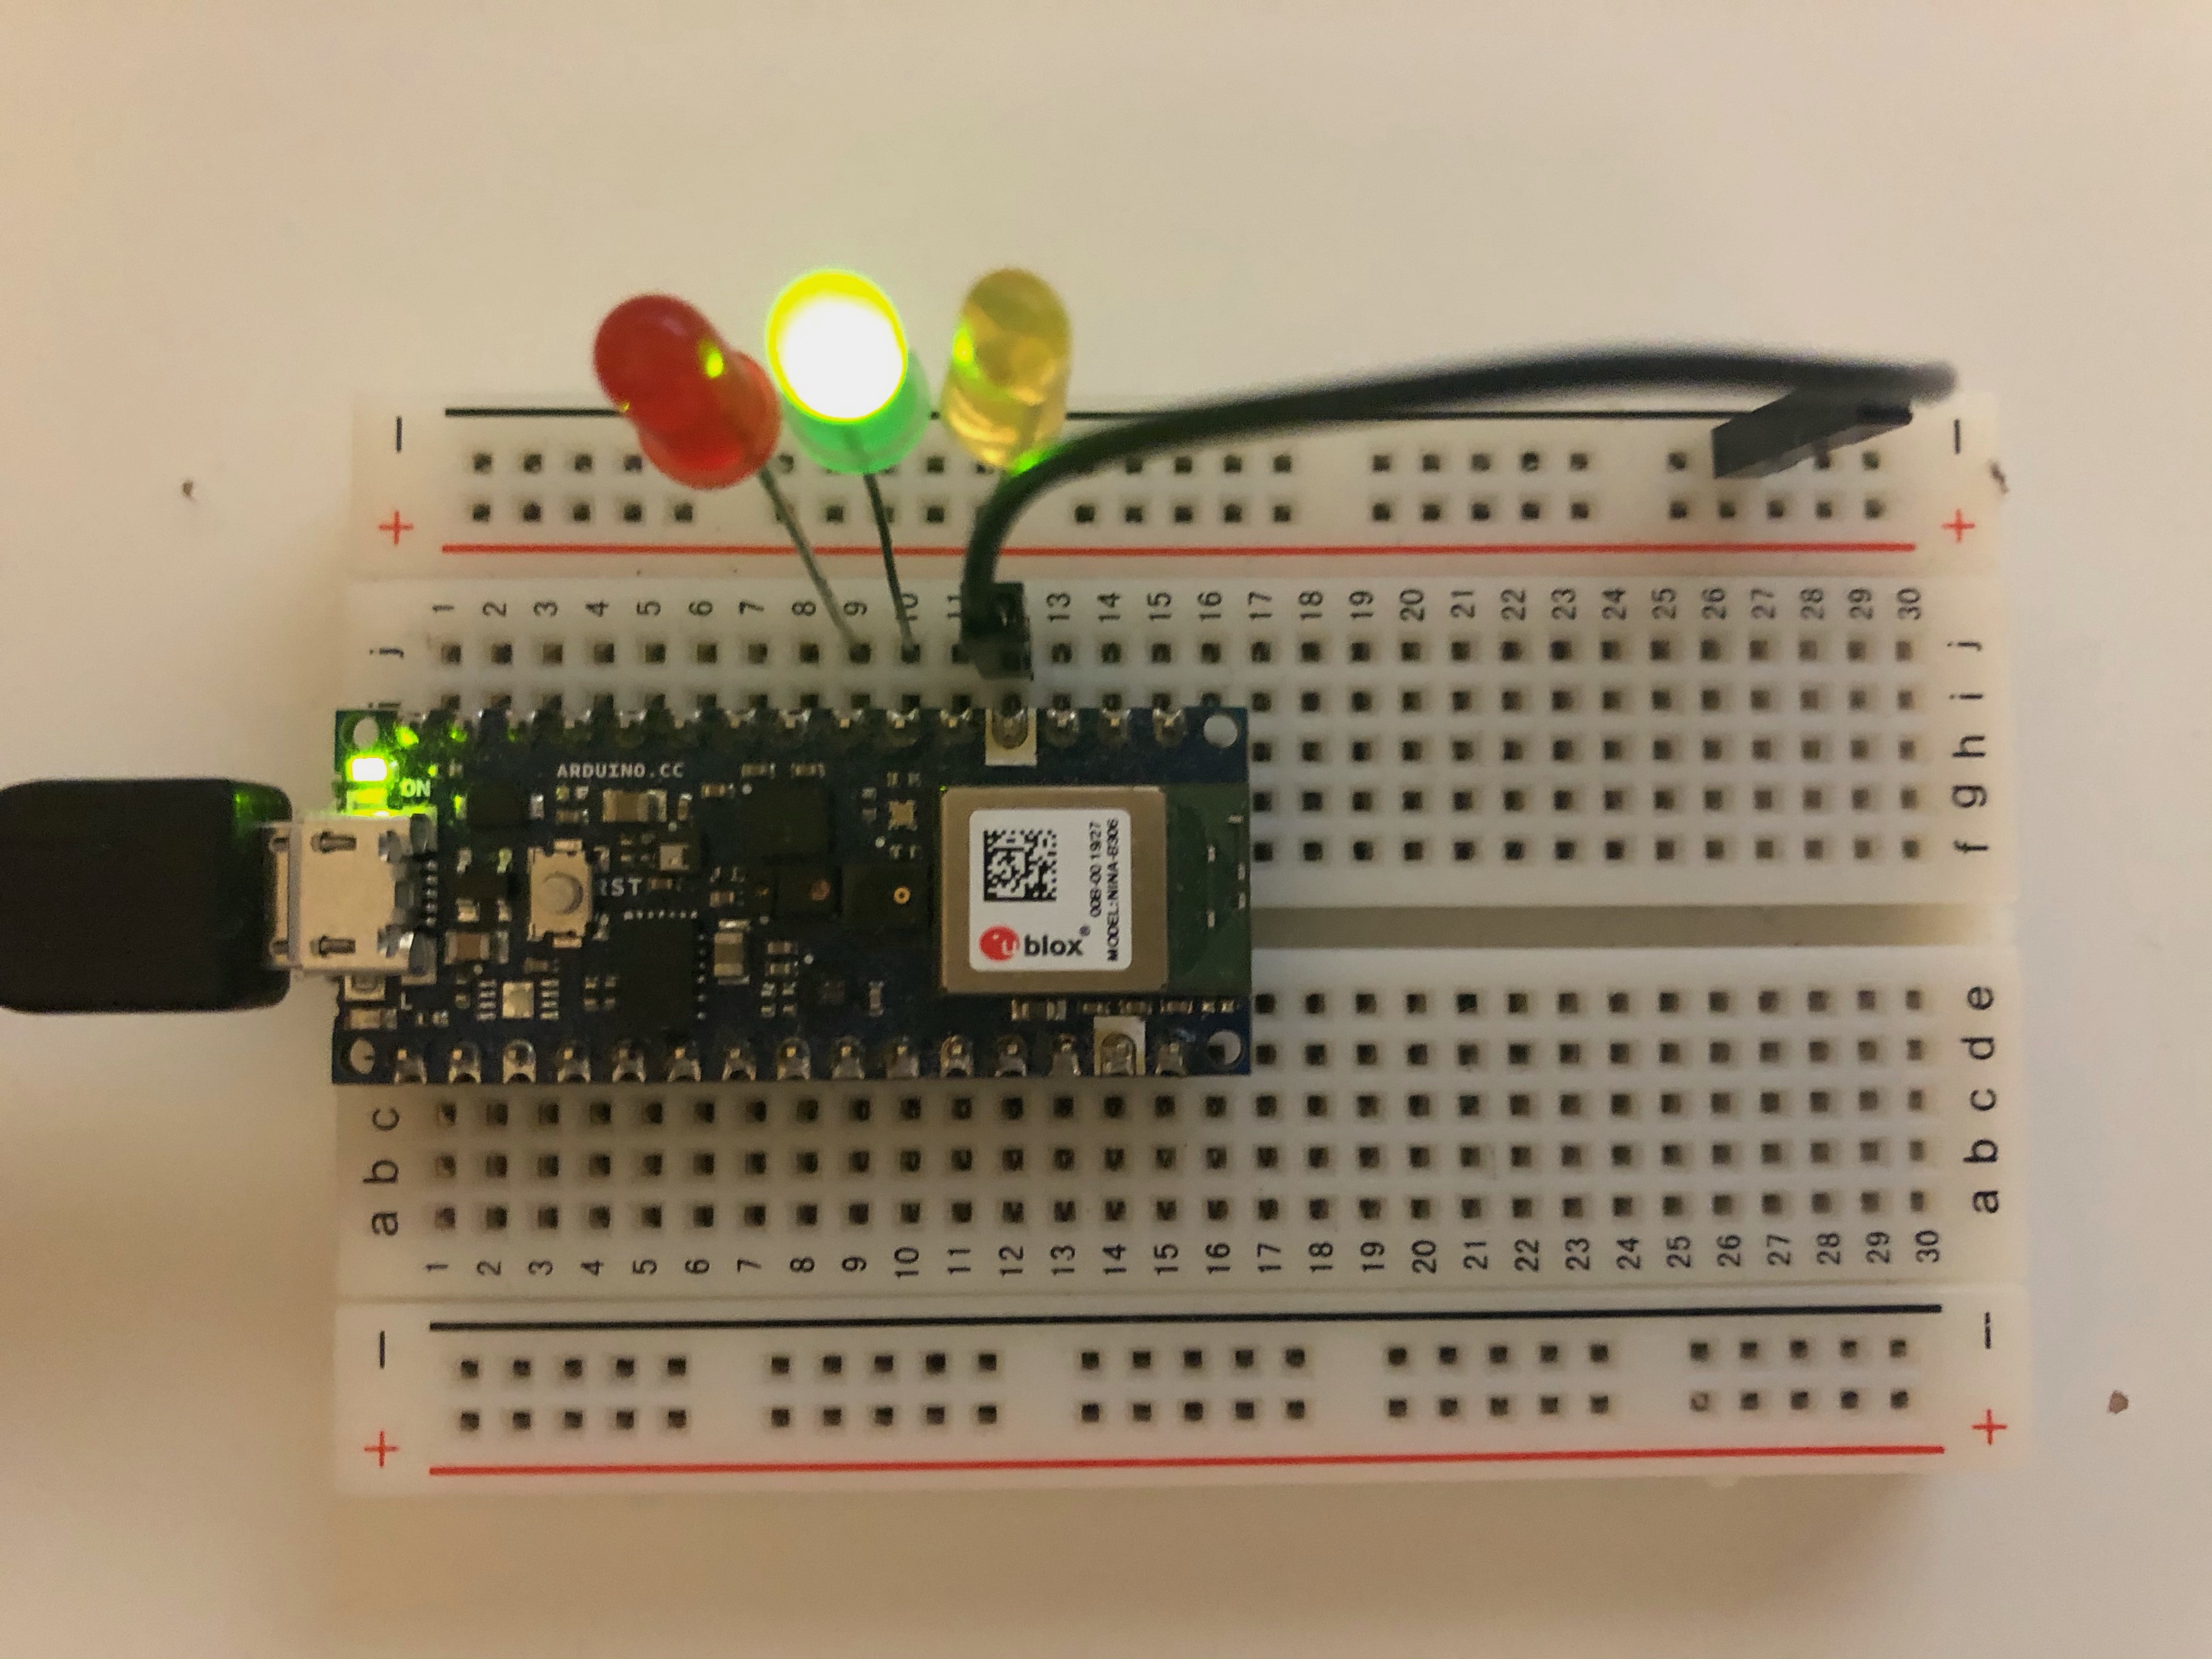
- Build the arduino circuit like the image above
- Upload Arduino code to the Arduino board, You can find here
- Open p5 serial app(don't open any port in the p5 serial app, just keep the app open)
- Go back to p5 web editor, test if p5 sketch and arduino can communicate.
- Upload the Arduino Sketch to the Arduino board
- Running p5 sketch, remember to update the
portNameandmySoundModelURL, and update class names to your own classes. - Video Demo
- Circuit
- Connect D2,3,4 to 3 LEDs
- Connect servo signal pin to D9. More about how to use servo motor with arduino.

- Running this p5 sketch on p5 web editor, remember to update the
portNameandmyImageModelURL, and update class names to your own classes. - Video Demo
- Running this p5 sketch on p5 web editor, remember to update the
portNameandposeModelUrl, and update class names to your own classes. - Video Demo
- How to use p5 serial
- Tips for p5 serial
- Download the app here
- Get the port name right
- The models works in p5 web editor, but my LEDs are not lighted up
- Light up LEDs in the arduino code directly to test if there is anything wrong with the LEDs.
- Make sure p5 serial is working: There shouldn't be any error in the console. The p5 serial app should be open, but do NOT connect to the port inside of the p5 serial app, otherwise p5 serial app will be using the port, then p5 web editor cannot use the port.
- You can find your portname in the p5 serial app. But there is no need to connect to the port in the p5 serial app.
- When you are re-uploading Arduino sketch, you need to stop p5 sketch in the editor and close the p5 serial app.
- Sound Classifier Speechcommand
- Image Classifier with Teachable Machine
- Sound Classifer with Teachable Machine
- Pose Classifier with Teachable Machine
- p5 Speech Continuous Recognition
- p5 Speech Single Recognition
- p5 Speech Speech Synthesis
- PitchDetection, https://editor.p5js.org/ml5/sketches/PitchDetection
- PitchDetection Game, https://editor.p5js.org/ml5/sketches/PitchDetection_Game
- PitchDetection Piano, https://editor.p5js.org/ml5/sketches/PitchDetection_Piano
- Sound Classifier with Teachable Machine and show gifs
Video
-
Our clap model: https://teachablemachine.withgoogle.com/models/dTlZ9kVJ5/
-
Pose regression: https://www.youtube.com/watch?v=lob74HqHYJ0
-
https://itp.nyu.edu/physcomp/labs/labs-serial-communication/lab-webserial-output-from-p5-js/
Coding
- Build an interactive browser experiment related to sound/image/pose/hand data, with an Arduino component.
- Document your p5.js sketch in a blog post and add a link to the post / your p5 sketch on the homework wiki. In your blog post, include visual documentation such as a recorded screen capture / video / GIFs of your sketch.

