-
-
Notifications
You must be signed in to change notification settings - Fork 637
Notifiers

Statping includes multiple Notifiers to alert you when your services are offline. You can also create your own notifier and send a Push Request to this repo! Creating a custom notifier is pretty easy as long as you follow the requirements. A notifier will automatically be installed into the users Statping database, and form values will save without any hassles. 💃
Example Code | Events | View Notifiers
- Must have a unique
METHODname - Struct must have
*notifier.Notificationpointer in it. - Must create and add your notifier variable in
init() - Should have a form for user to input their variables/keys.
Form: []notifier.NotificationForm
Statping has the Notifier interface which you'll need to include in your notifier. Statping includes many other events/triggers for your notifier, checkout Notifier Events to see all of them.
// Notifier interface is required to create a new Notifier
type Notifier interface {
        // OnSuccess is triggered when a service is successful
	OnSuccess(*services.Service) error
        // OnFailure is triggered when a service is failing
	OnFailure(*services.Service, *failures.Failure) error
        // OnTest is triggered for testing
	OnTest() (string, error)
}
var example = &Example{¬ifier.Notification{
Method: "example", // unique method name
Host: "http://exmaplehost.com", // default 'host' field
Form: []notifier.NotificationForm{{
Type: "text", // text, password, number, or email
Title: "Host", // The title of value in form
Placeholder: "Insert your Host here.", // Optional placeholder in input
DbField: "host", // An accepted DbField value (read below)
}},
}Include a form with your notifier so other users can save API keys, username, passwords, and other values.
// NotificationForm contains the HTML fields for each variable/input you want the notifier to accept.
type NotificationForm struct {
	Type        string `json:"type"`        // the html input type (text, password, email)
	Title       string `json:"title"`       // include a title for ease of use
	Placeholder string `json:"placeholder"` // add a placeholder for the input
	DbField     string `json:"field"`       // true variable key for input
	SmallText   string `json:"small_text"`  // insert small text under a html input
	Required    bool   `json:"required"`    // require this input on the html form
	IsHidden    bool   `json:"hidden"`      // hide this form element from end user
	IsList      bool   `json:"list"`        // make this form element a comma separated list
	IsSwitch    bool   `json:"switch"`      // make the notifier a boolean true/false switch
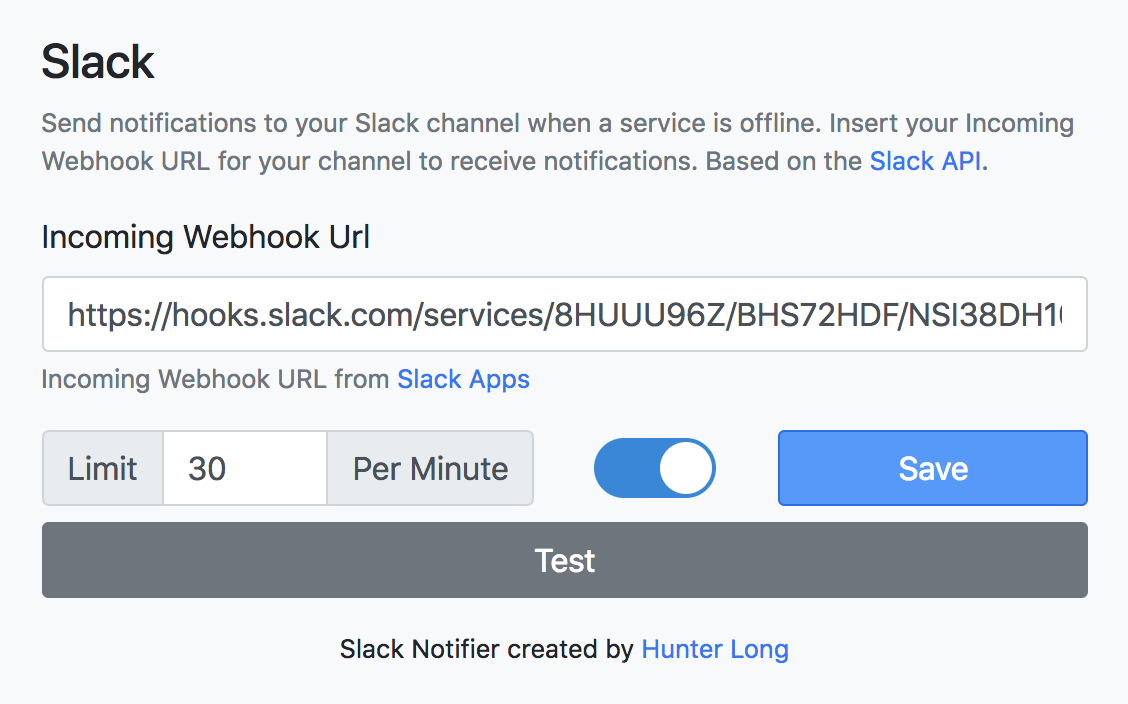
}This is the Slack Notifier Form fields.
Form: []notifier.NotificationForm{{
		Type:        "text",
		Title:       "Incoming webhooker Url",
		Placeholder: "Insert your slack webhook URL here.",
		SmallText:   "Incoming webhooker URL from <a href=\"https://api.slack.com/apps\" target=\"_blank\">slack Apps</a>",
		DbField:     "Host",
		Required:    true,
	}}
}The notifier.NotificationForm has a field called DbField which is the column to save the value into the database. Below are the acceptable DbField string names to include in your form.
-
hostused for a URL or API endpoint -
usernameused for a username -
passwordused for a password -
portused for a integer port number -
api_keyused for some kind of API key -
api_secretused for some API secret -
var1used for any type of string -
var2used for any type of string (extra)
You can completely custom your notifications to include a detailed form.
-
Typeis a HTML input type for your field -
Titlegive your input element a title -
Placeholderoptional field if you want a placeholder in input -
DbFieldrequired field to save variable into database (read above) -
Placeholderoptional field for inserting small hint under the input
To add a notifier to the Statping application, simply append your Notifier in the AttachNotifiers() function inside of core/core.go.
// AttachNotifiers will attach all the notifier's into the system
func AttachNotifiers() error {
	return notifier.AddNotifiers(
		notifiers.Command,
		notifiers.Discorder,
		notifiers.Emailer,
		notifiers.LineNotify,
		notifiers.Mobile,
		notifiers.Slacker,
		notifiers.Telegram,
		notifiers.Twilio,
		notifiers.Webhook,
	)
}Statping.com | Demo | Docker | Notifiers | API


