HOW TO
This short tutorial will show you how to utilize most basic scenarios with NavMeshPlus. To begin with, lanch Unity and crate new project from 2D Template. Add Tilemap to the scene, add three of them and call Ground, Walls and Pond. Import sprites that will be used as palette. For example 3 solid colored sprites. Create new palette and drag your imported sprites
Paint your ground in any mean. For example by solid "green" brush. Change "Active Tile Map" in palette to "Walls", paint some obstacles, than select "Pond" and draw body of water.
Download NavMeshPlus and copy NavMeshComponents into your asset folder. Now add EmptyObject in the root, rotate (-90;0;0), call it "NavMesh", add NavMeshSurface2d component to it. Open grid, select "Walls", add NavMeshModifier component. Select "NavMesh", in inspector hit "Bake".

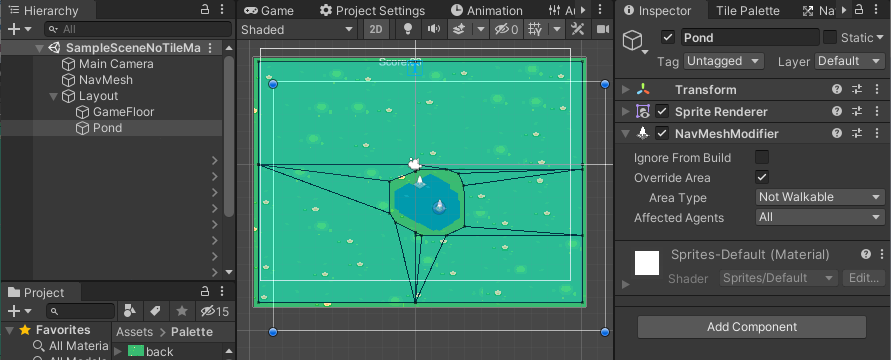
As you see all area is walkable. Lets override it, in NavMeshModifier component select Override Area - Not Walkable and hit bake. Areas will be carved out

Now add NavMeshModifier Component to "Pond" Tilemap, override area with your area type, and bake again. Now pound is also carved out form mesh.
Add NavMeshAgents and details, be aware that agent tend to rotate game object, that can be undesirable, so you should fix its rotation:
	void Start()	{
		var agent = GetComponent<NavMeshAgent>();
		agent.updateRotation = false;
		agent.updateUpAxis = false;
	}
Add this on Start for every of agents, and you ready to chase with obstacle avoidance
Some games want to use hexagonal or isometric grid, or even diamond grid. NamMeshPlus can be done in other types of grid as well. But only if spites has a shape of a grid.
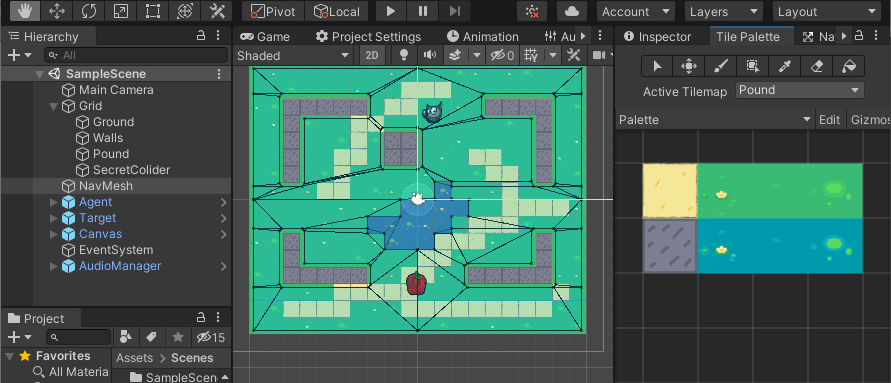
But in some cases sprite can be differ from grid and we want clean navigation though tile. To do that we override all tiles with a grid. First we need to have a mesh that has a form of a tile. Import mesh for hexagon tile (use blender or any other 3D software):
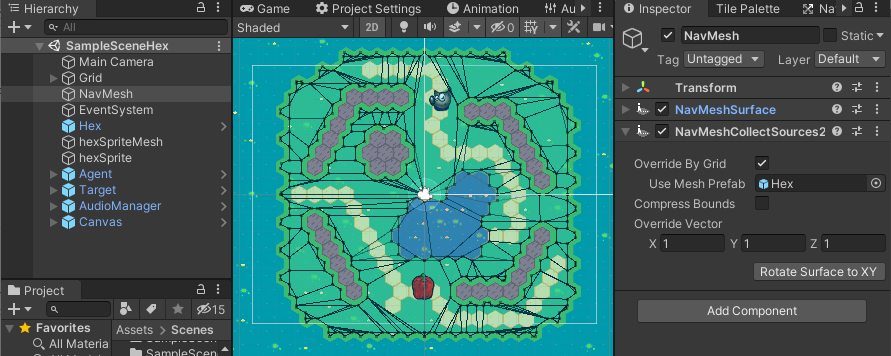
Add your hexagon to the scene and rotate it to face, and scale down to cell size:

Check "Override By Grid" and all tiles will have a shape of used prefab. Even if this option disabled, all sprites wihtout proper mesh will be substituted with used one.
If we remove prefab and leave override option, all tiles will be considered as squares images/Grid-05.png
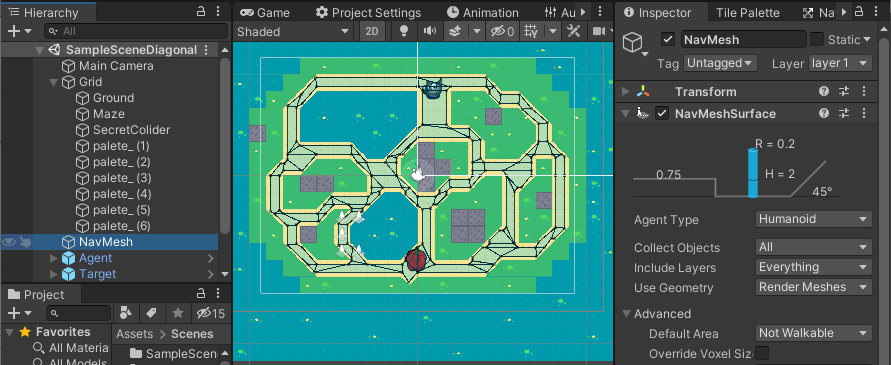
Other common task is not to carveout obstacles, but to navigate trough maze, where we can folow only strict path. To do that Bake with Default Area - Not Walkable, and NamMeshModifier - Walkable, and you will get this:
Any sprite in the Grid object with NavMeshMdifier will be added into bake process (sprite sgould have mesh). You can build bridges or baricades. Those object added into NavMesh as static data.
Enjoy "fully featured" 2D run and chase game "RedHotSweetPeper"

References:
- NavMeshSurface - https://docs.unity3d.com/Manual/class-NavMeshSurface.html
- NavMeshSurface2d - https://github.com/h8man/NavMeshPlus
- The Game Demo - https://github.com/h8man/RedHotSweetPepper
- Forum to discuss - https://forum.unity.com/threads/2d-navmesh-pathfinding.503596/