【webpack进阶系列】构建module流程 #99
Labels
Comments
|
good |
|
您好,我已经收到信件,我会尽快处理的……祝快乐每一天。
|
Sign up for free
to join this conversation on GitHub.
Already have an account?
Sign in to comment
在【webpack进阶系列】核心原理与流程中我们顺着webpack的核心脉络走了一遍
run的流程,本篇我们详细读一下webpack如何从入口entry找到所有的依赖,并转为module的总览
下图为本篇文章的总览流程图
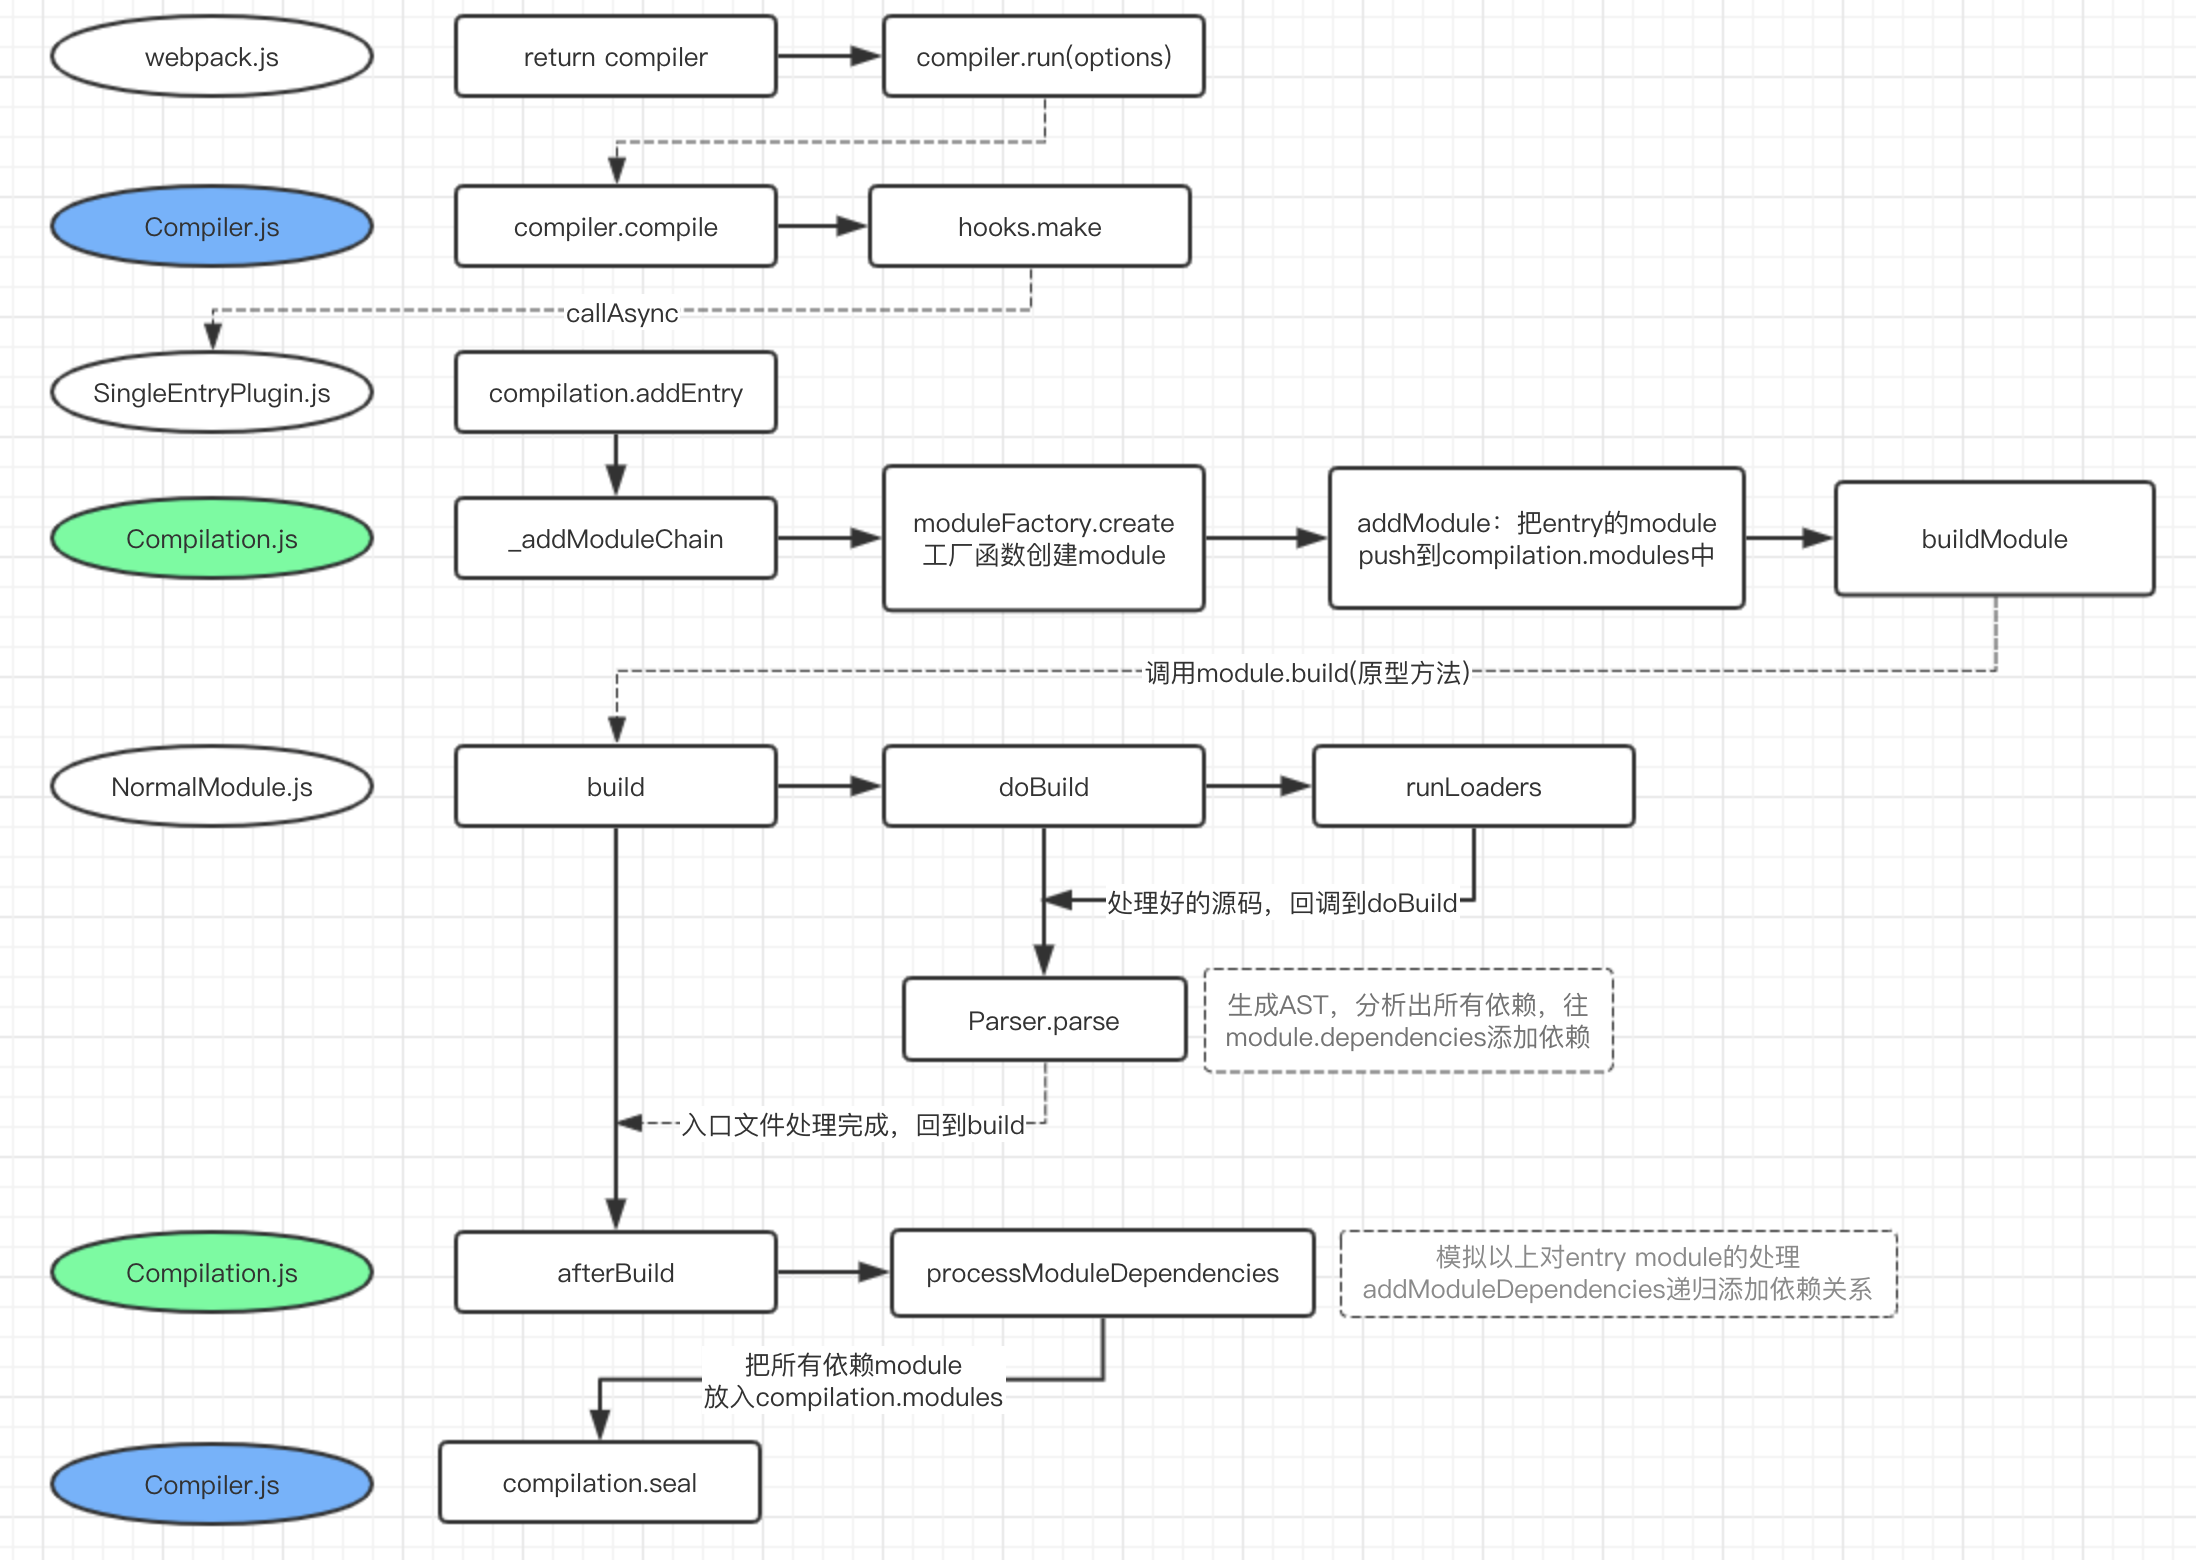
从入口开始,初始化
Compiler控制整个webpack的编译流程,它的生命周期中暴露了很多方法,如run,make,compile,finish,seal,emit等,Compiler中会实例化Compilation,它负责把所有的文件构建处理成module,一个Compiler周期内会反复触发Compilation实例无论入口文件是什么,都要从
compilation.addEntry开始,执行_addModuleChain,将入口文件加入需要编译的队列中,将队列里的文件依次处理,通过import/require等方法依赖的文件也会通过addModuleDependencies被添加到编译队列中,当整个编译队列完成时,从文件到module的转换就完成了编译队列
编译队列的控制是由
Semaphore(信号量)来完成的,它的代码量很少,先看下它的实现通过
this.available来控制同时处理资源的并发数,默认100这里的并发概念只是代码中的并发,跟JS单线程并不是同一个概念
只对外暴露了
acquire(申请资源)、release(释放资源)两个方法申请资源成功则
this.available--,可用资源减1,申请资源失败则把任务丢进等待编译的队列this.waiters释放资源则
this.available++,同时从等待队列中拿出最后一个任务,并在process.nextTick后执行入口与模块工厂
通过webpack官网文档,可以看到入口

entry可以有string、[string]、object、function等几种形式通过前面的文章,我们知道用户自定义的配置都在
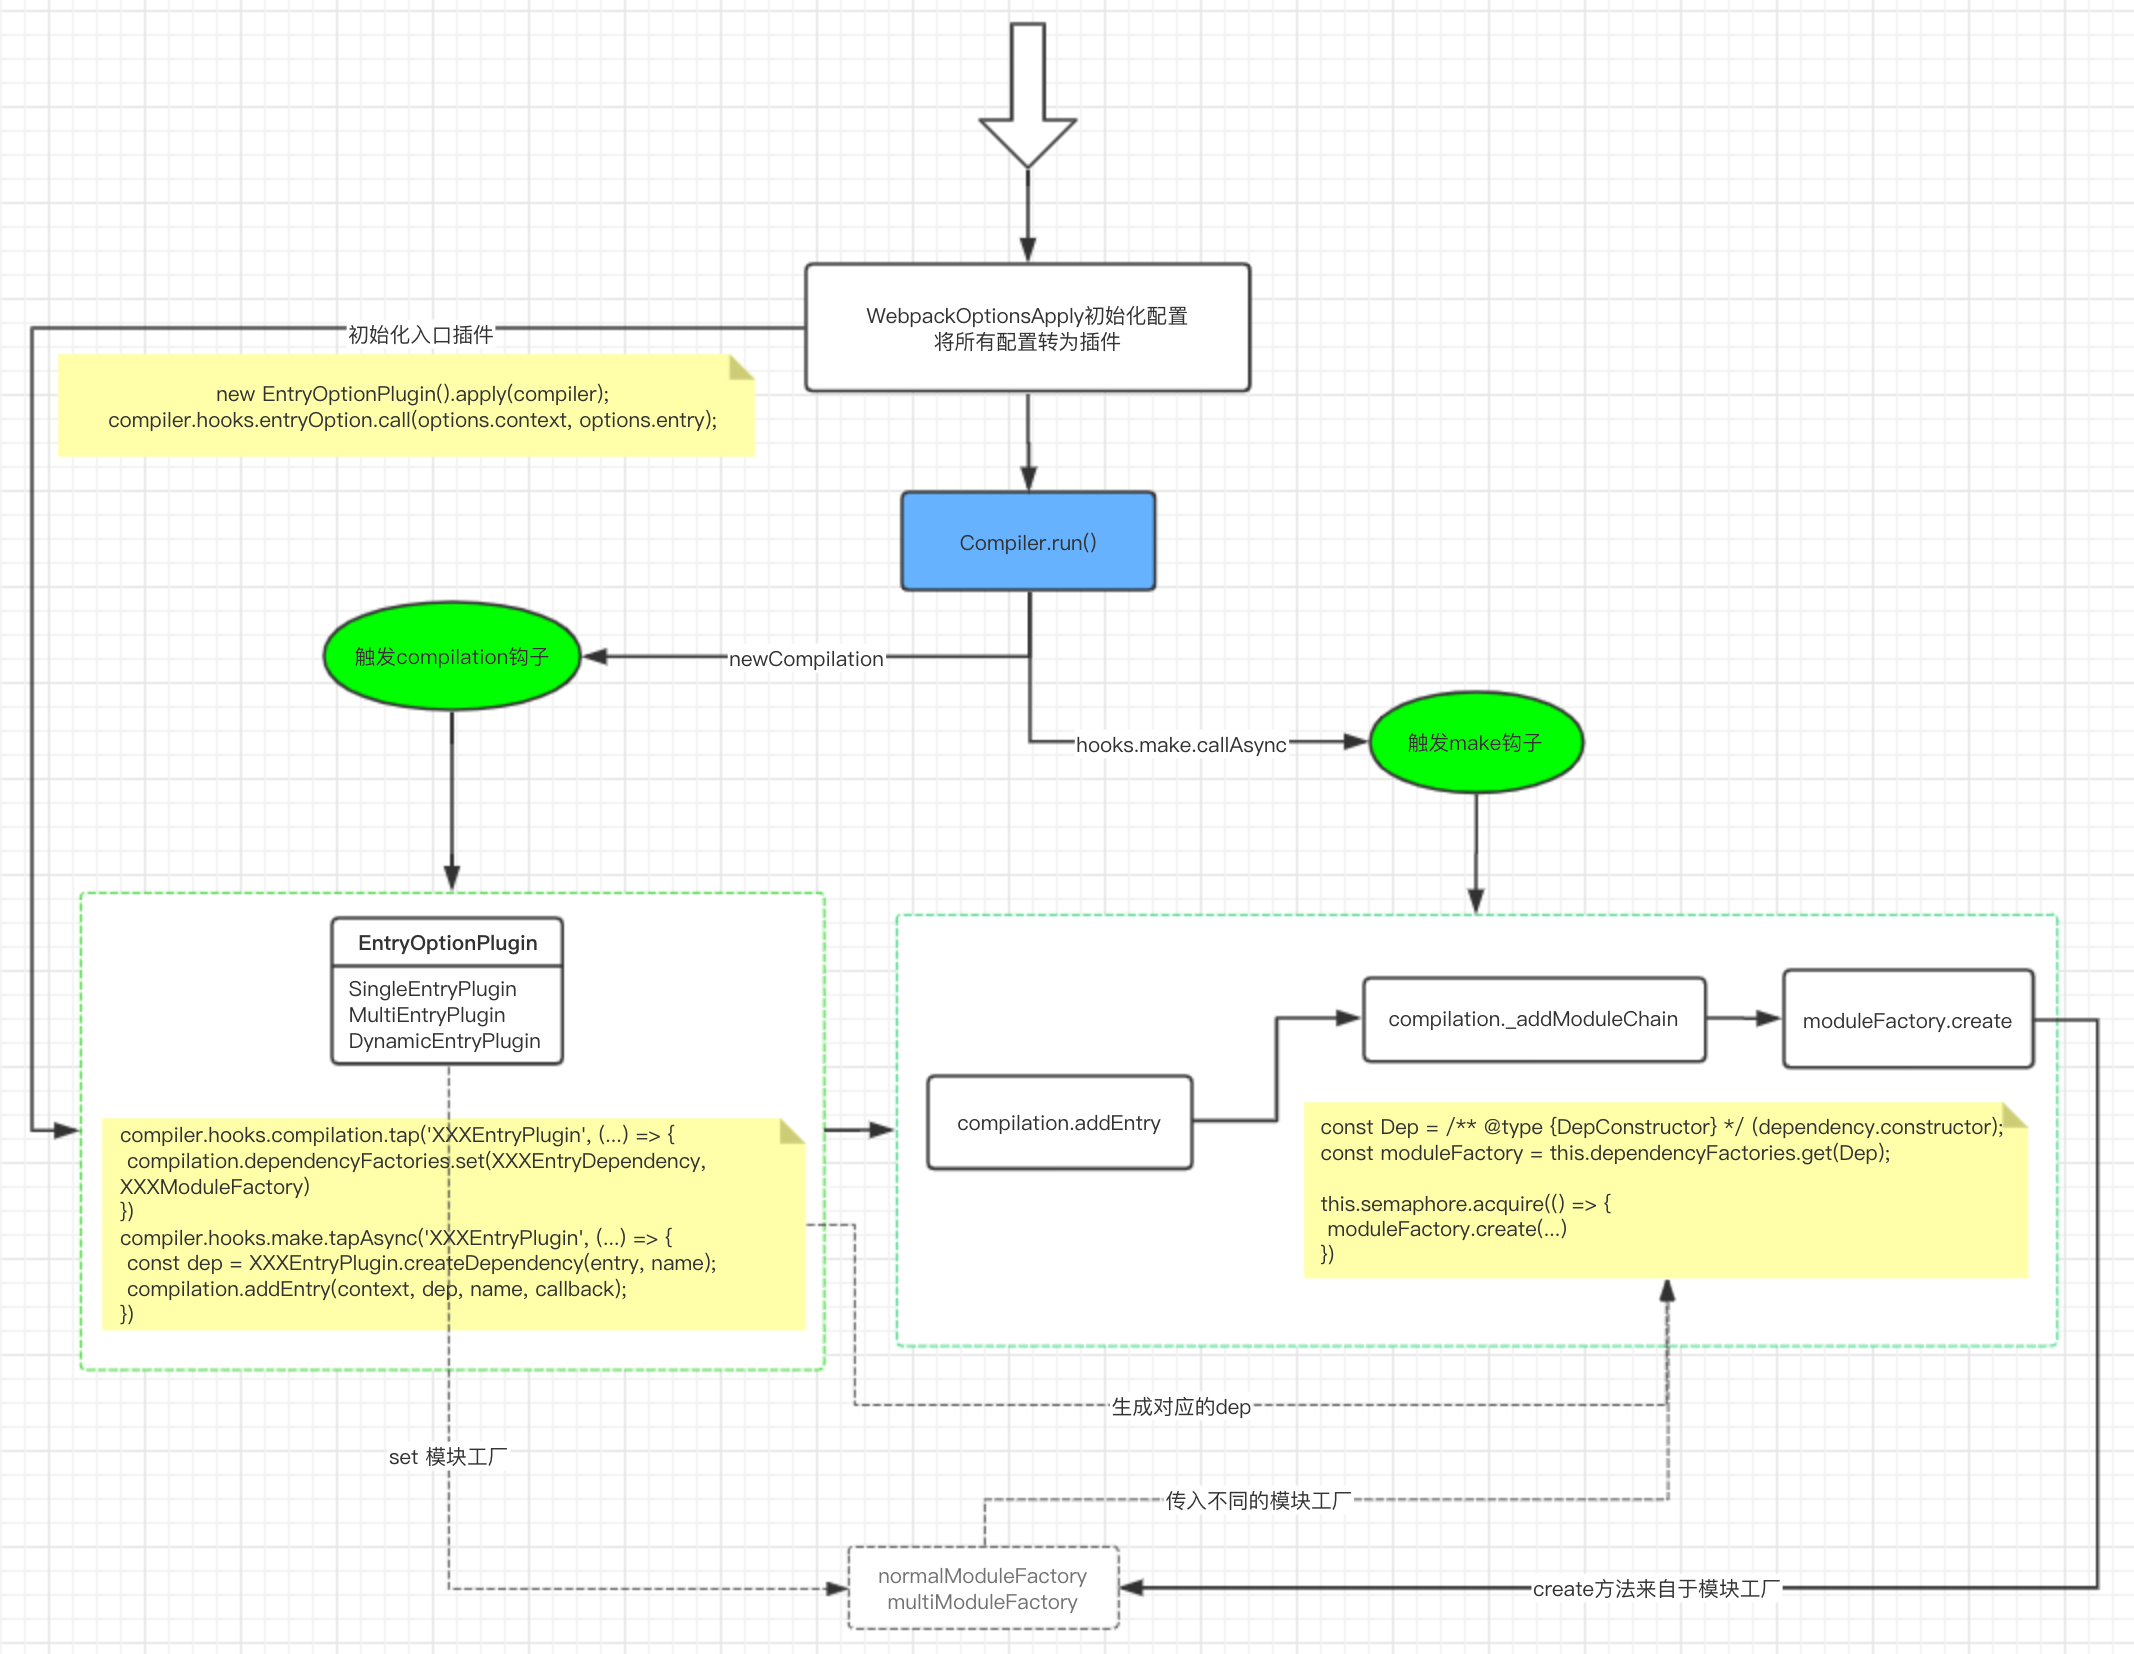
WebpackOptionsApply.process(options, compiler)中处理了,而对于入口的处理在EntryOptionPlugin插件中这个插件的代码也很简单
string->SingleEntryPluginarray->MultiEntryPluginfunction->DynamicEntryPluginobject-> 遍历后,根据不同类型选择SingleEntryPlugin/MultiEntryPlugin然后我们再观察一下这个三个插件
SingleEntryPlugin、MultiEntryPlugin、DynamicEntryPlugin,它们都会做的两件事情1、注册
compilation钩子,设置dependencyFactories,在后面的module.create()时候可以根据拿到正确的moduleFactory,moduleFactory有可能是normalModuleFactory、multiModuleFactory2、注册
make钩子回调,在make被触发时,调用compilation.addEntry() -> compilation._addModuleChain开始编译工作这一部分的整个流程串起来如下图
compilation构建
进入
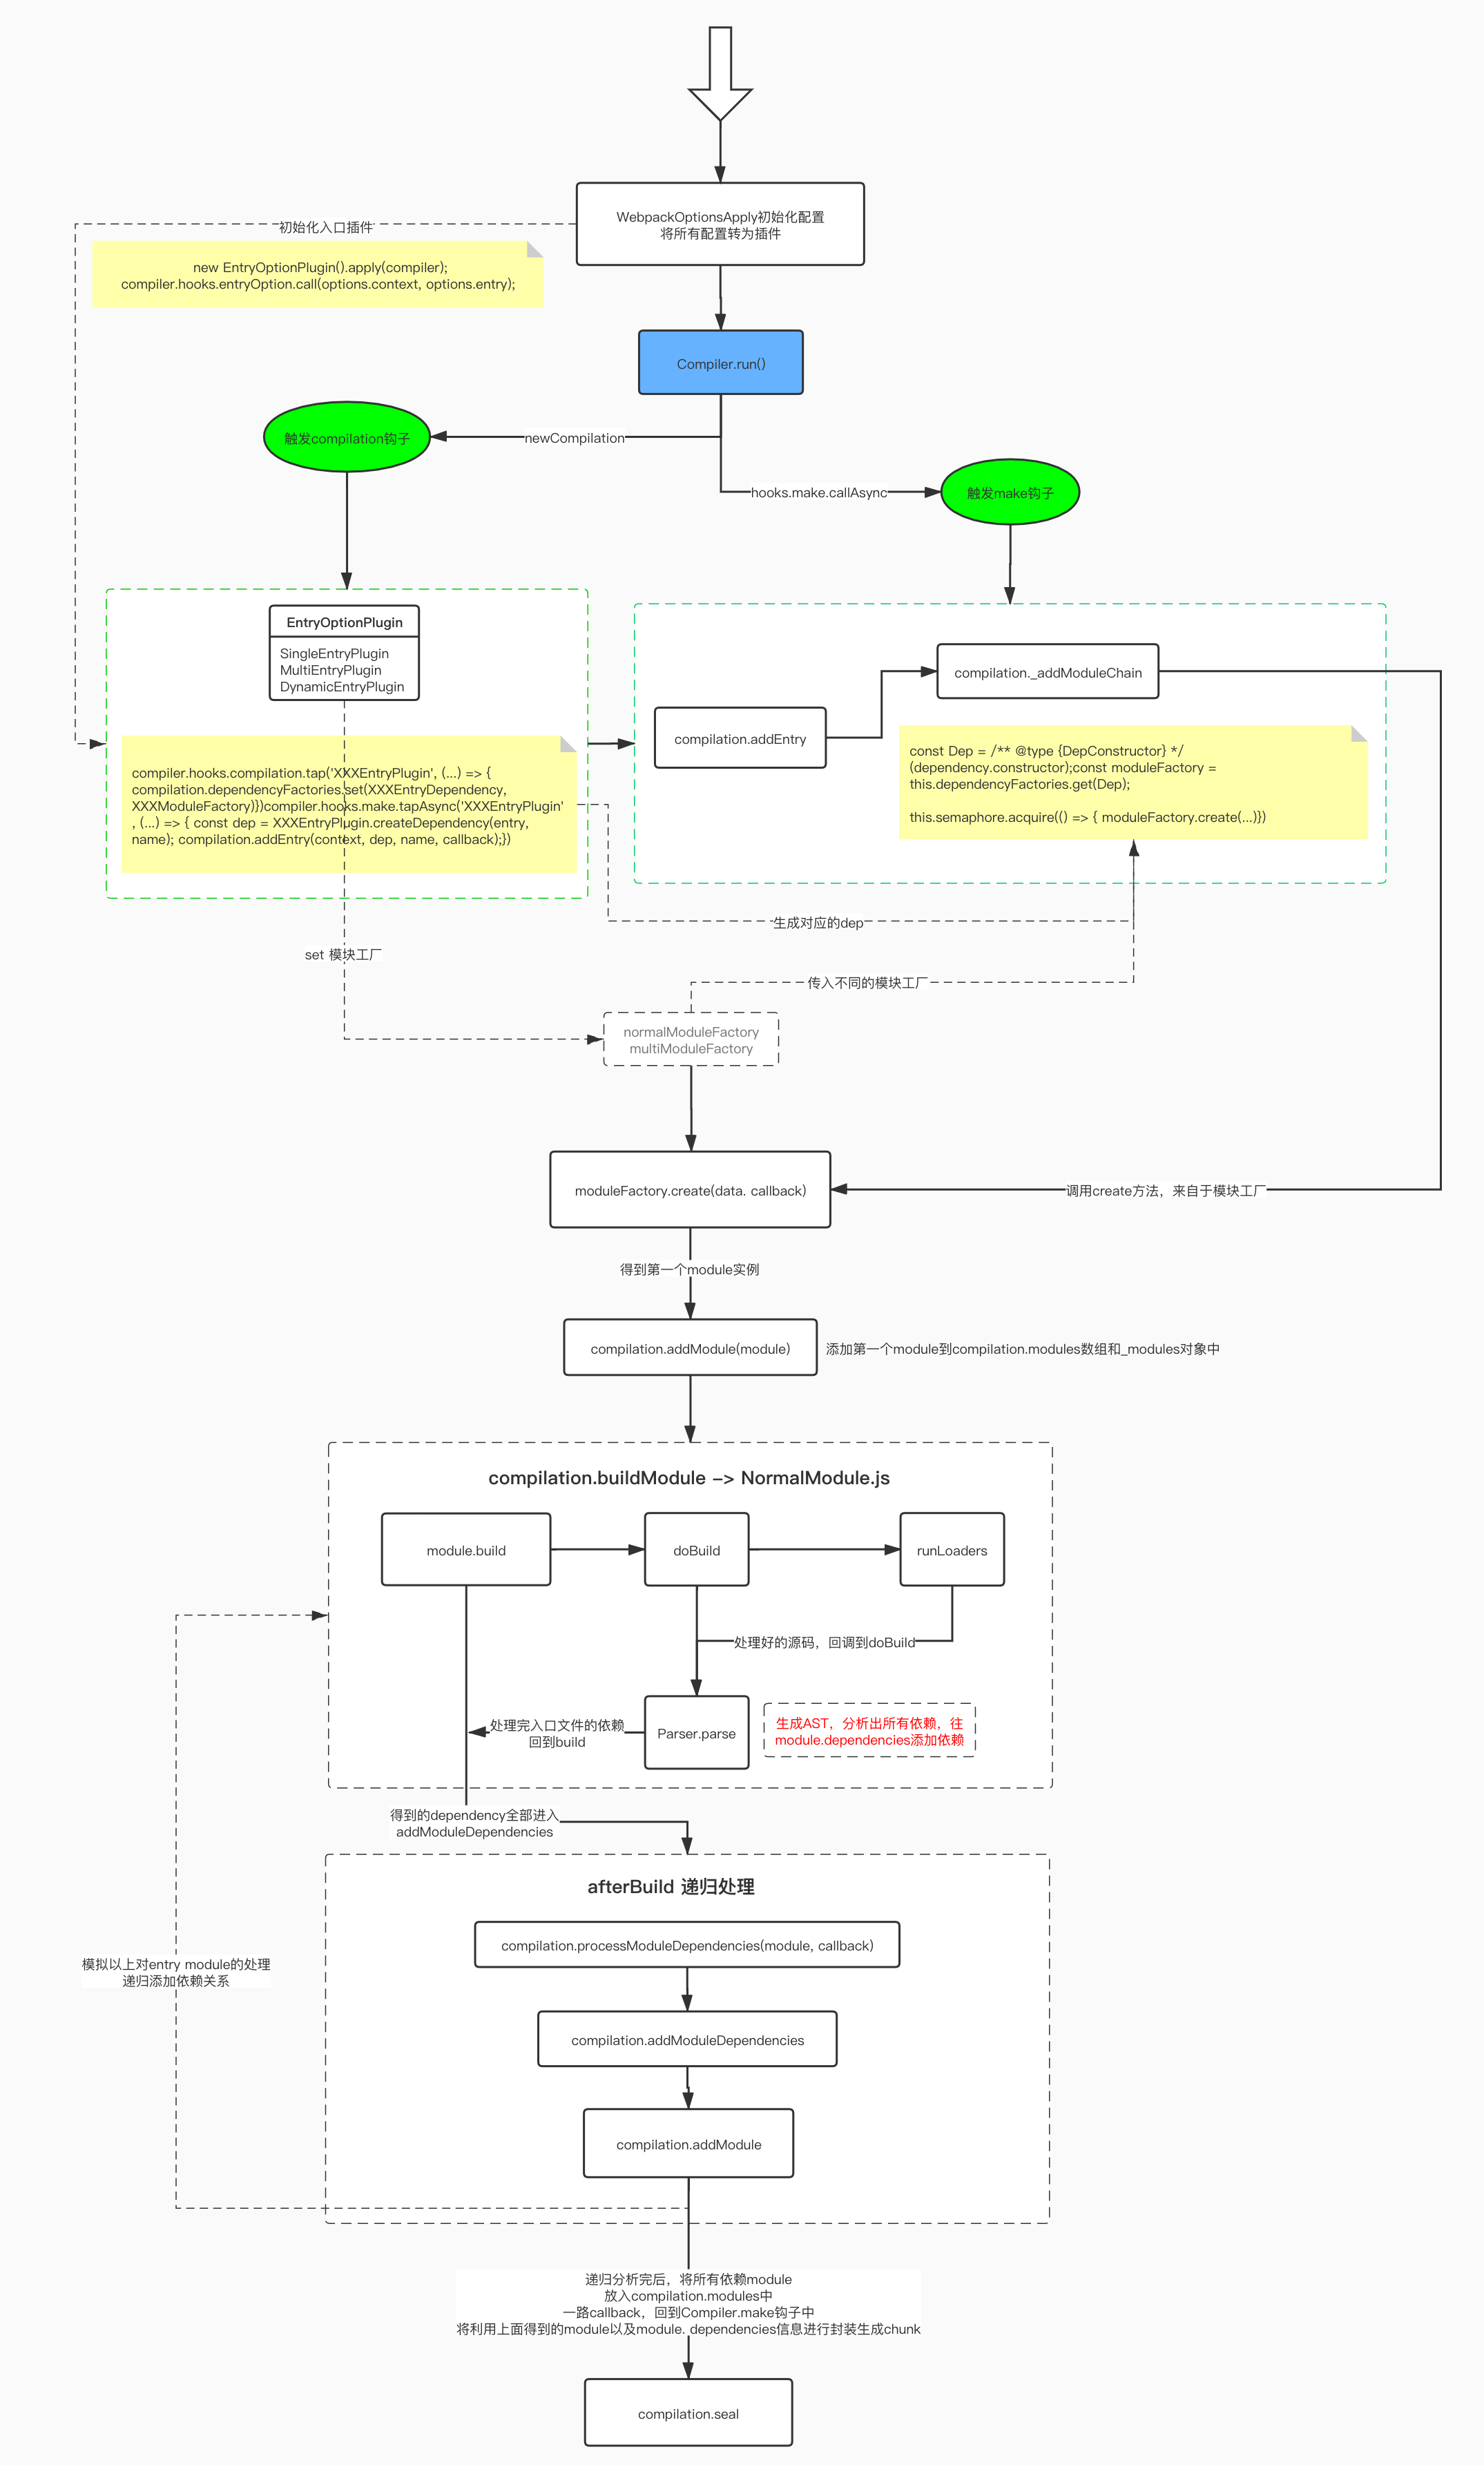
module.create后,跟着断点走能够比较清晰的看到compilation实例中modules和modules.dependencies中的数据变化,下面的流程图比较清晰的画出了几个函数方法的调用过程具体
runLoaders和Parser.parse部分的调用逻辑没有深入往下读,后续有时间再另写文章细读下一篇是封装生成chunk的流程解读,敬请期待
The text was updated successfully, but these errors were encountered: