基于React版本16的源码解析(一):组件实现 #27
Comments
|
支持一下! |
|
期待更新 |
|
求画图工具,以及期待更新 |
|
@weijie9520 画图工具是Axure |
|
请问用的是 Axure 的什么元件库画的图? |
|
@amandakelake 会有不同的属性分别挂在上面isReactComponent和isPureReactComponent,用来判断是纯组件还是有状态组件和无状态组件,isPureReactComponent的时候会执行state和props的浅层判断来调用shouldUpdate |
|
中间那段ComponentDummy应该是典型的寄生组合式继承吧,楼主啥时候更新期待ing |
|
16.3的版本之后没有了AsyncComponent,那render方法是哪来的呢? |
最新版本master上 render方法是调用的ReactRoot对象属性方法 后面的绑定和更新操作都是基于FiberNode 这个对象 |
|
写的蛮好的,说明了版本,跟着源码看,挺清晰的,期待后面的更新 |
|
_assign(pureComponentPrototype, Component.prototype),是将Component.prototype对象复制到pureComponentPrototype对象上,Component.prototype对象并没改变吧? |
|
Component的原型上面没有render方法... |
|
pureComponent和AsyncComponent有共同的东西,这个共同的东西不能污染到Component,所以添加了中间继承类ComponentDummy,_assign的解析有问题,后面的React已经修改为Object.assign,所以Component上并没有融合的render函数 |
|
ComponentDummy.prototype的constructor还是Component吧,并不能指向ComponentDummy或者PureComponent |
|
大家读源码都从node_modules开始的? 我把react的源码clone下来发现,项目文件结构易于常规项目 |
本次分析的源码采用的是
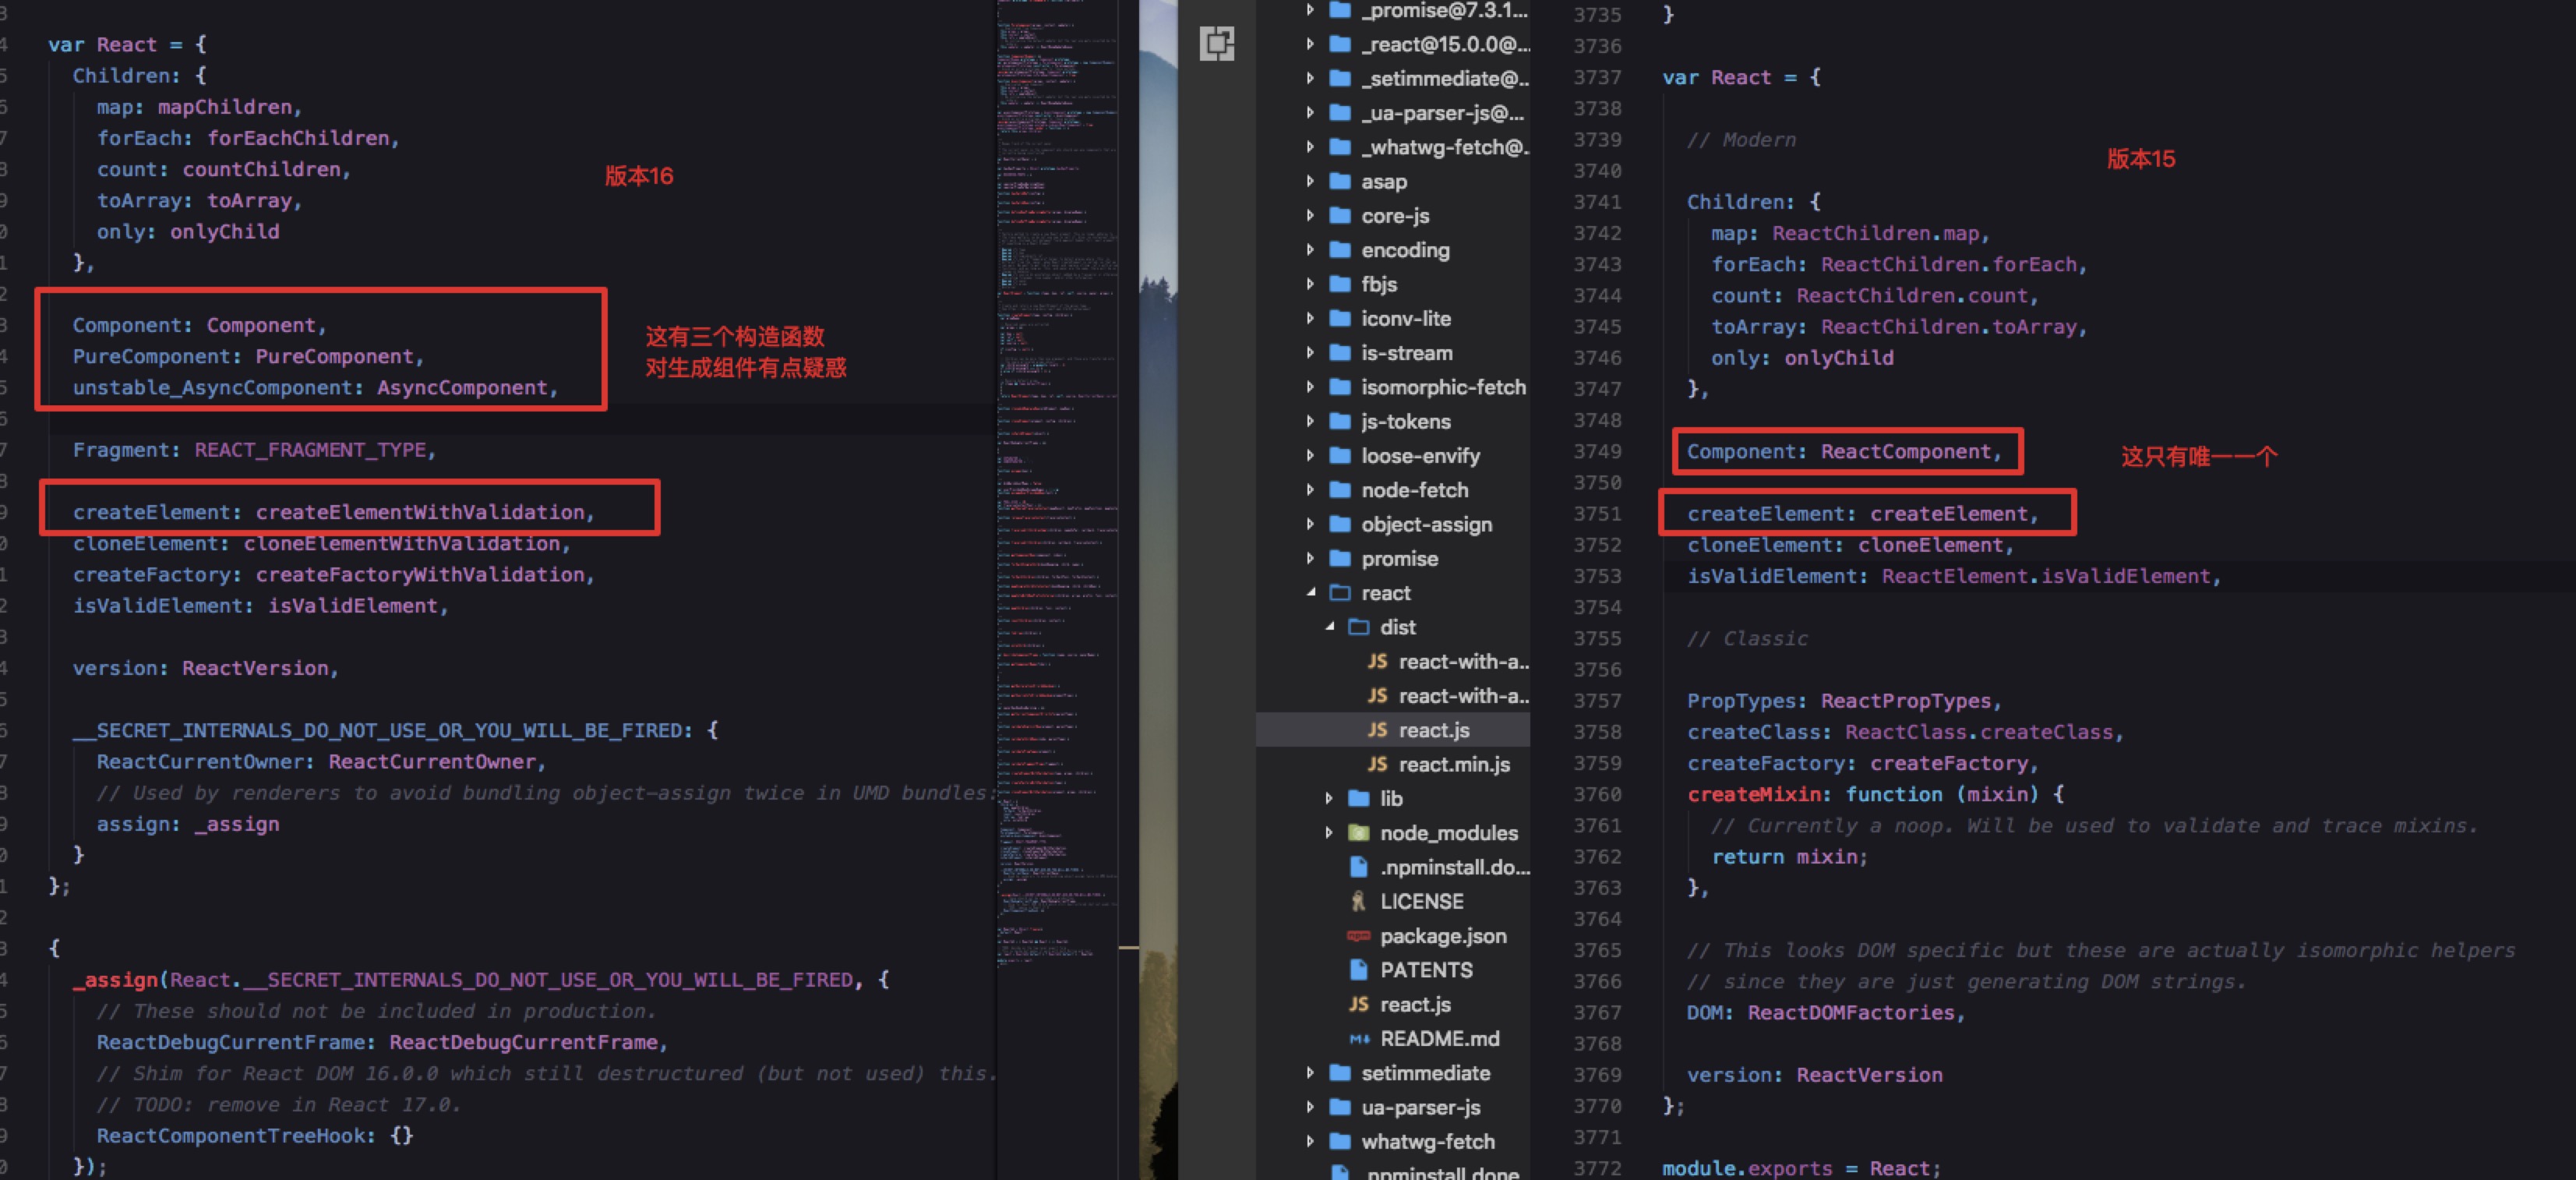
16.2.0的版本目前网上现有的react源码分析文章基于的都是版本16以前的源码,入口和核心构造器不一样了,如下图所示
本想借鉴前人的源码分析成果,奈何完全对不上号,只好自己慢慢摸索
水平有限,如果有错误和疏忽的地方,还请指正。
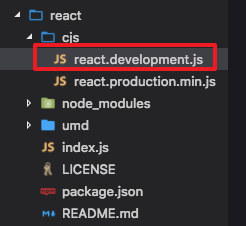
最快捷开始分析源码的办法
然后打开项目,进入
node_nodules => react先看入口文件
index.js我们就看开发环境下的版本吧,压缩版本是打包到生产环境用的
打开图中文件即可
核心接口
分析源码先找对外的暴露接口,当然就是
react了,直接拉到最下面ReactChildren
ReactChildren提供了处理 this.props.children 的工具集,跟旧版本的一样
组件
旧版本只有
ReactComponent一种新版本定义了三种不同类型的组件基类
Component,PureComponent,unstable_AsyncComponent等下再具体看都是什么
生成组件
判断组件:isValidElement
校验是否是合法元素,只需要校验类型,重点是判断
.$$typeof属性_assign
其实是
object-assign,但文中有关键地方用到它,下文会讲var _assign = require('object-assign');React组件的本质
组件本质是对象
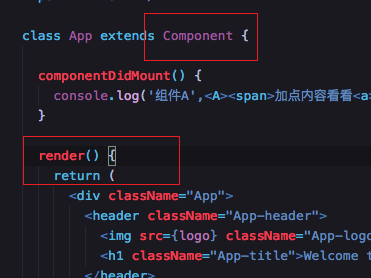
不急着看代码,先通过例子看看组件是什么样子的
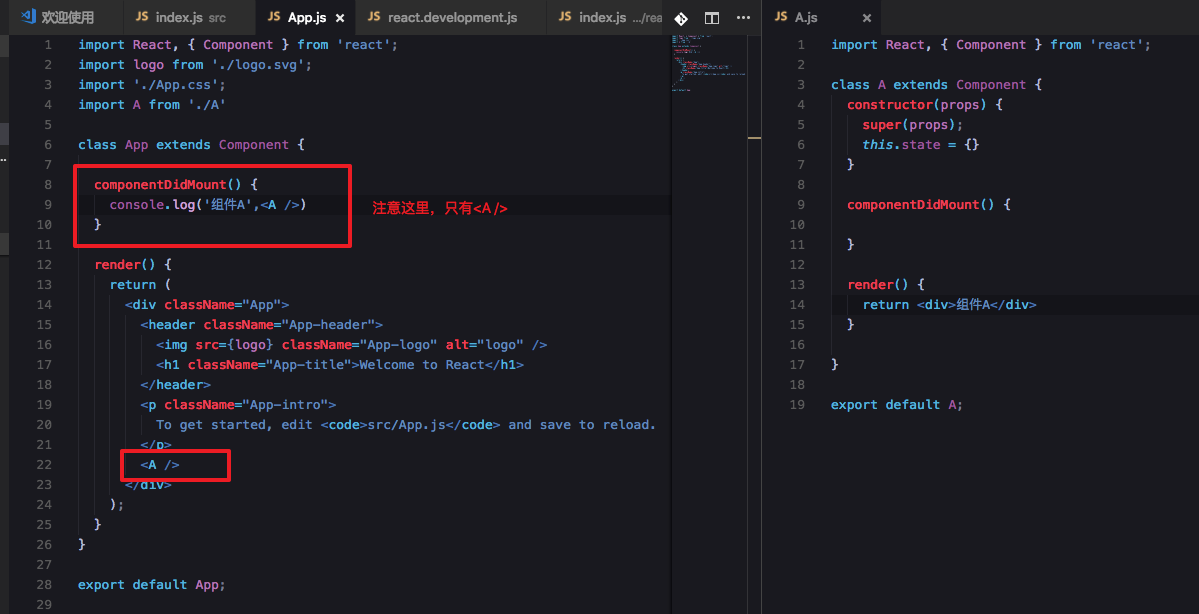
用
creact-react-app生成一个最简单的react项目在
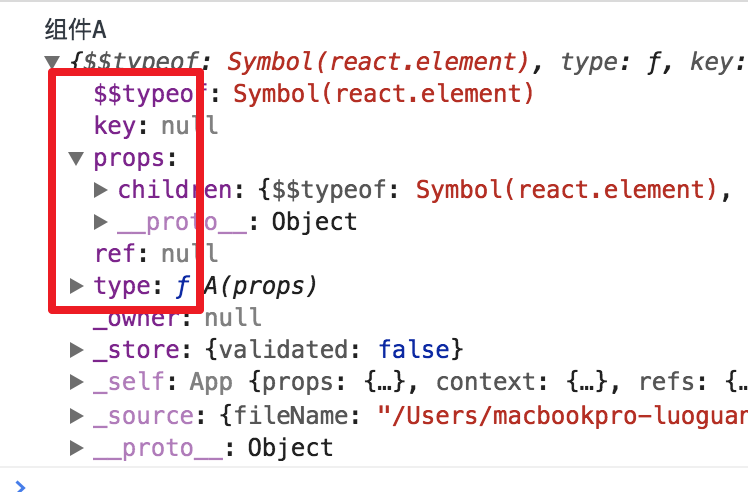
App.js文件加点东西,然后打印组件A看一下是什么npm start启动项目看看其实就是个对象,有很多属性,注意到
props里面, 没有内容给组件A里面包含一点内容
可以看到,
props.children里面开始嵌套内容了那以我们聪明的程序员的逻辑来推理一下,其实不断的页面嵌套,就是不断的给这个对象嵌套
props而已不信再看一下
虚拟DOM概念
所以到目前为止,我们知道了react的组件只是对象,而我们都知道真正的页面是由一个一个的DOM节点组成的,在比较原生的jQuery年代,通过JS来操纵DOM元素,而且都是真实的DOM元素,而且我们都知道复杂或频繁的DOM操作通常是性能瓶颈产生的原因
所以React引入了虚拟DOM(Virtual DOM)的概念
React虚拟DOM浅析 | AlloyTeam
总的说起来,无论多复杂的操作,都只是先进行虚拟DOM的JS计算,把这个组件对象计算好了以后,再一次性的通过Diff算法进行渲染或者更新,而不是每次都要直接操作真实的DOM。
在即时编译的时代,调用DOM的开销是很大的。而Virtual DOM的执行完全都在Javascript 引擎中,完全不会有这个开销。
知道了什么是虚拟DOM以及组件的本质后,我们还是来看一下代码吧
先从生成组件开始切入,因为要生成组件就肯定会去找组件是什么
createElement: createElementWithValidation,组件的本源
知道了组件是对象后,我们去看看它的本源
摘取一些核心概念出来看就好
可以看到,返回了一个
element,这个元素又是由createElement方法生成的,顺着往下找返回的是
ReactElement方法,感觉已经很近了,马上要触及本源了bingo,返回了一个对象,再看这个对象,是不是跟上面打印出来的对象格式很像?再看一眼
这就是组件的本源
组件三种基类
前面说了,版本16以后,封装了三种组件基类:分别是组件、纯组件、异步组件
一个个去看一下区别在哪里,先看**
Component**很简单,一个构造函数,通过它构造的实例对象有三个私有属性,
refs则是个emptyObject,看名字就知道是空对象这个
emptyObject也是引入的插件var emptyObject = require('fbjs/lib/emptyObject');再去看
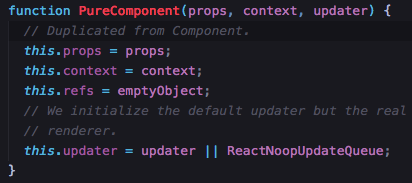
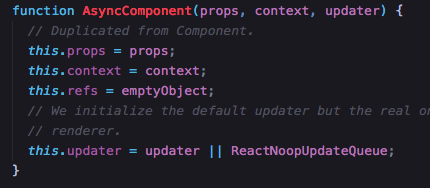
PureComponent,AsyncComponent,定义的时候居然跟Component是一样的都是这四句话
区别呢?这里就要比较理解原型链方面的知识了
虽然原型和继承在日常项目和工作中用的不多,那是因为我们在面向过程编程,但想要进阶,就要去读别人的源码,去自己封装组件,这事它们就派上用场了,这就是为什么它们很重要的原因。
核心的方法,和属性,以及这三种组件直接的关系都是通过原型的知识联系起来的,关键代码如下,我画了个简图,希望能对看文章的各位有所帮助,如果有画错的,希望能指正我
先上核心代码
setState和forceUpdate这两个方法挂载Component(组件构造器)的原型上定义一个
ComponentDummy,其实也是一个构造器,按照名字来理解就是“假组件”😂,它是当做辅助用的让ComponentDummy的原型指向Component的原型,这样它也能访问原型上面的共有方法和属性了,比如setState和forceUpdate
这句话,假组件构造器ComponentDummy实例化出来一个对象pureComponentPrototype,然后把这个对象的constructor属性又指向了PureComponent,因此PureComponent也成为了一个构造器,也就是上面的第二种组件基类
AsyncComponent基类也是一样
但是AsyncComponent的原型多了一个方法render,看到了吗,妈妈呀,这就是render的出处
所以到目前为止,可以得出一个原型图

但是,有个问题来了,render方法挂载在AsyncComponent的原型上,那通过Component构造器构造出来的实例岂不是读不到render方法,那为什么日常组件是这样写的?
还有两句代码,上面做了个小剧透的
_assign每句话上面还特意有个注释,
Avoid an extra prototype jump for these methods.,避免这些方法额外的原型跳转,先不管它,先看_assign做了什么,把Component的原型跟AsyncComponent的原型合并,
那么这里答案就呼之欲出了,如此一来,AsyncComponent上面的render方法,不就相当于挂载到Component上面了吗?
以此类推,三种基类构造器最后都是基于同一个原型,共享所以方法,包括render、setState、forceUpdate等等,最后的原型图应该就变成了这样
到这里,有个问题要思考的是?
既然最后三个基类共用同一个原型,那为什么要分开来写?
中间还通过一个假组件构造器ComponentDummy来辅助构建两个实例
源码还没读完,这个地方我目前还没弄明白,应该是后面三个基类又分别挂载了不一样的方法,希望有大佬能提前回答一下
The text was updated successfully, but these errors were encountered: