-
Notifications
You must be signed in to change notification settings - Fork 6
/
Copy pathesp32s3_setup.qmd
227 lines (128 loc) · 14 KB
/
esp32s3_setup.qmd
1
2
3
4
5
6
7
8
9
10
11
12
13
14
15
16
17
18
19
20
21
22
23
24
25
26
27
28
29
30
31
32
33
34
35
36
37
38
39
40
41
42
43
44
45
46
47
48
49
50
51
52
53
54
55
56
57
58
59
60
61
62
63
64
65
66
67
68
69
70
71
72
73
74
75
76
77
78
79
80
81
82
83
84
85
86
87
88
89
90
91
92
93
94
95
96
97
98
99
100
101
102
103
104
105
106
107
108
109
110
111
112
113
114
115
116
117
118
119
120
121
122
123
124
125
126
127
128
129
130
131
132
133
134
135
136
137
138
139
140
141
142
143
144
145
146
147
148
149
150
151
152
153
154
155
156
157
158
159
160
161
162
163
164
165
166
167
168
169
170
171
172
173
174
175
176
177
178
179
180
181
182
183
184
185
186
187
188
189
190
191
192
193
194
195
196
197
198
199
200
201
202
203
204
205
206
207
208
209
210
211
212
213
214
215
216
217
218
219
220
221
222
223
224
225
226
227
# ESP32S3 Setup {.unnumbered}
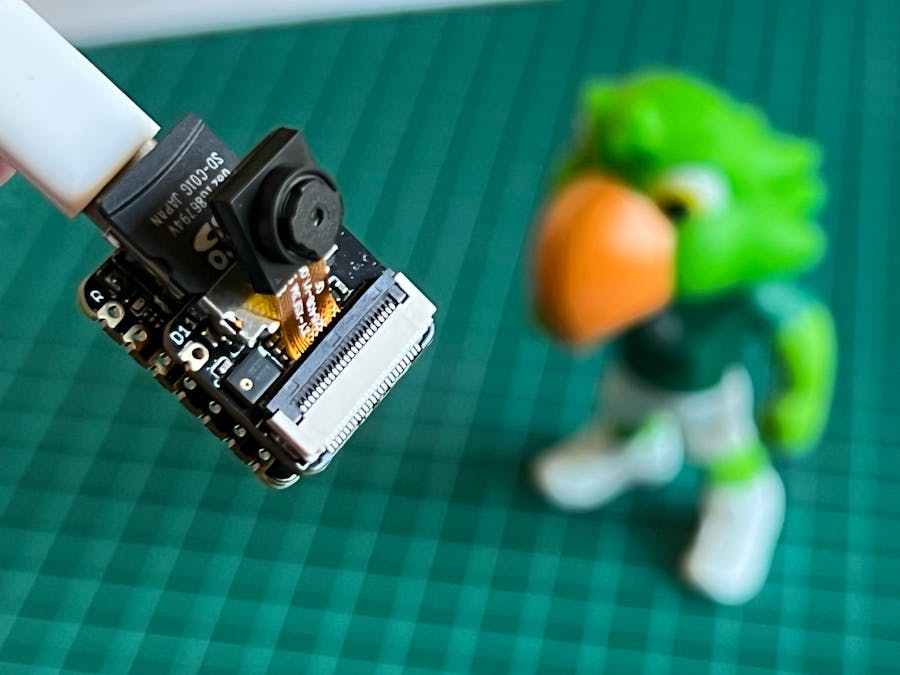
Setup the Seeed XIAO ESP32S3 Sense.
## Introduction
Seeed Studio launched 2023 a new affordable development board, the [XIAO ESP32S3 Sense](https://www.seeedstudio.com/XIAO-ESP32S3-Sense-p-5639.html), which integrates a camera sensor, digital microphone, and SD card support. Combining embedded ML computing power and photography capability, this development board is a great tool to start with TinyML (intelligent voice and vision AI).

**XIAO ESP32S3 Sense Main Features**
- **Powerful MCU Board**: Incorporate the ESP32S3 32-bit, dual-core, Xtensa processor chip operating up to 240 MHz, mounted multiple development ports, Arduino / MicroPython supported
- **Advanced Functionality**: Detachable OV2640 camera sensor for 1600\*1200 resolution, compatible with OV5640 camera sensor, integrating an additional digital microphone
- **Elaborate Power Design**: Lithium battery charge management capability offer four power consumption model, which allows for deep sleep mode with power consumption as low as 14μA
- **Great Memory for more Possibilities**: Offer 8MB PSRAM and 8MB FLASH, supporting SD card slot for external 32GB FAT memory
- **Outstanding RF performance**: Support 2.4GHz Wi-Fi and BLE dual wireless communication, support 100m+ remote communication when connected with U.FL antenna
- **Thumb-sized Compact Design**: 21 x 17.5mm, adopting the classic form factor of XIAO, suitable for space-limited projects like wearable devices

Below is the general board pinout:

> For more details, please refer to the Seeed Studio WiKi page: https://wiki.seeedstudio.com/xiao_esp32s3_getting_started/
## Installing the XIAO ESP32S3 Sense on Arduino IDE
On Arduino IDE, navigate to **File \> Preferences**, and fill in the URL:
[*https://raw.githubusercontent.com/espressif/arduino-esp32/gh-pages/package_esp32_dev_index.json*](https://raw.githubusercontent.com/espressif/arduino-esp32/gh-pages/package_esp32_dev_index.json)
on the field ==\> **Additional Boards Manager URLs**

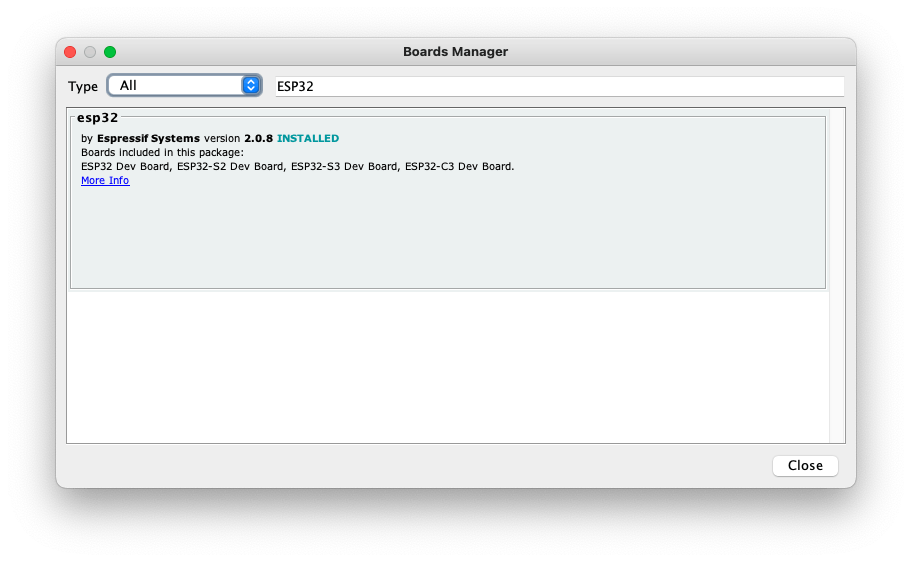
Next, open boards manager. Go to **Tools** \> **Board** \> **Boards Manager...** and enter with *esp32.* Select and install the most updated and stable package (avoid *alpha* versions) :
> The current alpha versions (3.0) did not work correctly with the XIAO---the 2.0.8 or 2.0.14 work fine.
On **Tools**, select the Board (**XIAO ESP32S3**):
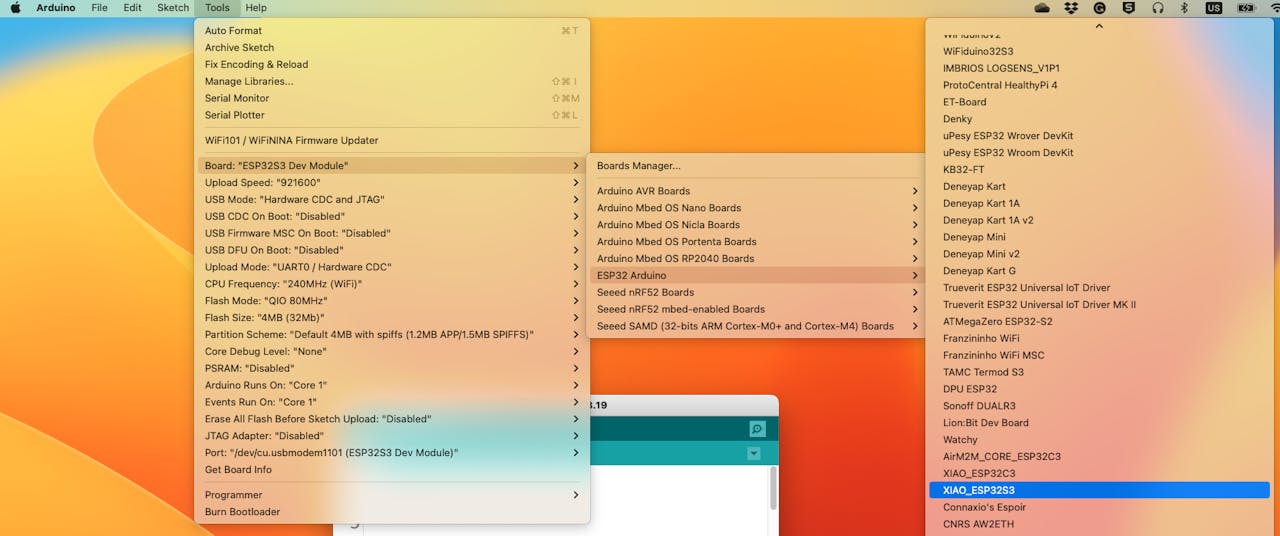
Last but not least, select the **Port** where the ESP32S3 is connected.
That is it! The device should be OK. Let's do some tests.
## Testing the board with BLINK
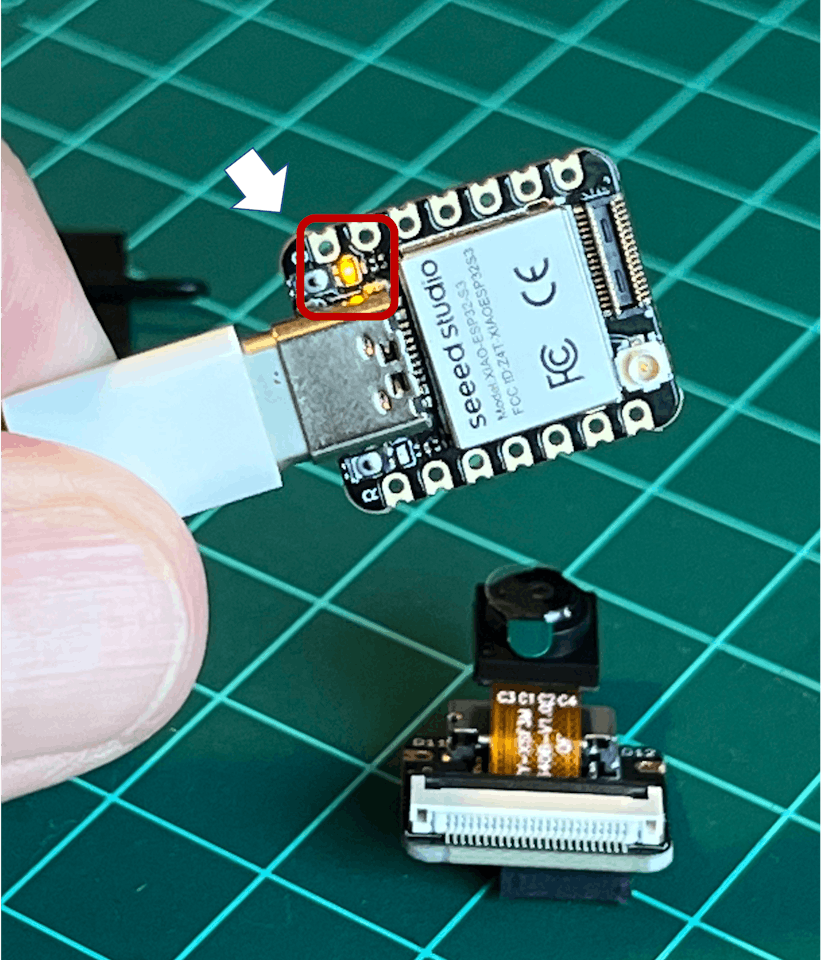
The XIAO ESP32S3 Sense has a built-in LED that is connected to GPIO21. So, you can run the blink sketch as it is (using the LED_BUILTIN Arduino constant) or by changing the Blink sketch accordingly:
``` cpp
#define LED_BUILT_IN 21
void setup() {
pinMode(LED_BUILT_IN, OUTPUT); // Set the pin as output
}
// Remember that the pin works with inverted logic
// LOW to Turn on and HIGH to turn off
void loop() {
digitalWrite(LED_BUILT_IN, LOW); //Turn on
delay (1000); //Wait 1 sec
digitalWrite(LED_BUILT_IN, HIGH); //Turn off
delay (1000); //Wait 1 sec
}
```
> Note that the pins work with inverted logic: LOW to Turn on and HIGH to turn off
## Connecting Sense module (Expansion Board)
When purchased, the expansion board is separated from the main board, but installing the expansion board is very simple. You need to align the connector on the expansion board with the B2B connector on the XIAO ESP32S3, press it hard, and when you hear a "click," the installation is complete.
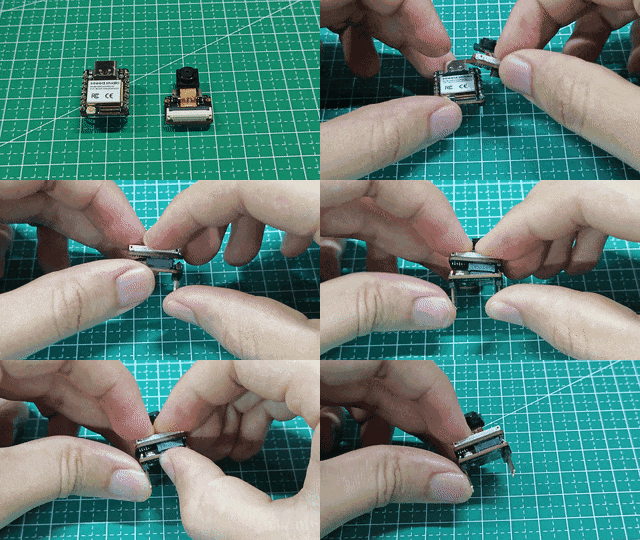
As commented in the introduction, the expansion board, or the "sense" part of the device, has a 1600x1200 OV2640 camera, an SD card slot, and a digital microphone.
## Microphone Test
Let's start with sound detection. Go to the [GitHub project](https://github.com/Mjrovai/XIAO-ESP32S3-Sense) and download the sketch: [XIAOEsp2s3_Mic_Test](https://github.com/Mjrovai/XIAO-ESP32S3-Sense/tree/main/Mic_Test/XiaoEsp32s3_Mic_Test) and run it on the Arduino IDE:
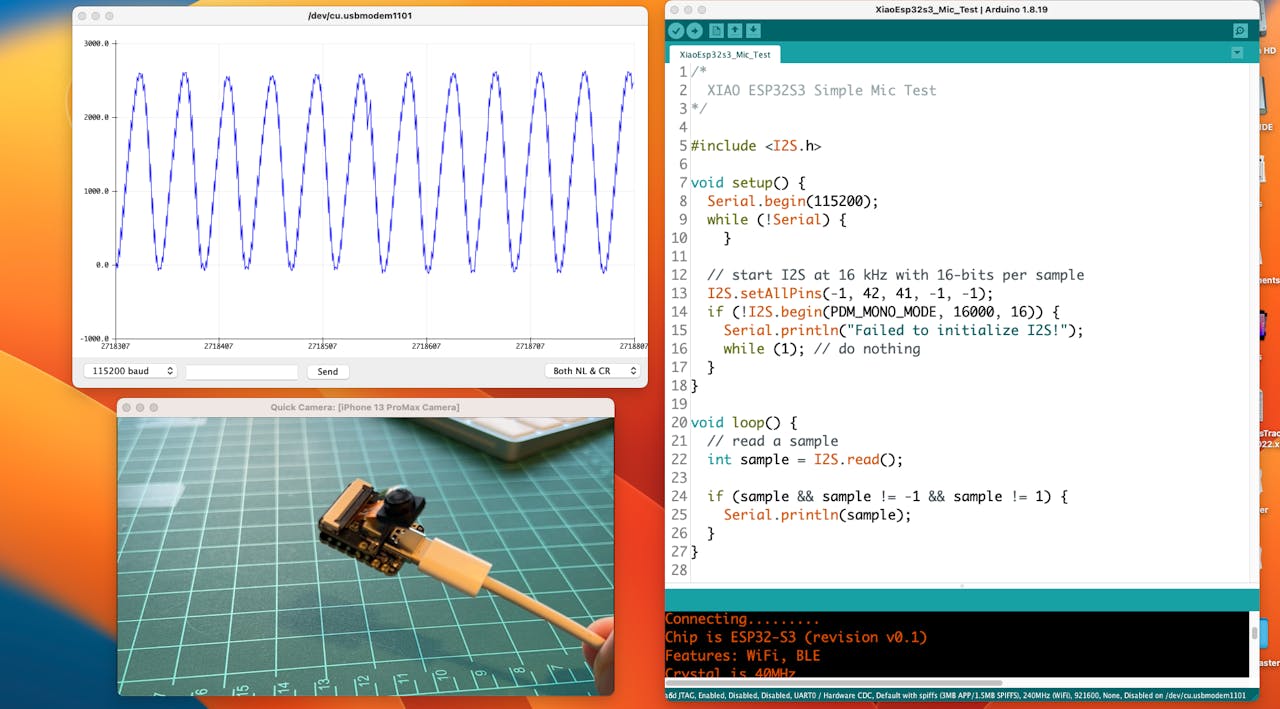
When producing sound, you can verify it on the Serial Plotter.
**Save recorded sound (.wav audio files) to a microSD card.**
Now, the onboard SD Card reader can save .wav audio files. For that, we need to habilitate the XIAO PSRAM.
> ESP32-S3 has only a few hundred kilobytes of internal RAM on the MCU chip. It can be insufficient for some purposes, so ESP32-S3 can use up to 16 MB of external PSRAM (Psuedostatic RAM) connected in parallel with the SPI flash chip. The external memory is incorporated in the memory map and, with certain restrictions, is usable in the same way as internal data RAM.
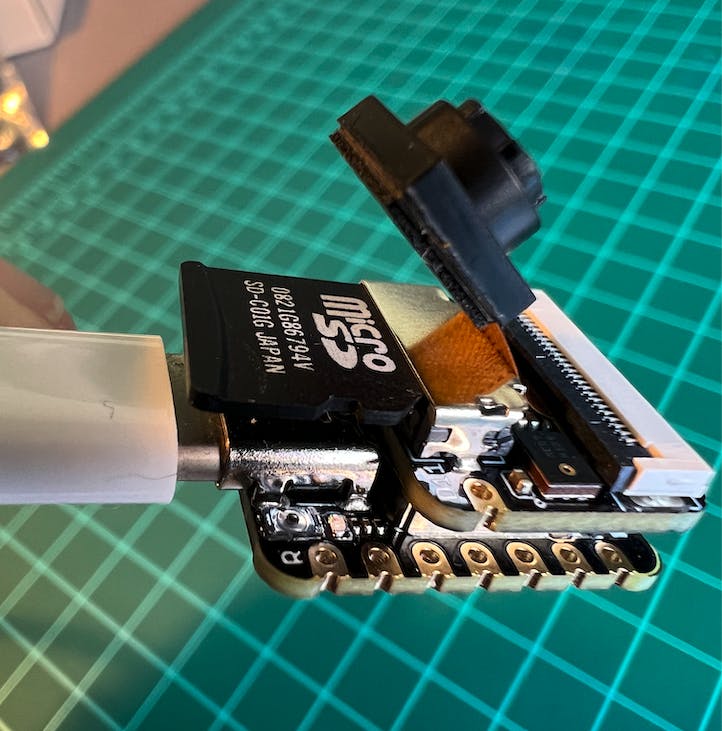
For a start, Insert the SD Card on the XIAO as shown in the photo below (the SD Card should be formatted to **FAT32**).
- Download the sketch [Wav_Record](https://github.com/Mjrovai/XIAO-ESP32S3-Sense/tree/main/Mic_Test/Wav_Record), which you can find on GitHub.
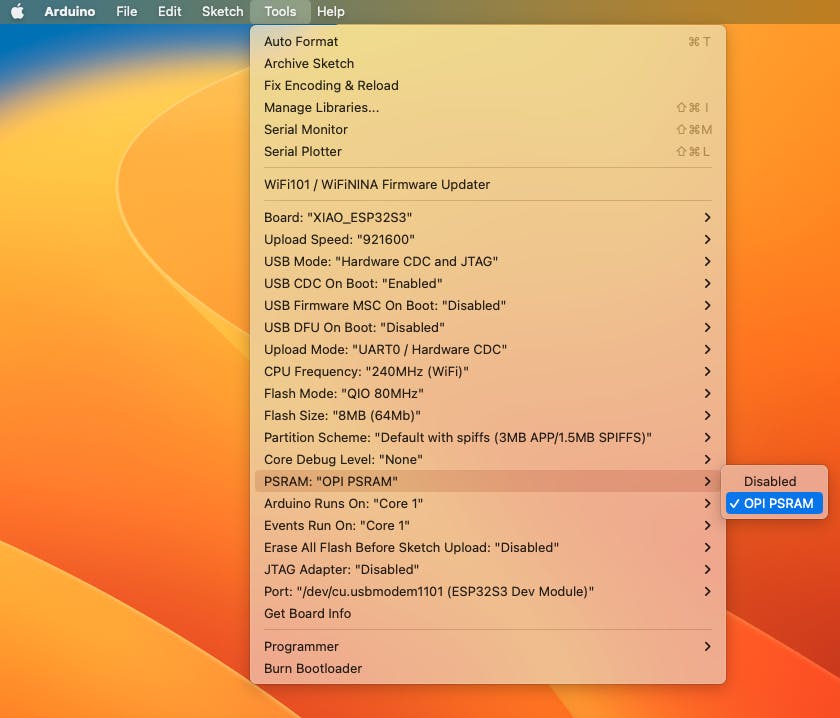
- To execute the code (Wav Record), it is necessary to use the PSRAM function of the ESP-32 chip, so turn it on before uploading.: `Tools>PSRAM: "OPI PSRAM”>OPI PSRAM`
- Run the code Wav_Record.ino
- This program is executed only once after the user **turns on the serial monitor**, recording for 20 seconds and saving the recording file to a microSD card as "arduino_rec.wav".
- When the "." is output every 1 second in the serial monitor, the program execution is finished, and you can play the recorded sound file with the help of a card reader.
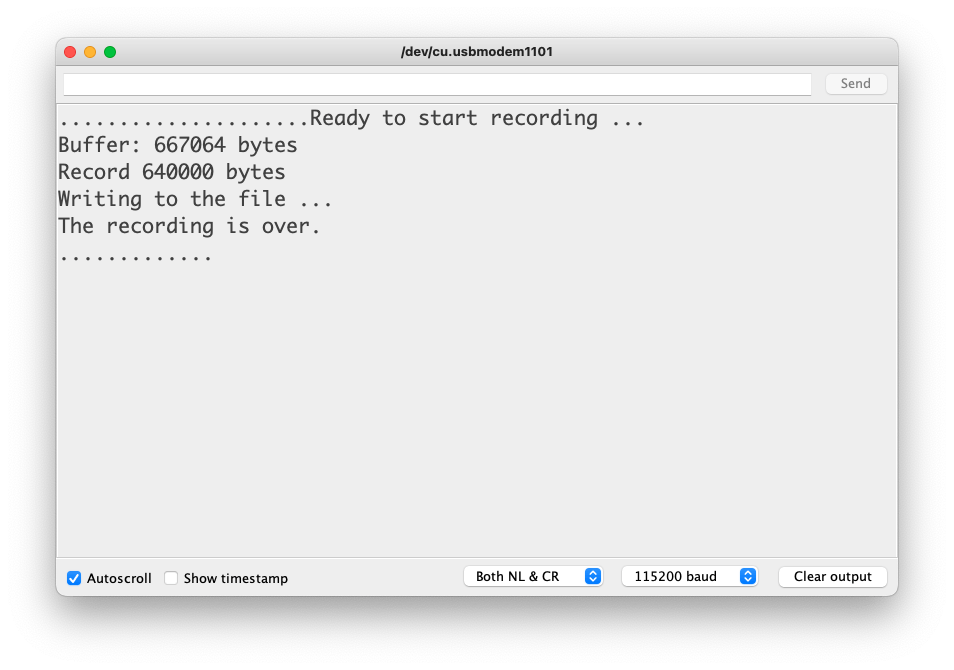
The sound quality is excellent!
> The explanation of how the code works is beyond the scope of this tutorial, but you can find an excellent description on the [wiki](https://wiki.seeedstudio.com/xiao_esp32s3_sense_mic#save-recorded-sound-to-microsd-card) page.
## Testing the Camera
For testing the camera, you should download the folder [take_photos_command](https://github.com/Mjrovai/XIAO-ESP32S3-Sense/tree/main/take_photos_command) from GitHub. The folder contains the sketch (.ino) and two .h files with camera details.
- Run the code: take_photos_command.ino. Open the Serial Monitor and send the command "capture" to capture and save the image on the SD Card:
> Verify that \[Both NL & CR\] is selected on Serial Monitor.
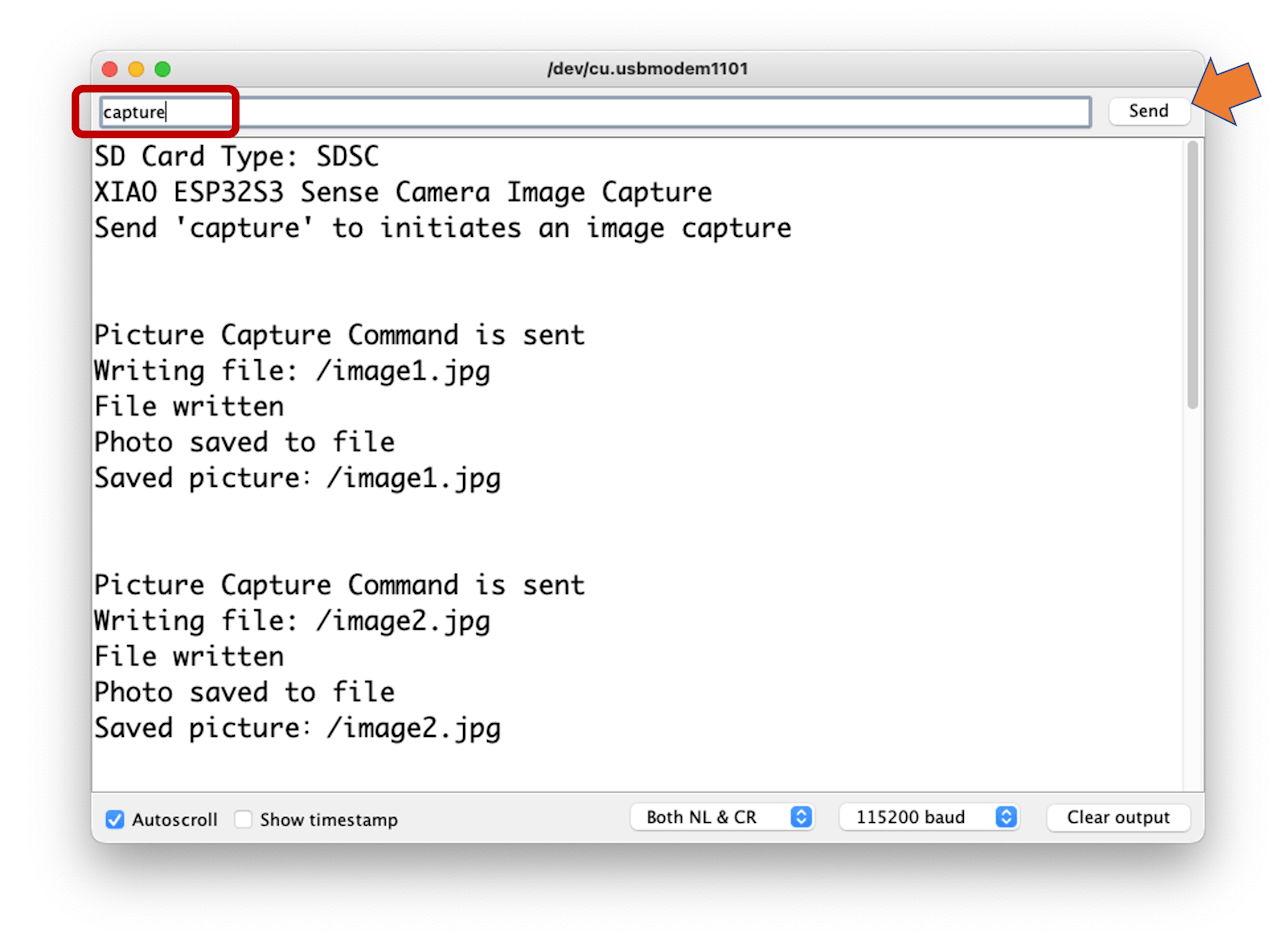
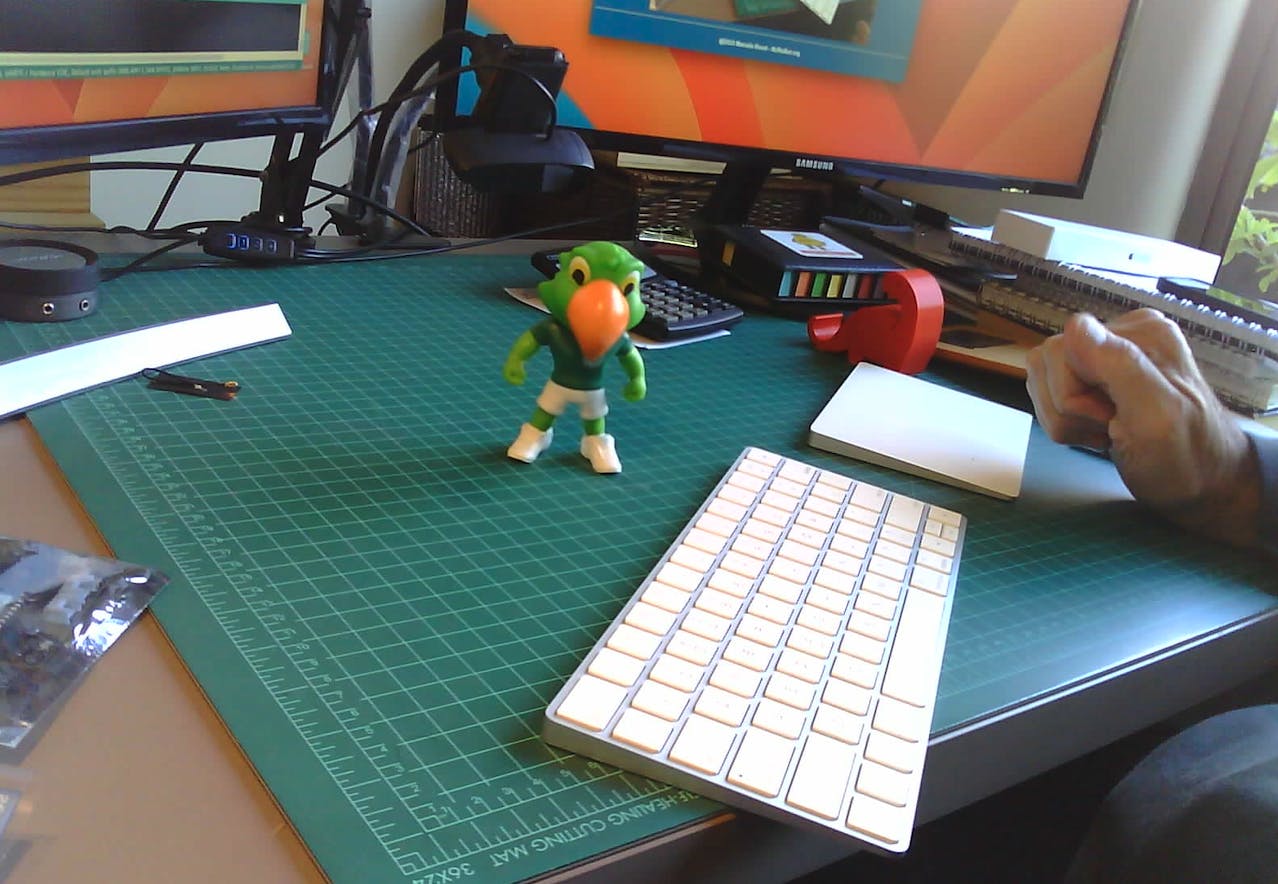
Here is an example of a taken photo:
## Testing WiFi
One of the differentiators of the XIAO ESP32S3 is its WiFi capability. So, let's test its radio, scanning the wifi networks around it. You can do it by running one of the code examples on the board.
Go to Arduino IDE Examples and look for **WiFI ==\> WiFIScan**
On the Serial monitor, you should see the wifi networks (SSIDs and RSSIs) in the range of your device. Here is what I got on the lab:
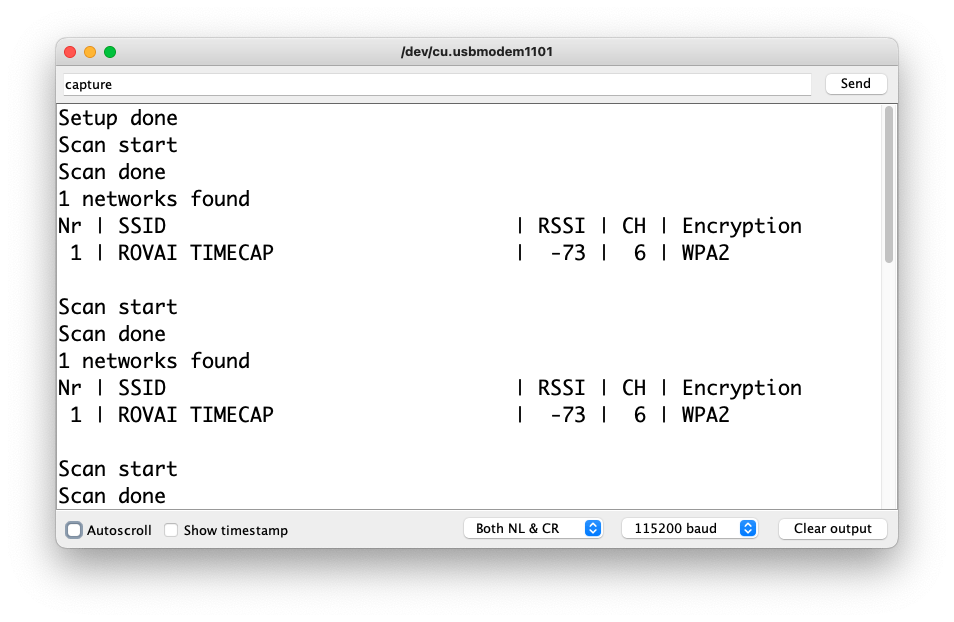
**Simple WiFi Server (Turning LED ON/OFF)**
Let's test the device's capability to behave as a WiFi Server. We will host a simple page on the device that sends commands to turn the XIAO built-in LED ON and OFF.
Like before, go to GitHub to download the folder with the sketch: [SimpleWiFiServer](https://github.com/Mjrovai/XIAO-ESP32S3-Sense/tree/main/SimpleWiFiServer).
Before running the sketch, you should enter your network credentials:
```
const char* ssid = "Your credentials here";
const char* password = "Your credentials here";
```
You can monitor how your server is working with the Serial Monitor.
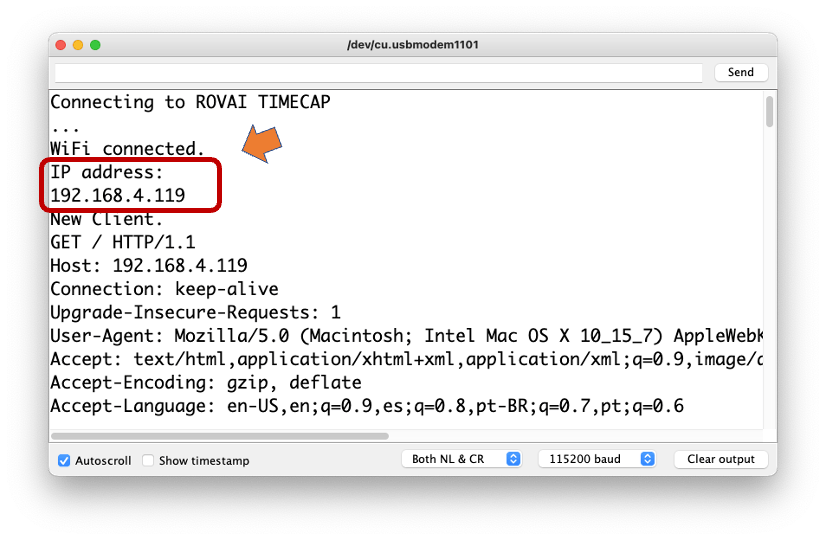
Take the IP address and enter it on your browser:
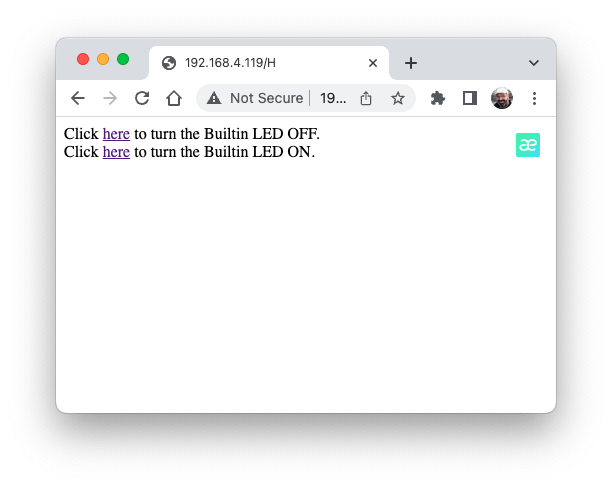
You will see a page with links that can turn ON and OFF the built-in LED of your XIAO.
**Streaming video to Web**
Now that you know that you can send commands from the webpage to your device, let's do the reverse. Let's take the image captured by the camera and stream it to a webpage:
Download from GitHub the [folder](https://github.com/Mjrovai/XIAO-ESP32S3-Sense/tree/main/Streeming_Video) that contains the code: XIAO-ESP32S3-Streeming_Video.ino.
> Remember that the folder contains not only the.ino file, but also a couple of.h files, necessary to handle the camera.
Enter your credentials and run the sketch. On the Serial monitor, you can find the page address to enter in your browser:
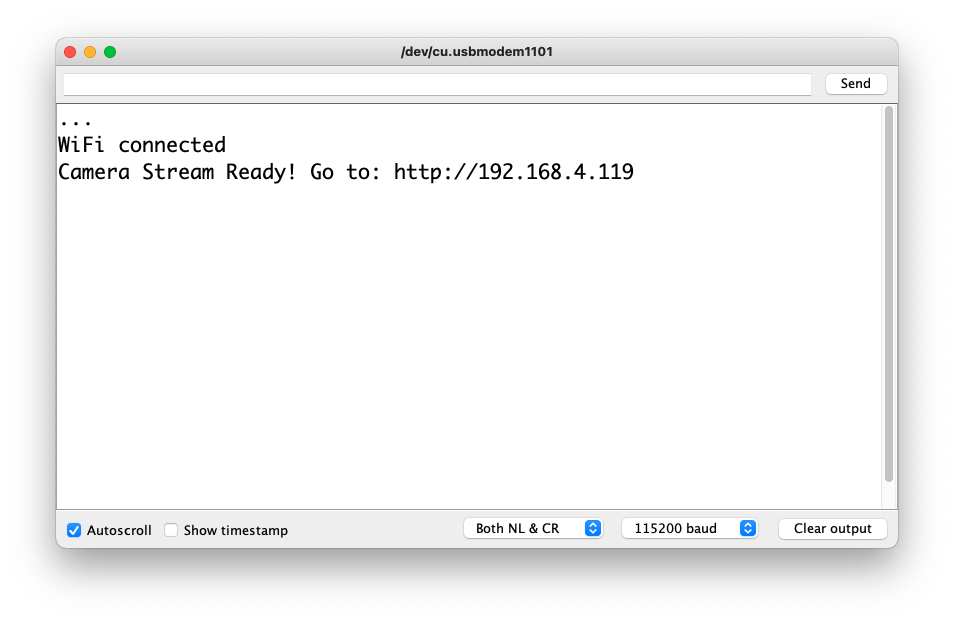
Open the page on your browser (wait a few seconds to start the streaming). That's it.

Streamlining what your camera is "seen" can be important when you position it to capture a dataset for an ML project (for example, using the code "take_phots_commands.ino".
Of course, we can do both things simultaneously, show what the camera is seeing on the page, and send a command to capture and save the image on the SD card. For that, you can use the code Camera_HTTP_Server_STA which [folder](https://github.com/Mjrovai/XIAO-ESP32S3-Sense/tree/main/Camera_HTTP_Server_STA) can be downloaded from GitHub.
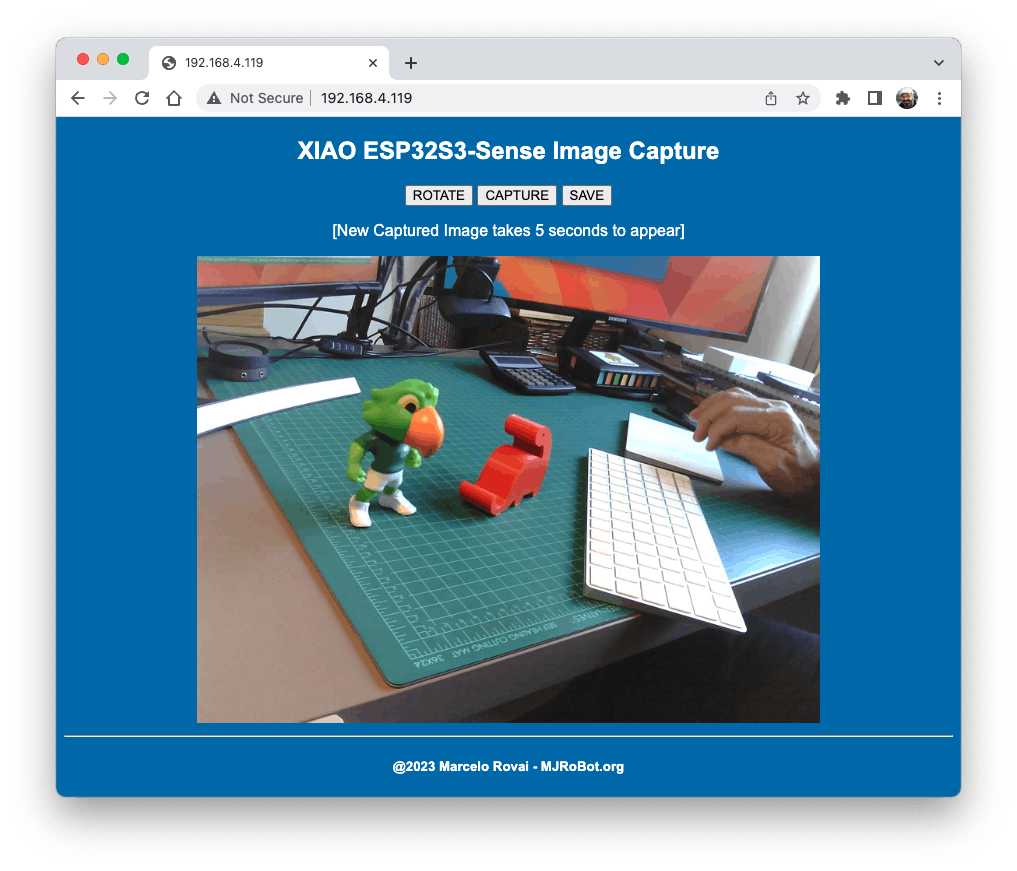
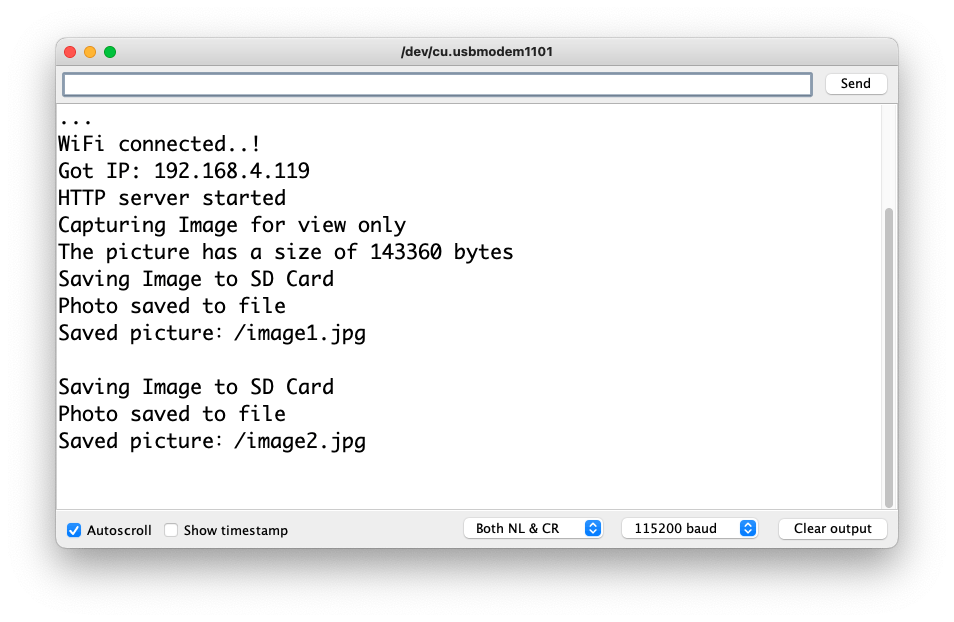
The program will do the following tasks:
- Set the camera to JPEG output mode.
- Create a web page (for example ==\> http://192.168.4.119//). The correct address will be displayed on the Serial Monitor.
- If server.on ("/capture", HTTP_GET, serverCapture), the program takes a photo and sends it to the Web.
- It is possible to rotate the image on webPage using the button \[ROTATE\]
- The command \[CAPTURE\] only will preview the image on the webpage, showing its size on Serial Monitor
- The \[SAVE\] command will save an image on the SD Card, also showing the image on the web.
- Saved images will follow a sequential naming (image1.jpg, image2.jpg.
> This program can be used for an image dataset capture with an Image Classification project.
Inspect the code; it will be easier to understand how the camera works. This code was developed based on the great Rui Santos Tutorial: [ESP32-CAM Take Photo and Display in Web Server](https://randomnerdtutorials.com/esp32-cam-take-photo-display-web-server/), which I invite all of you to visit.
### Collecting Dataset with the ESP Camera Web Server
The ESP32 Library has a general aplictation to setup and test the camera, that can be also used to collect image datasets. Alternatively, lets use here the Arduino IDE 2.x.
Open the Arduino IDE and select the `XIAO_ESP32S3` board (and the port where it is connected). On `File > Examples > ESP32 > Camera`, select `CameraWebServer`. On the BOARDS MANAGER panel, confirm that you have installed the latest "stable" package.
You also should comment on all cameras' models, except the XIAO model pins: #define CAMERA_MODEL_XIAO_ESP32S3 // Has PSRAM and on Tools, enable the PSRAM. Enter your wifi credentials and upload the code to the device:

If the code is executed corretctelly, you should see the address on the Serial Monitor:

Copy the address on your browser and wait for the page to be uploaded. Select the camera resolution (for example, QVGA) and select `[START STREAM]`. Wait for a few seconds/minutes, depending on your connection. You can change and test several of the camera setup and also save an image on your computer's download area using the `[Save]` button.

## Conclusion
The XIAO ESP32S3 Sense is a very flexible, not expensive, and easy-to-program device. It can be used on TinyML projects. Also we saw that memory is not an issue; the device can handle many post-processing tasks, including communication.
On the GitHub repository, you will find the last version of the codes: [XIAO-ESP32S3-Sense.](https://github.com/Mjrovai/XIAO-ESP32S3-Sense)